

Ever watch your edit back and think, “Why does this feel… kinda messy?”
Yeah. Nine times out of ten, it’s not your clips. It’s your transitions.
Here’s the truth: on Reels and TikTok, transitions are supposed to be invisible helpers.
They hide cuts, speed things up, and point the viewer’s eyes where you want them. If they steal attention, they’re doing the opposite.
So let’s fix it. I’ll show you the CapCut transitions that look clean in almost any niche, exactly when to use them, and the simple rules that keep your edits smooth instead of chaotic.
Table of Contents
- CapCut transitions for Reels/TikTok (Quick Tip)
- What Makes a Transition Look “Pro” on Short-Form
- Best CapCut Transitions for Reels and TikTok (By Style)
- How to Add Transitions in CapCut (Step-by-Step)
- 7 Transition Combos You Can Copy (By Content Type)
- Reels vs TikTok: Transition Differences That Matter
- Common Transition Mistakes (That Make Videos Look Messy)
- Frequently Asked Questions
- FAQs About CapCut Transitions for Reels and TikTok
- Conclusion
CapCut transitions for Reels/TikTok (Quick Tip)
If you only want the transitions that work in real life, start here. These are the ones you can use again and again without your edits looking overdone.
Use these transitions most often (they work in almost every niche):
- Clean cut (the best “transition” for short-form)
- Blur (smooth and safe)
- Whip/pan (adds energy between clips)
- Zoom (pulls attention to the next moment)
- Match cut (same framing, instant polished feel)
- Mask/wipe (creative, controlled reveal)
- Flash/light leak (only sometimes, very short)
If you want your videos to look cleaner fast, pick 2–3 from this list and stick to them. Consistency is what makes edits feel intentional instead of random.
If you want the full picture beyond just transitions, check out the CapCut for Social Media guide. It brings together all my step-by-step guides, workflows, and platform-specific tips in one place.
What Makes a Transition Look “Pro” on Short-Form
A transition only looks good when it has a job. If it’s just there to show off, it usually makes the edit feel busy and cheap.
A “pro” transition does one of these:
- Hides a cut so the edit feels smooth
- Speeds up pacing so the video never drags
- Guides attention so viewers know what to look at next
If it’s not doing one of those, it’s probably just noise.
Transitions also look cleaner when the motion makes sense.
If your first clip moves right, the next clip should also move right. If one clip moves left and the next moves right, your viewer feels a little “jerk” in their brain, even if they can’t explain why. Same thing with framing. If you switch angles, keep the subject in a similar spot on screen so the cut feels natural.
Keep durations short, too. Most transitions look best when they’re quick. Long transitions start to feel like a slideshow, and slideshows don’t hold attention on Reels or TikTok.
And here’s the biggest one: don’t mix 10 transition styles in one video. Consistency looks expensive. Pick 1–3 styles and reuse them so your edits feel branded instead of random.
Last thing: Cuts should be your default. The cleanest editors don’t transition every clip. They cut clean, then use a transition only when it helps, like a scene change, a time jump, or an energy shift.
Best CapCut Transitions for Reels and TikTok (By Style)
Clean Cut (The Best “Transition”)
This is your default. It keeps pacing tight and looks native to short-form.
Best for: tutorials, talking-head videos, product demos, and any fast edit.
Use it when the clip change already makes sense (new step, new angle, new moment). If the cut feels clean on its own, you don’t need an effect.
Blur Transition (Smooth and Safe)
Blur is the easiest way to soften a hard cut. It helps scene changes feel less harsh, especially when the background changes a lot.
Best for: Reels with a clean aesthetic, lifestyle/vlog clips, beauty and fashion edits.
Keep it short so it doesn’t turn dreamy or slow.
Whip/Pan Transition (Adds Energy)
Whip and pan transitions work because they follow motion your eyes already expect.
Best for: TikTok trends, fast montages, outfit changes, before/after reveals.
It looks best when clip one ends with a pan left or right and clip two starts with similar motion. If the motion doesn’t match, it feels jarring.
Zoom Transition (Pulls Attention)
Zoom transitions feel punchy when you use them lightly. They’re great for pulling the viewer into the next moment.
Best for: emphasis moments, switching wide shot to close-up, reveals (product, result, reaction).
Don’t stack zooms back to back. That’s when it starts to feel messy.
Match Cut (Instant “Pro” Feel)
A match cut is when two clips line up visually, like the subject is in the same spot and the framing feels similar. Even with no effect, it looks polished.
Best for: step-by-step tutorials, storytelling Reels, before/after transformations.
If you want your edits to look clean without “trying,” do more match cuts.
Mask/Wipe (Creative but Controlled)
Masks and wipes are perfect for reveals because they feel intentional, not chaotic.
Best for: product reveals, scene changes (indoors to outdoors), visual storytelling.
Pick one wipe direction and stick with it most of the time. That consistency makes it feel branded.
Flash/Light Leak (Use Sparingly)
Flash transitions can look great for high-energy edits, but they get annoying fast if you repeat them.
Best for: beat drops, quick montage hits, highlight reels.
Keep it very short and use it once for emphasis, not on every clip.
How to Add Transitions in CapCut (Step-by-Step)
Transitions in CapCut live in one spot: between two clips. If your clips aren’t touching, or you’re zoomed too far out, the transition option can be easy to miss.
Before You Start (This Makes Transitions Work)
- Put clips on the same track
Transitions work best when two clips sit back-to-back on the same video layer. - Remove gaps between clips
If there’s a space between clips, CapCut treats it like a pause, not a cut. Drag the second clip left until it snaps against the first. - Zoom in on the timeline
If you’re zoomed out, the transition point is tiny. Zoom in until you can clearly see the cut between clips.
Step 1: Add and Trim Your Clips First
Import your clips, drop them onto the timeline, and trim them before adding any transitions.
Why this matters: if you add transitions first and then trim later, your timing can get weird and the transition may land on the wrong moment.
Quick trim check:
- cut dead space at the start and end of each clip
- keep only the action or the line that matters
- make sure the clip change feels logical even without an effect
Step 2: Find the Transition Point Between Clips
On the timeline, look at the exact spot where clip 1 ends and clip 2 begins.
In most versions of CapCut you’ll see one of these:
- a small transition box/icon between the clips
- a tiny vertical divider that becomes clickable when you hover or tap
If you don’t see anything clickable:
- zoom in more
- confirm the clips are touching
- confirm both clips are on the same track
Step 3: Open the Transitions Panel
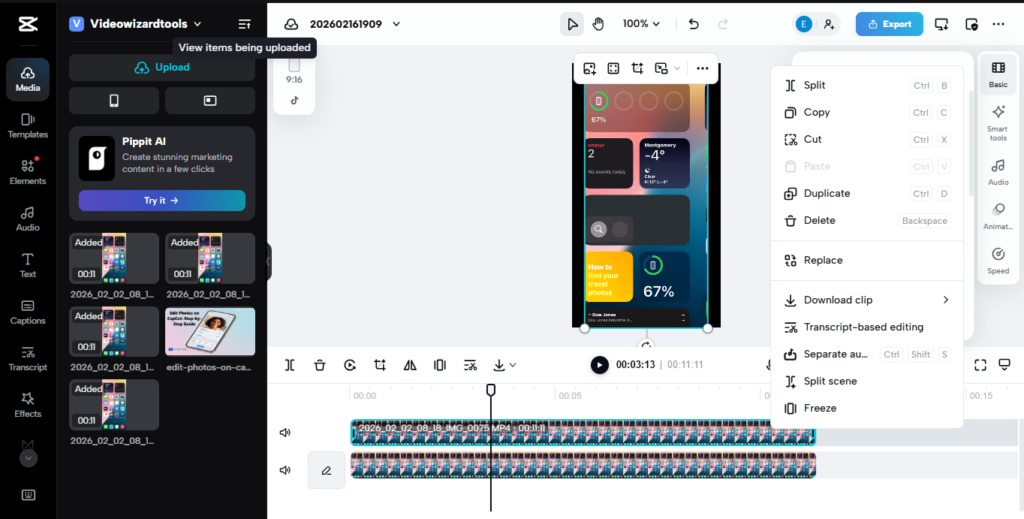
Click or tap the small transition box between the two clips.
This opens the transitions library, where you can pick options like blur, whip/pan, zoom, wipe, and more.
Step 4: Pick the Right Transition for the Moment
Use this simple rule so it looks natural:
- Same scene, same angle, same vibe: use a clean cut
- Scene change or background change: use a blur or wipe
- Energy jump or trend-style edit: use a whip/pan
- Emphasis or reveal moment: use a quick zoom
- Before/after with similar framing: use a match cut (often no effect needed)
If you’re unsure, pick blur. It’s the safest option that rarely looks cheesy.
Step 5: Set the Duration (This Is Where Most People Mess Up)
Most transitions look better when they’re fast.
A simple range that works for most short-form edits:
- Talking-head / tutorials: very short
- Montage/highlight reels: short, but slightly longer than talking-heads
- Flash/light leak: shortest possible, only for one beat hit
If your transition feels slow, don’t switch transitions first. Shorten the duration first. That fixes most “why does this look bad?” moments.
Step 6: Preview and Fix the “Jerk”
Play the cut back a few times. If it feels off, it’s usually one of these problems:
Problem: it feels like a jump scare
Fix: shorten the duration or switch to blur/clean cut.
Problem: whip/pan looks messy
Fix: the motion doesn’t match. Trim the end of clip 1 so it exits in the same direction clip 2 enters.
Problem: zoom feels chaotic
Fix: use zoom once, not repeatedly. Also keep the zoom quick.
Problem: wipe feels random
Fix: pick one wipe direction and keep it consistent across the video.
Step 7: Use “Apply to All” Only When the Video Is One Style
“Apply to all” works when your edit is one consistent montage with the same kind of footage.
Don’t use it when:
- you’re doing a tutorial with different scenes
- you’re switching between talking-head and b-roll
- the pacing changes a lot
In those cases, use clean cuts most of the time and add transitions only when the moment calls for it.
Step 8: A Quick Checklist Before You Export
- are most cuts clean even without effects?
- are transitions short and not slowing pacing?
- are you using only 1–3 transition styles?
- do whip/pan transitions match motion direction?
- do text elements stay clear of UI areas on Reels/TikTok?
7 Transition Combos You Can Copy (By Content Type)
1) Tutorials (Clean and Readable)
Use clean cuts for almost everything. Add a quick blur only when you switch locations or sections.
Combo:
Cut → Cut → Cut
Blur (scene change)
Cut → Cut
2) Talking-Head (Don’t Over-Edit)
Most talking-head videos look best with simple jump cuts. If you want emphasis, use a subtle keyframe zoom instead of a flashy transition.
Combo:
Cut between sentences
Occasional zoom-in on a key line
No heavy transitions
3) Before/After Reveals (High Impact)
Match framing first. If you want extra punch, add a short whip into the reveal.
Combo:
Before clip (hold 0.5–1s)
Whip/pan (very short)
After clip (hit the beat)
Clean cut to the result again
4) Outfit Change / Glow-Up (TikTok-Native)
Whip/pan is the main move here. Use a flash once on the beat drop, then finish with clean cuts.
Combo:
Whip (short) → Whip (short)
Flash (one time on the beat drop)
Clean cuts to finish
5) Product Demo / UGC (Clean and Premium)
Let clean cuts carry the edit. Use blur for angle changes, then a wipe/mask for the reveal moment.
Combo:
Cut (hands/product close-up)
Blur (angle change)
Cut (use case)
Wipe/mask (reveal result)
Cut (CTA)
6) Montage / Highlights (Fast Rhythm)
Pick one main transition style and repeat it. Then use one zoom on the key moment so it stands out.
Combo:
Blur → Blur → Blur (short and consistent)
Zoom (one time on the best moment)
Back to blur or cuts
7) Story/Reveal (Retention-Focused)
Keep it clean and easy to follow. Save one wipe for the “twist” so it feels intentional.
Combo:
Cut (setup)
Match cut (new angle, similar framing)
Wipe (twist moment)
Cut (payoff)
Reels vs TikTok: Transition Differences That Matter
TikTok usually rewards more energy. Faster cuts and punchier transitions feel normal there, and viewers don’t mind a little aggression in the edit.
What tends to work best on TikTok:
- whip/pan transitions (short)
- quick zoom transitions (used lightly)
- match cuts with strong movement
- one flash transition on a beat drop (not repeated)
If your transitions feel too soft on TikTok, the video can start to feel slow, even if the clips are good.
Reels usually look better when they’re cleaner. Heavy effects can feel messy fast, especially if the visuals are already busy.
What tends to work best on Reels:
- clean cuts (default)
- blur transitions (safe and smooth)
- match cuts (super clean)
- simple wipes (controlled reveal)
If you use whip or flash too much on Reels, it can start to feel spammy.
One more thing: safe zones matter more on Reels. The interface covers more of the screen, so transitions that include big on-screen text or motion graphics can get blocked.
If you’re adding text during transitions:
- Keep it off the bottom area
- Avoid placing key text on the right side
The easiest rule to remember:
- TikTok: 70% cuts + 30% energetic transitions
- Reels: 85% cuts + 15% smooth transitions
Common Transition Mistakes (That Make Videos Look Messy)
Using a Transition on Every Cut
If every clip has an effect, your video starts to feel like a slideshow. Clean cuts should be the default. Save transitions for scene changes, time jumps, reveals, or an energy shift.
Mixing Too Many Transition Styles
Blur to whip to zoom to flash to wipe in one video looks random. Pick 1–3 transition styles that match your niche and stick to them.
Making Transitions Too Long
Long transitions slow the pacing and hurt retention. Short-form edits need quick, snappy movement. If it feels slow, shorten the duration first.
Not Matching Motion Between Clips
Whip and pan transitions only look smooth when the motion matches. If clip one moves left and clip two moves right, the change feels “jerky” even if viewers can’t explain why.
Using Transitions to Hide Weak Footage
Transitions can’t save boring clips. Tighten your trims first. If the content is slow, cut tighter, then add a transition only if it improves flow.
Overusing Flash or Shake Effects
Flash and shake can work for one strong moment, but repeating them looks spammy fast, especially on Reels. Use them once for emphasis, not as a default.
Forgetting Text Safe Zones
If your transitions include text or big motion graphics, don’t place them too low or too far right. Platform UI can cover them, and viewers miss the point.
Frequently Asked Questions
FAQs About CapCut Transitions for Reels and TikTok
What are the best CapCut transitions for TikTok?
Clean cuts, blur, whip or pan transitions, zoom transitions, and match cuts are the most reliable. TikTok can handle more energy, so whip and quick zoom transitions usually feel natural as long as they are short and not stacked nonstop.
What are the best CapCut transitions for Instagram Reels?
Clean cuts, blur, match cuts, and simple wipes tend to look best. Reels usually rewards cleaner visuals, so heavy transitions can start to look messy fast.
How do I add transitions in CapCut?
Tap the small transition icon between two clips on the timeline, choose a transition, set a short duration, then preview the result. If it feels awkward, shorten the duration or switch to a simpler option like blur or a clean cut.
How long should transitions be for Reels and TikTok?
Keep them short. Most transitions should be quick so the pacing stays tight and the edit feels natural for short-form video. If the edit starts to feel like a slideshow, the transition is probably too long.
Why do CapCut transitions look bad or cheap sometimes?
CapCut transitions usually look bad when they are too long, used too often, or when the motion does not match between clips. Shorten the duration, use fewer transition styles, and make sure movement and framing line up between shots.
Should I use transitions on every cut?
No. Use clean cuts as your default. Add transitions only when they help the edit, such as scene changes, time jumps, reveals, or energy shifts.
What is the easiest CapCut transition that always looks good?
A clean cut with good timing is the safest choice. If you need an effect, blur is usually the easiest transition that works across most niches.
Conclusion
The best CapCut transitions for Reels and TikTok aren’t the fanciest ones. They’re the ones that keep your video moving without stealing attention from what you’re saying or showing.
Use clean cuts as your default. Add transitions only when they actually help, like a scene change, a time jump, a reveal, or a quick energy lift.
If you want the safest option that works in almost any niche, blur is it. If you want more punch, especially for TikTok, whip/pan or a quick zoom can hit hard, as long as you keep them short.
The fastest upgrade is simple: build a small “transition kit” and stick to it. When your motion matches, your timing feels tight, and you’re not switching styles every two seconds, your edits look more professional, even if your footage is basic.