
How to Create Smooth Captions in CapCut (Bouncy Text Effects)
If you scroll TikTok or Instagram Reels, you’ve likely seen captions that move with life—text that flows in, wobbles subtly, and feels alive.
These “smooth captions” or “bouncy text” give videos a polished, professional look and instantly grab attention.
The challenge: CapCut doesn’t offer a preset called “smooth bounce.” The default Bounce animation is too rigid or mechanical.
To create truly smooth captions in CapCut, you need to combine multiple animation settings, tweak timing, and style captions carefully for fluid, natural motion.
In this guide, you’ll learn step-by-step how to achieve smooth captions in CapCut that look custom and professional covering mobile and desktop workflows, exact settings that ensures your captions feel lively without chaos.
If you’re new to adding captions in CapCut, start with this step-by-step guide on how to add captions on CapCut. where you’ll learn proper timing, syncing, and structure before adding advanced animations.
Understanding the “Smooth” Aesthetic in CapCut Captions
Before adjusting settings, it helps to understand what makes “smooth” captions feel different from standard animations.
Standard CapCut Bounce
- Single overshoot—text goes past its target and snaps back
- Linear timing—moves at constant speed
- Feels mechanical, rigid, and generic
Smooth / Elastic Bounce
- Multiple micro-adjustments—tiny overshoots and undershoots before settling
- Eased timing—accelerates and decelerates naturally
- Variable duration—slower entrance, quicker settle
- Feels organic, weighted, and professional
How to Create Smooth Captions in CapCut (Bouncy Text Effect)
Smooth captions in CapCut make text feel alive, dynamic, and professional.
Unlike the default Bounce animation, smooth captions flow in with momentum, settle naturally, and create a polished look that grabs attention on TikTok and Instagram Reels.
Below are step-by-step methods for both mobile and desktop workflows.
Method 1: Enhanced Mobile Bounce
CapCut Mobile has limited animation controls, but you can enhance the default Bounce effect to feel smoother:
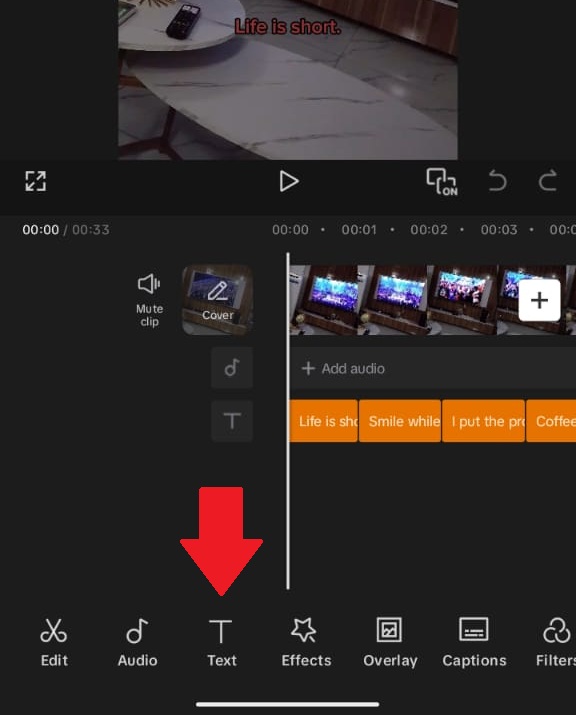
- Add and style your caption: Tap Text → Add Text and type a short phrase (3–5 words).
- Font: Montserrat Black or Bebas Neue
- Size: Large enough to read at arm’s length
- Color: White (#FFFFFF) with black shadow
- Position: Horizontally centered, slightly above center (~55% from bottom)
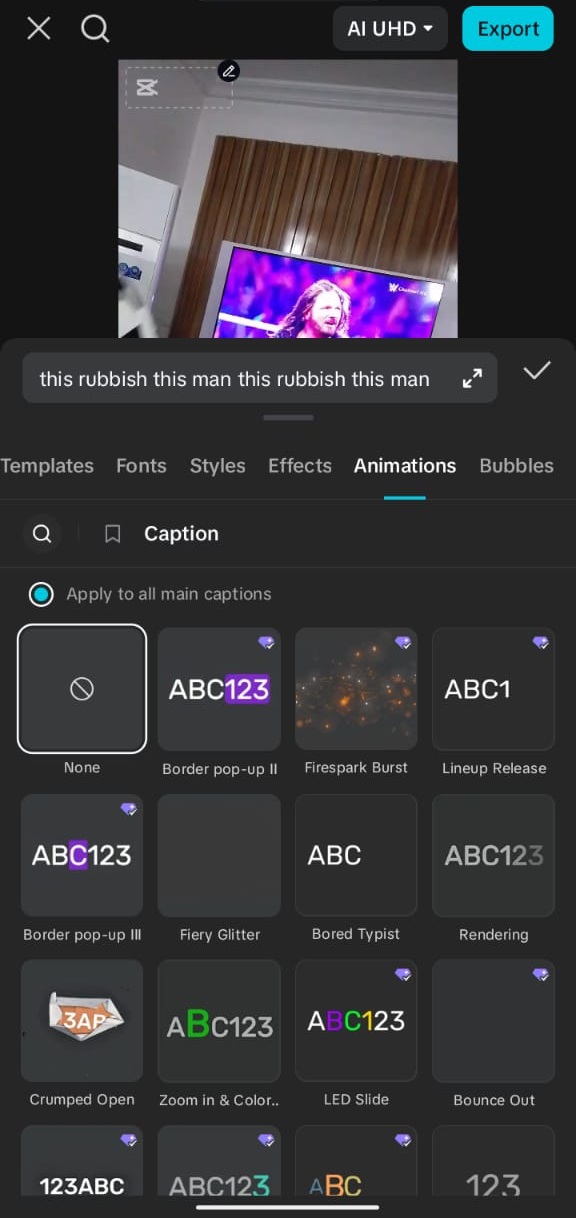
This is where your captions and text come to life - Apply the Bounce animation: Select the text layer → Animation → In → Bounce.
- Default duration is too fast. Increase to ~0.5–0.6s.
- Add subtle motion after bounce: Apply Animation → Loop → Breathing or Pulse.
- Duration: 2–3 seconds
- Intensity: 20–30%
- Timing refinement: Ensure the Bounce completes slightly before the speech it matches. Subsequent captions should follow a consistent rhythm to maintain flow.
Tip: Mobile can’t customize easing curves. Duration + subtle Loop effects are your main tools for smoothness.
Method 2: Custom Elastic Motion with Keyframes (Desktop)
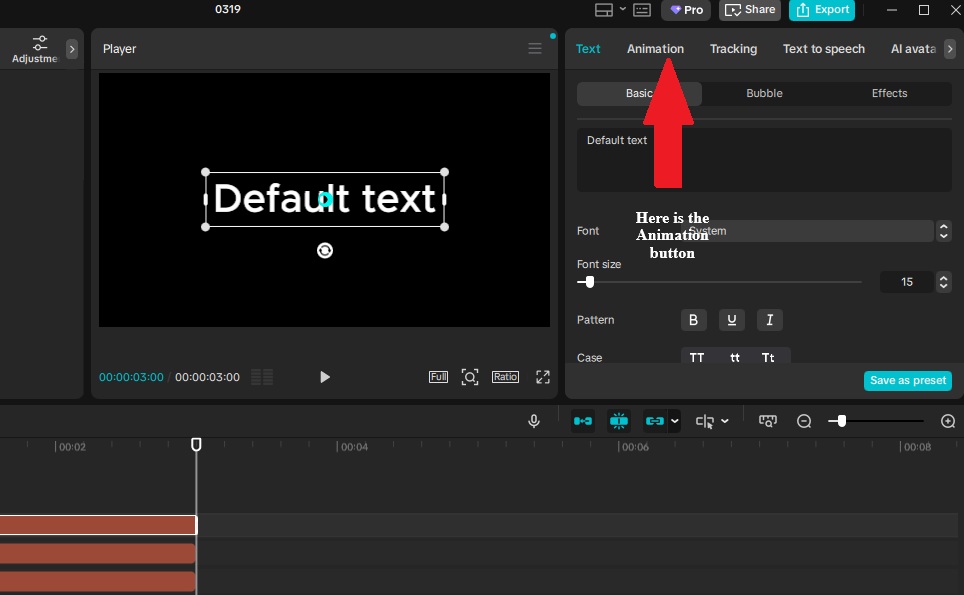
CapCut Desktop allows precise control using keyframes to create a true elastic motion. Follow these steps:
- Add and position text: Insert a text layer at your desired start point (often slightly below the final position). Why: Starting off-screen or below target allows momentum-based movement.
- First keyframe (start): At 0s, set:
- Position: Start point (below final target)
- Scale: 90% (slightly smaller)
- Opacity: 0%
- Second keyframe (overshoot): Around 0.3s, set:
- Position: Above final target (~10–20% higher)
- Scale: 105%
- Easing: Ease Out
- Third keyframe (undershoot): Around 0.5s, set:
- Position: Slightly below final target
- Scale: 98%
- Easing: Ease In Out
- Fourth keyframe (final settle): Around 0.7s:
- Position: Final target
- Scale: 100%
- Easing: Ease Out
- Optional: Animate additional properties:
- Letter spacing (tracking): -5% → +10% → 0%
- Subtle rotation: 5° → -3° → 0°
- Opacity/color: 70% gray → 100% bright → final color
Method 3: Coordinated Caption Sets
Animating multiple captions sequentially creates rhythm and visual flow that single captions can’t achieve:
- Create 3–5 captions with similar content.
- Apply the same animation to each, but stagger start times (e.g., Caption 1 at 0.0s, Caption 2 at 0.3s, Caption 3 at 0.6s).
- Optional: Vary scale slightly (e.g., 95–100%) or horizontal position to create depth.
- Result: Captions appear in a wave-like bounce, increasing production value and visual interest.
Tips for Smooth Captions in CapCut
- Always use easing curves (Ease In/Out or Bezier) for smooth acceleration and deceleration.
- Keep motion readable—fast animation can make text difficult to follow.
- Preview mobile and desktop outputs to ensure smoothness translates across devices.
- Less is more—avoid animating all properties at once to prevent visual clutter.
Styling for Smoothness: Visual Design Choices
Animation gives your captions motion, but styling determines whether that motion looks smooth or jarring. Proper font, color, shadow, and timing choices enhance the perception of fluid, professional motion.
Font Selection for Smooth Captions
Best choices:
- Montserrat Black: Geometric, clean motion that reads clearly during bounces
- Poppins Bold: Rounded, friendly elasticity that feels approachable
- Nunito Black: Soft, modern, and readable with smooth curves
- Bebas Neue: Dramatic, high-impact bounce, best for hooks (all caps)
Avoid:
- Serif fonts – serifs create visual noise during motion
- Thin fonts – motion emphasizes fragility and reduces readability
- Decorative fonts – combining decoration with animation overwhelms the eye
Color and Shadow for Motion Clarity
Proper shadow and color amplify smoothness by creating contrast and a subtle “motion blur” effect.
- Shadow color: Black
- Opacity: 80%
- Offset: 4–6px (slightly larger than static captions)
- Blur: 4–8px (softens the shadow trail to mimic motion blur)
This approach helps the text feel like it’s moving in space rather than snapping mechanically.
Background Considerations
Works well against:
- Solid colors – shadow reads clearly
- Slightly blurred backgrounds – bokeh enhances depth
- Gradients – motion creates appealing color interaction
Avoid:
- Busy patterns – motion plus clutter reduces readability
- Rapidly changing video – competing motion distracts the eye
- Pure white backgrounds – shadows may disappear
Timing and Rhythm: The Invisible Framework
Even perfect styling fails if your bounce timing is off. Smooth captions must match your content’s natural rhythm.
Speech-Synced Timing
Beat-matching technique: Align the overshoot peak with stressed syllables in your spoken phrase, then complete the settle before the next phrase:
- Example phrase: “You WON’T beLIEVE this”
- “WON’T” = bounce peak (maximum energy)
- “beLIEVE” = settling motion
- “this” = fully settled, stable
The Silence Technique
For dramatic pauses, let the bounce fully settle and hold for ~0.5s before starting the next caption. This rest makes subsequent motion more impactful.
Pacing Variations by Content Type
| Content Type | Bounce Duration | Settle Hold | Rhythm |
|---|---|---|---|
| Fast comedy | 0.4s | 0.3s | Staccato, punchy |
| Storytelling | 0.7s | 0.8s | Legato, flowing |
| Educational | 0.5s | 1.2s | Measured, clear |
| Hype / High-energy | 0.3s | 0.2s | Rapid, intense |
Sound Design for Smooth Captions
Visual smoothness is amplified when paired with the right sound effects. Proper audio cues make the bounce feel tactile and satisfying, while poor or missing audio can make captions feel flat or disconnected.
Choosing the Right Sound Effects in CapCut
Standard Bounce:
- Navigate to Sound Effects → UI → Pop or Click
- Trim to ~0.1s for a crisp effect
- Time the sound to play exactly at the bounce peak (overshoot moment)
- Why: Small clicks reinforce the visual “pop” without distracting from the content.
Enhanced Smoothness:
- Navigate to Sound Effects → Whoosh → Soft Whoosh or Air
- Lower volume to 30–40% so it complements, not dominates
- Start the sound at bounce beginning; peak aligns with overshoot
- Why: A soft whoosh mimics momentum, making the animation feel fluid and alive.
High-Energy Content:
- Navigate to Sound Effects → Cartoon → Boing or Spring
- Adjust pitch: higher for smaller captions, lower for larger captions
- Time precisely with the overshoot frame for maximum impact
- Why: Over-the-top effects match energetic content and emphasize punchlines or hooks.
The Silence Rule
Not every caption needs sound. Use effects sparingly to maintain impact:
- First caption in a sequence
- Emphasis captions (punchlines, key facts)
- Call-to-action captions
- Body text should often remain silent, letting emphasis captions “pop” when used
Platform-Specific Smooth Caption Optimization
- TikTok: Bounce duration 0.4–0.5s, strong shadow (6px offset + 6px blur), sound is essential due to audio-first platform
- Instagram Reels: Bounce duration 0.5–0.7s, optional subtle gradients, sound optional as many users watch muted
- YouTube Shorts: Bounce duration 0.5–0.6s, prioritize readability over style for diverse devices, sound helpful but not critical
Common Smooth Caption Mistakes & Fixes
- Over-bouncing: Every caption uses maximum energy
Fix: Reserve full smooth bounce for hooks/emphasis; use Fade or Slide for body text. - Timing mismatch: Bounce ends after the phrase finishes
Fix: Align bounce peak with mid-phrase; settle before phrase ends for readability. If your captions still feel delayed or disconnected from speech, here’s how to fix out-of-sync captions in CapCut step by step. - Inconsistent physics: Captions bounce at random heights or speeds
Fix: Set a consistent “physics” (duration + overshoot %), and apply across all captions. - Ignoring safe zones: Bounce arcs get cut by UI
Fix: Ensure the entire motion stays within the middle 70% vertical screen zone. - Motion fatigue: Continuous bouncing for long sequences
Fix: Introduce static captions every 3–5 bounces; give the viewer’s eye a rest.
The “Signature Smooth” Workflow
Create a repeatable system for smooth captions that saves time, ensures consistency, and looks professional on every video.
Step 1: Establish Your Formula
Define the key parameters that will guide every caption:
- Duration: e.g., 0.6s – how long the entrance animation lasts
- Overshoot percentage: e.g., 15% – determines how far the text goes past the final position
- Font: e.g., Montserrat Black – clean and readable during motion
- Shadow settings: e.g., 6px offset, 6px blur – ensures motion remains visible
- Why: Setting these values in advance keeps motion consistent and visually professional.
Step 2: Create a Template Project
- Build one “perfect” smooth caption in CapCut (mobile or desktop workflow)
- Save it as a template or favorite layer for reuse
- Use this layer as the basis for all future captions
- Why: Templates eliminate repeated guesswork and maintain brand consistency.
Step 3: Batch Caption Creation
- Create all text layers first
- Apply your template styling to each layer
- Adjust timing individually for speech, beat, or visual emphasis
- Add sound effects at the end, aligning with overshoot peaks
- Why: This workflow keeps production efficient while preserving smooth motion and audio synchronicity.
Step 4: Quality Control
- Export a 10-second test clip
- Verify bounce timing matches speech
- Ensure all bounces stay within the safe zones
- Check that sound effects align with visual peaks
- Why: Testing ensures captions look polished and function across different devices and platforms.
FAQs About Smooth Captions in CapCut
What are smooth captions in CapCut?
Smooth captions use eased timing, natural motion, and subtle transitions so text flows naturally. Unlike standard animations, they feel fluid instead of rigid or mechanical.
How do I create smooth bouncy captions in CapCut?
Use slower entrance timing, apply easing curves, and layer animations. On desktop, keyframes give you more control for creating elastic and natural motion.
Can I make smooth captions on CapCut mobile?
Yes, but mobile is limited. You can adjust timing and use bounce effects, but CapCut desktop offers better control with keyframes for smoother results.
How do I sync captions perfectly with audio?
Match the animation peak to key words or beats, then let the caption settle before the next phrase. Proper timing makes captions feel natural and easier to follow.
Why are some caption animations missing in CapCut?
CapCut updates frequently, and some animations may be moved, removed, or hidden. Saved presets can also disappear after updates, so you may need to recreate them.
Where should I place captions to avoid TikTok UI overlap?
Keep captions centered or slightly above center. Avoid the bottom and right edges where TikTok buttons and UI elements can block your text.
How do I make captions readable on all devices?
Use bold fonts, high contrast colors, and short lines. Test your captions on mobile screens to ensure they remain clear even in bright environments.
Why do my animated captions glitch in CapCut?
Glitches can happen when combining auto captions with animations. Try deleting and recreating the text or reapplying animations to fix display issues.
Can CapCut auto-generate animated captions?
Yes, CapCut can auto-generate captions using AI. You can then apply animation styles to customize them while saving time on manual editing.
Final Thoughts
Smooth captions separate casual CapCut users from creators who understand motion design. The elastic, weighted bounce communicates professionalism—even subconsciously to viewers.
Keyframe animation on desktop provides full control, while enhanced mobile presets allow quick, accessible results.
Start with Method 1 (enhanced mobile bounce) to master rhythm, then graduate to Method 2 (desktop keyframes) for custom physics, and use Method 3 (coordinated sets) for maximum visual impact.
Follow this workflow consistently, and your captions will feel alive, engaging, and perfectly timed every time.