

If you have ever tried to work on a CapCut project with another person, you already know how messy it can get.
One person has the latest draft. Another person has the logo file. Someone else leaves feedback in WhatsApp, email, or Google Docs. Before long, nobody knows which version is final.
That is the problem CapCut Pro for Teams is supposed to solve.
Instead of treating video editing like a solo task, CapCut Pro for Teams gives creators, marketers, agencies, small businesses, educators, nonprofits, and content teams a shared workspace for video projects, brand assets, templates, and collaboration.
But here is where many people get confused.
Does CapCut Pro for Teams mean two people can edit the same video at the exact same time?
Is CapCut Teamspace free?
Can you share an editable CapCut project with someone else?
Do team members get Pro features, or does each person need a separate CapCut Pro account?
Those are the real questions this guide will answer.
In this post, I’ll break down how CapCut Pro for Teams works, how Teamspace works, how project sharing works, what team members can access, what the pricing looks like, and whether it is actually worth it for your workflow.
Quick Answer: What Is CapCut Pro for Teams?
CapCut Pro for Teams is CapCut’s team-focused plan for people who create videos together.
Instead of one person keeping all the projects, files, brand assets, and exports inside a personal account, CapCut Pro for Teams gives your group a shared workspace where team members can manage video projects, access shared materials, and work more smoothly together.
It is useful for creator duos, social media teams, small agencies, marketing teams, educators, nonprofits, and businesses that need to produce regular video content without passing files back and forth manually.
But it is important to understand one thing early:
CapCut Pro for Teams does not always mean two people can freely edit the same timeline at the exact same second, like a Google Doc.
In many team workflows, one person controls the edit at a time while others can review, access assets, leave feedback, or take over editing when needed.
So, the real value of CapCut Pro for Teams is not just “live editing.” It is the full team workflow:
- shared projects
- shared assets
- brand consistency
- team storage
- Pro tools
- project handoff
- faster review
- less version confusion
If your team creates social videos, client edits, brand content, TikToks, Reels, YouTube Shorts, ads, or campaign videos, CapCut Pro for Teams can make the process much easier than working from separate personal accounts.
Does CapCut Have Teamspace?

Yes, CapCut has a Teamspace feature that lets you work with other people inside a shared space instead of keeping everything inside one personal account.
Think of Teamspace as the shared folder for your CapCut workflow.
It is where you can bring together projects, drafts, brand assets, templates, and team members so everyone is not working from scattered files or separate personal folders.
This matters because many people confuse sharing a CapCut video with sharing a CapCut project.
They are not the same thing.
Sharing a finished video only lets someone watch the exported file. Sharing through Teamspace can help team members work around the actual project workflow, depending on their access and permissions.
For example, a team may use Teamspace to:
- store shared video clips, logos, music, and brand materials
- Keep project drafts in one shared location
- Invite teammates into a workspace
- review edits without sending large files manually
- Reduce version confusion between editors
- keep content more consistent across TikTok, Reels, Shorts, ads, and brand videos
This is why Teamspace is one of the most important parts of CapCut Pro for Teams.
It turns CapCut from a personal video editor into a more organized team workflow.
However, do not assume every Teamspace feature is the same for every account. CapCut’s team limits, available tools, storage, and member access can vary depending on your region, account type, app version, and whether you are using a free or paid team plan.
So before you build your whole team workflow around it, check your own CapCut dashboard to see what your account allows.
Can Two People Work on CapCut at the Same Time?
Yes, two people can work on CapCut together, but it is important to understand what “together” really means.
CapCut collaboration is not always the same as Google Docs-style editing, where two people can freely change the same content at the exact same second.
In many CapCut team workflows, one person controls the main edit at a time. Other team members may be able to view the project, access shared assets, review the draft, leave feedback, or take over editing when permission is passed to them.
That means CapCut can work well for team editing, but you should not expect every teammate to move clips, trim footage, change captions, and adjust effects on the same timeline at the exact same moment.
A more realistic workflow looks like this:
One person creates the first draft.
Another teammate reviews it and leaves feedback.
The editor makes changes.
A second editor takes over if needed.
A manager or client reviews the final version before export.
This is still useful because it keeps the project inside one shared workflow instead of forcing everyone to send files back and forth.
So, if your question is “Can two people collaborate on a CapCut project?” the answer is yes.
But if your question is “Can two people edit the same CapCut timeline at the exact same second with no restrictions?” the safer answer is: not in the same way as a live document editor.
For most creator duos, social media teams, and small agencies, that is usually enough. You can still share projects, hand off edits, keep assets in one place, and avoid creating five different versions of the same video.
How to Collaborate on CapCut as a Team
The best way to collaborate on CapCut is to work inside a shared space instead of passing files between separate personal accounts.
This matters because CapCut collaboration is built around spaces, team members, permissions, shared assets, and editing handoff.
If one person edits in a personal space and later tries to send the project to someone else, the workflow can get messy fast.
Here is the cleaner way to do it.
1. Create or open your CapCut space
Start by opening CapCut and going to your workspace area.
If you are setting this up for a team, agency, business, school project, nonprofit, or client workflow, it is better for the main account owner to create the space.
That keeps billing, permissions, shared files, and project ownership easier to manage.
In CapCut Online, you can create a new space from the Workspace area. CapCut says users can create spaces, invite members, and let members access the space from different devices.
Once the space is ready, use it as the main home for your team projects.
2. Invite the people who need access
After creating the space, invite your team members.
Depending on your account and platform, CapCut may let you invite people by email or by invitation link.
This is useful when you need to bring in an editor, designer, social media manager, assistant, teammate, client, or reviewer.
Do not invite everyone at once just because you can. Start with the people who actually need access to the project.
For example, you may invite:
- Your main video editor
- Your social media manager
- Your designer
- Your assistant
- Your client or manager
- Your teammate who reviews content before publishing
This keeps the workspace cleaner and reduces the chance of someone changing or deleting the wrong file.
3. Set the right permissions
Permissions are important in CapCut Teams because not every person needs the same level of control.
Your main editor may need editing access. A designer may need access to brand assets. A client may only need to review the video and leave feedback. A manager may need to approve the final version.
CapCut’s exact role names can vary depending on your account, plan, region, and app version, but the idea is simple:
- Give editing access to people who need to edit.
- Give admin access only to people who need to manage the space.
- Give review access to people who only need to check the video or leave feedback.
This helps prevent common team problems like someone editing the wrong draft, deleting an asset, exporting an unfinished video, or confusing the team about which version is final.
4. Upload your shared assets before editing
Before your team starts editing, upload the files everyone will use often.
This can include:
- Logos
- Brand fonts
- Brand colors
- Intro clips
- Outro clips
- Music
- Sound effects
- B-roll
- Product clips
- Caption styles
- Thumbnail assets
- Template videos
This step saves time because every editor works from the same materials.
Instead of one person asking, “Where is the logo?” and another person sending an old file through WhatsApp, everything stays inside the shared CapCut workflow.
That is one of the biggest benefits of using CapCut as a team.
5. Create the project inside the team space
If the video is a team project, create it inside the shared space from the beginning.
This is better than starting the edit inside your personal account and trying to move everything later.
When a project starts in the right space, your team is less likely to run into missing files, wrong permissions, broken access, or version confusion.
If you already started the project in your personal space, check whether CapCut gives you an option to move, copy, upload, or share it into the correct team space.
6. Decide who controls the edit
This is where many beginners misunderstand CapCut collaboration.
CapCut team editing does not always work like Google Docs, where everyone can freely edit the same thing at the exact same second.
CapCut’s official collaboration guide says only one member can hold editing permission at a time. While that person is editing, other members are in view-only mode. When someone else needs to edit, the current editor can transfer editing permission to another team member.
So a realistic CapCut team workflow looks like this:
- One person creates the first draft.
- Another person reviews the video.
- The editor makes changes.
- A designer checks the branding.
- A manager or client approves the final version.
- Another editor takes over only when editing permission is transferred.
This setup may sound less flexible than live document editing, but it helps prevent conflicting edits and duplicate versions.
7. Keep feedback close to the project
Try not to scatter feedback across WhatsApp, email, Google Docs, and private messages.
That is how teams lose track of what needs to be changed.
A better workflow is to keep review and feedback as close to the CapCut project as possible. When a teammate or client needs to review the video, share it for review instead of sending random exports back and forth.
This makes it easier to track comments, make changes, and move toward one approved final version.
8. Export the final version from one place
When the project is approved, let one person export the final video.
This avoids the common problem where three people export three slightly different versions of the same project.
For a cleaner workflow, use simple file names like:
- brand-video-final-instagram-reels
- product-demo-final-youtube-shorts
- client-ad-final-approved
- campaign-video-final-tiktok
The goal is simple: your team should know where the project lives, who is editing it, who is reviewing it, and which version is final.
Quick CapCut Team Collaboration Checklist
- Create or open your CapCut space.
- Invite only the people who need access.
- Set the right permissions for each member.
- Upload shared assets before editing.
- Create the project inside the team space.
- Let one person control the edit at a time.
- Transfer editing permission when another person needs to take over.
- Keep review and feedback close to the project.
- Export the final video from one place.
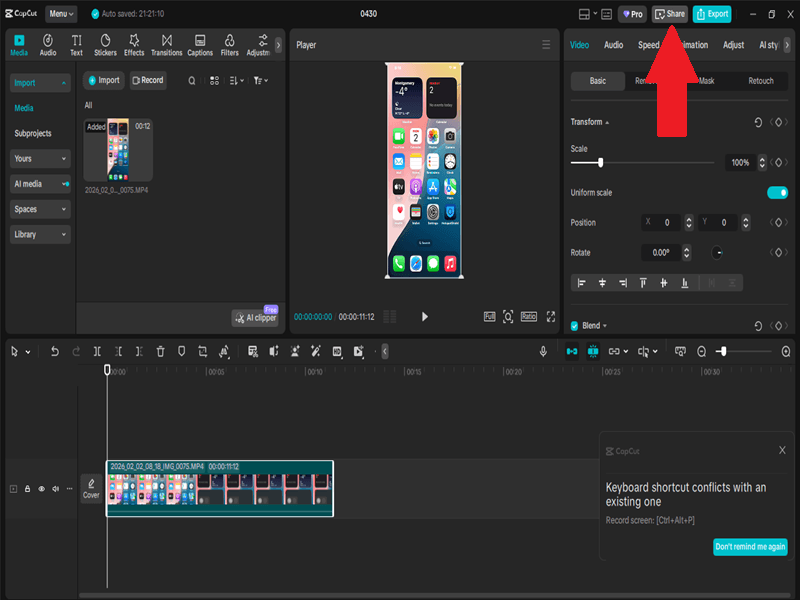
How to Share a CapCut Project Without Losing the Editable Timeline
One of the biggest mistakes beginners make is thinking that sharing a CapCut video is the same as sharing a CapCut project.
They are not the same thing.
When you share a finished video, the other person can watch the exported file. They cannot open your full CapCut timeline, move clips, change captions, replace music, adjust effects, or continue editing from where you stopped.
When you share a CapCut project properly, the other person may be able to access the editable project through the correct space, permission, and workflow.
That difference matters if you are working with another editor, teammate, client, or social media manager.
If you only send someone an exported MP4 file, they can review the video, but they cannot easily fix a caption, change the pacing, replace a logo, or continue the edit inside CapCut.
If the project is shared through the right CapCut workspace, the workflow is much cleaner.
The main ways to share CapCut work
CapCut gives you different ways to share your work, but each one has a different purpose.
1. Share a finished video
Use this when the video is already complete and you only want someone to watch, download, approve, or publish it.
This is best for:
- Final approvals
- Client delivery
- Posting to TikTok
- Posting to Instagram Reels
- Posting to YouTube Shorts
- Sending a completed draft for quick viewing
This does not give the other person your editable CapCut timeline. It only gives them the finished video file or viewing link.
2. Share for review
Use this when you want someone to check the video and leave feedback, but you do not want them to edit the full project.
This works well when a client, manager, teammate, or reviewer needs to check:
- Captions
- Pacing
- Voiceover
- Branding
- Message
- Spelling
- Product details
- Final approval
CapCut’s official guide says you can use Export, then Share for review, to share a video with team members or external people by link or email. This allows people to review and comment without needing to take over the full edit.
This is usually cleaner than sending a video through WhatsApp and collecting feedback in five different places.
3. Share as a presentation
CapCut also has a share-as-presentation option in its online workflow.
This is useful when you want to present or share the video in a more viewable format instead of sending the raw project. Depending on the settings available in your account, you may be able to share by link, embed, or email.
This option is better for viewing and presenting, not for handing over the full editable project.
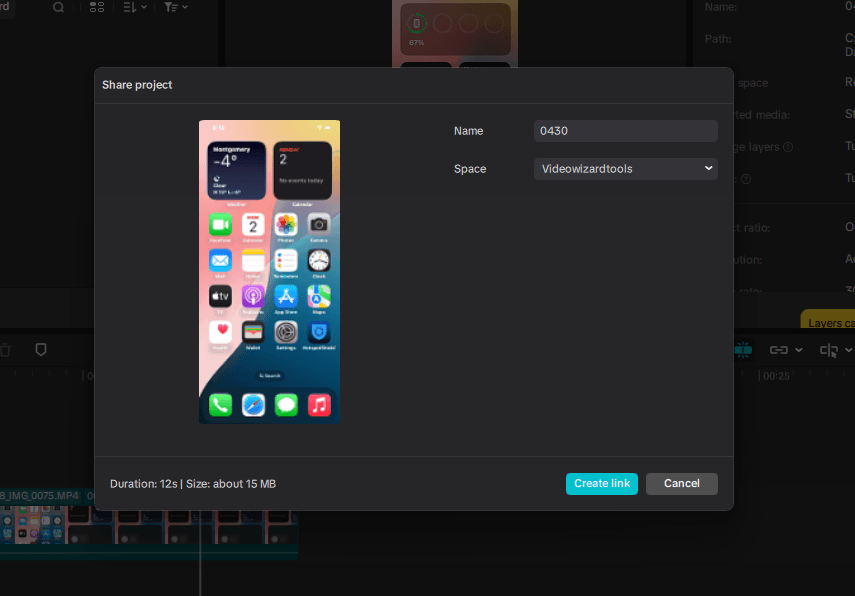
4. Share the editable project through a team space
Use this when another person needs to continue editing the project.
This is the best option for real collaboration because the project stays inside the shared workspace instead of being trapped inside one person’s personal account.
This is useful for:
- Creator duos
- Small agencies
- Social media teams
- Client video workflows
- Editors handing off projects
- Teams using the same clips, logos, templates, and music
If another person needs to actually edit the project, do not just send them the final video. Make sure the project is in the correct CapCut space and that the person has the right access.
5. Transfer editing permission when needed
If another team member needs to take over the edit, they may need editing permission.
CapCut’s collaboration workflow uses editing handoff. That means one person controls the edit at a time, and editing permission can be transferred to another member when needed.
For example:
- The first editor creates the rough cut.
- The caption editor takes over and fixes text.
- The designer checks the logo, colors, and layout.
- The final editor exports the approved version.
This keeps the workflow organized and reduces the risk of two people making conflicting edits at the same time.
Why your CapCut project may not share properly
If your teammate cannot open or edit your CapCut project, one of these issues is usually the reason:
- The project was created in a personal space instead of the team space.
- The teammate has not accepted the invite.
- The teammate is logged into the wrong CapCut account.
- The teammate does not have the right permission.
- The project was shared as a finished video instead of an editable project.
- The original media files are missing or not synced.
- The project uses Pro assets the teammate cannot access.
- The team space has reached a free member limit.
- The feature is easier to manage from CapCut Online than from desktop or mobile.
- The project has not synced properly across devices yet.
Best practice for sharing CapCut projects
If another person needs to edit the project, start the project inside the team space from the beginning.
Upload your shared clips, logos, music, templates, and brand assets before editing. Then make sure every teammate is working from the same space instead of separate personal accounts.
For review, use a review link.
For final delivery, share or export the finished video.
For real editing handoff, keep the project inside the team space and transfer editing permission when another person needs to take over.
That simple difference can prevent most CapCut sharing problems before they happen.
Do Team Members Get CapCut Pro Features?
Yes, team members can get access to CapCut Pro features when they are part of a paid CapCut Pro for Teams workspace.
This is one of the main reasons teams choose the team plan instead of asking every person to buy an individual CapCut Pro account.
With the CapCut team plan, members can work from the same shared workspace and use Pro-level tools for team projects.
This can make collaboration easier because your editor, designer, social media manager, or content assistant can all work with the same creative tools and shared assets.
Depending on your plan and account, this may include access to features like:
- Pro templates
- premium effects
- advanced transitions
- AI tools
- brand assets
- team storage
- shared project materials
- higher-quality export options
But there is one important detail:
Your team members should work inside the correct team workspace.
If someone edits from their personal CapCut account or outside the team workspace, they may not see the same Pro tools, shared files, brand materials, or project access. This is where many teams get confused.
So if a teammate says they cannot access a Pro feature, the first thing to check is not always the subscription itself.
Check these first:
- Are they logged into the right CapCut account?
- Have they accepted the team invite?
- Are they working inside the team workspace?
- Do they have the right permission?
- Is the feature included in your team plan?
- Are they using the mobile, desktop, or web version where that feature is available?
Also remember that CapCut features, limits, and Pro access can vary by region, device, account type, and plan.
So your safest option is to check your own CapCut billing page and Teamspace settings before assuming every member has the exact same access.
For most teams, the key idea is simple:
CapCut Pro for Teams is best when your team members are invited properly, working inside the same workspace, and using the team plan instead of separate personal workflows.
This has also been discussed on Reddit, where one user shared:
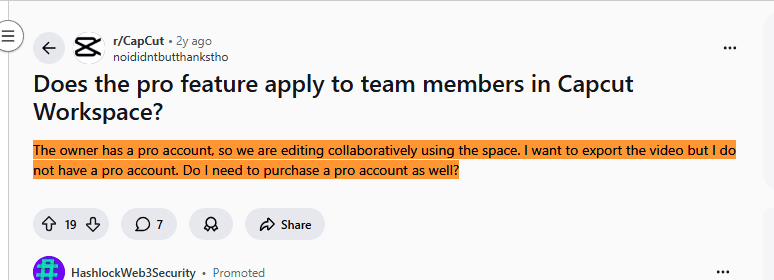
CapCut Teams Roles and Permissions
CapCut Teams works better when each person has the right level of access.
This matters because not everyone on your team needs the same control. Your main editor may need full project access, while a client, assistant, or manager may only need to review the draft and leave feedback.
Here are the main types of users you may have in a CapCut team workflow.
1. Owner or Admin
The owner or admin is usually the person who creates and manages the team workspace.
This person may be responsible for:
- Managing the team workspace
- Inviting new team members
- Removing members when needed
- Managing billing or subscription settings
- Organizing shared assets
- Making sure projects stay inside the correct workspace
- Controlling who can access team projects
This role is best for the business owner, agency lead, content manager, or the person responsible for the team’s CapCut account.
2. Team Member or Collaborator
A team member or collaborator is someone who helps with the actual video creation process.
This person may be able to:
- Upload video clips
- Edit projects
- Use shared assets
- Add captions
- Add brand elements
- Review drafts
- Prepare videos for export
- Work inside the team workspace
This role is best for editors, social media managers, designers, assistants, and other people who need to help create or manage video content.
3. Reviewer or Client
A reviewer or client usually does not need full editing access.
This person may only need to:
- Watch the draft
- Check the message
- Review captions
- Approve the final version
- Suggest changes
- Leave feedback
This role is best for clients, managers, brand owners, teachers, campaign leads, and non-editing team members.
For these people, it is usually better to share the video for review instead of giving them full editing access.
Why Permissions Matter in CapCut Teams
Permissions help protect your projects and keep the workflow organized.
Without clear access control, someone may accidentally:
- Edit the wrong draft
- Delete a file
- Move an important asset
- Change a caption by mistake
- Export an unfinished version
- Confuse the team about which version is final
For a small creator duo, this may not feel like a big problem at first. But once you start creating videos regularly, permissions become very important.
They help your team clearly understand:
- Who can edit the project
- Who can review the project
- Who manages the workspace
- Who handles billing
- Who uploads shared assets
- Who exports the final video
- Who should not change the main edit
Important Note About CapCut Role Names
CapCut’s exact role names and permission options may vary depending on your account, region, app version, and whether you are using a free workspace or a paid Teams plan.
So do not assume every CapCut account will show the exact same role labels.
In some accounts, you may see wording like:
- Owner
- Admin
- Member
- Collaborator
- Reviewer
- Viewer
The safest approach is to check the role options inside your own CapCut Teamspace or workspace settings before inviting everyone.
As a simple rule:
Give full editing access only to people who need to edit the project.
Give review access to people who only need to leave feedback or approve the final video.
CapCut Pro For Teams Pricing & Plans Explained
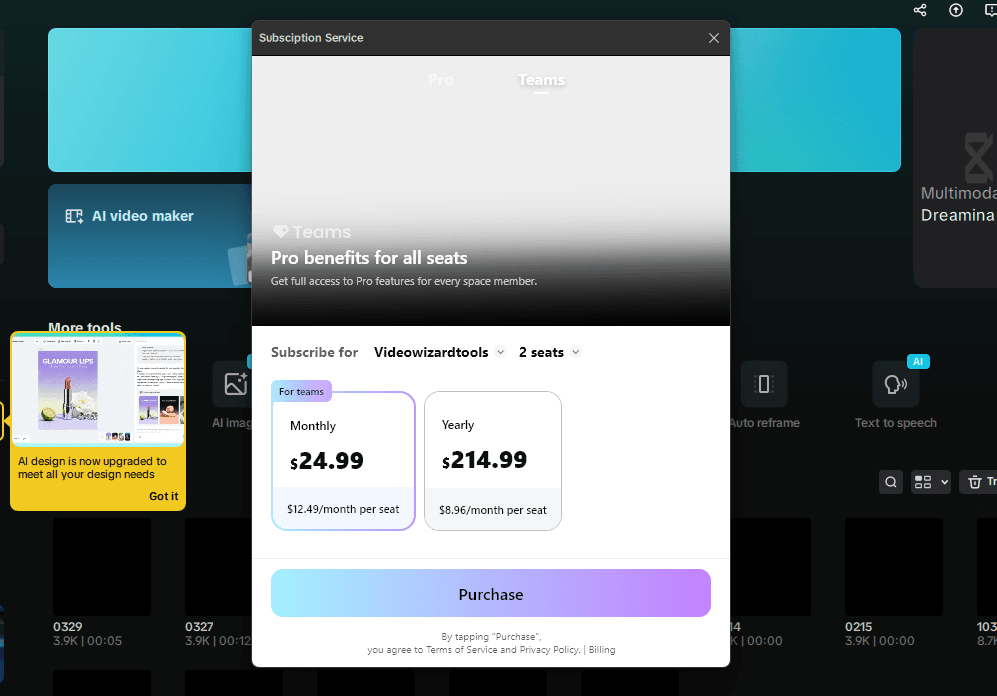
CapCut Teams subscription pricing screen showing monthly and yearly Pro access options for multiple seats.
CapCut Pro for Teams is made for groups that need a shared video workflow, not just a personal editing account.
The Teams plan is usually priced by seat. That means your total cost depends on how many people need access to the team workspace.
In my CapCut Teams checkout screen, the Teams plan shows $24.99 per month for 2 seats, which works out to $12.49 per month per seat.
The yearly option shows $214.99 for 2 seats, which works out to about $8.96 per month per seat.
Note: Prices may vary by region, currency, billing cycle, number of seats, taxes, and current CapCut offers, so check your own CapCut billing page before subscribing.
For a full breakdown of CapCut’s free plan, Pro plan, monthly cost, annual cost, and plan differences, read my complete guide to CapCut pricing plans.
What Are You Paying for With CapCut Pro for Teams?
Since this post has already explained Teamspace, sharing, permissions, and collaboration earlier, I will keep this part simple.
With CapCut Pro for Teams, you are mainly paying for a more organized team workflow instead of a single-user editing setup.
That usually means:
- Seats for multiple team members, so more than one person can work inside the team setup.
- A shared workspace, where projects, drafts, and assets can stay in one place.
- Team access to Pro-level tools, depending on your plan, account, region, and device.
- Cloud-based project access, which helps reduce manual file sharing.
- A cleaner review and handoff process, so editors, managers, and clients are not working from scattered files.
So the real question is not only, “How much does CapCut Pro for Teams cost?”
The better question is, “Will this save my team enough time and confusion to justify the monthly or yearly price?”
If you work alone, the answer may be no. A regular CapCut Pro plan may be enough.
But if you work with an editor, assistant, designer, social media manager, client, or content team, the Teams plan can make sense because it gives everyone a more central place to manage projects, assets, feedback, and final videos.

Best Use Cases for CapCut Pro for Teams
CapCut Pro for Teams is most useful when video creation involves more than one person.
You may not need it if you only edit your own videos. But if your workflow includes planning, editing, reviewing, approving, and publishing content as a group, the Teams plan can make the process easier to manage.
Here are the best use cases.
1. Creator Duos
CapCut Pro for Teams can work well for two creators who share the editing process.
For example, one person may record the content while the other edits, adds captions, checks pacing, or prepares the final export.
This is much cleaner than sending clips back and forth through WhatsApp, Google Drive, or email.
2. Social Media Teams
If your team creates TikToks, Instagram Reels, YouTube Shorts, Facebook videos, or ads regularly, CapCut Pro for Teams can help keep projects and brand assets in one place.
This is useful when different people handle different parts of the workflow, such as scripting, editing, captions, review, approval, and publishing.
3. Small Agencies
Small agencies can use CapCut Pro for Teams to manage client video projects without moving into more complicated editing software.
It is especially useful for short-form client content, product videos, campaign clips, social ads, and branded templates.
4. E-commerce Brands
Ecommerce teams often need quick product videos, promotional clips, customer testimonial edits, and ad creatives.
A shared CapCut workspace can help the team reuse product clips, logos, brand colors, music, and templates without starting from scratch every time.
5. Nonprofits and Community Groups
Nonprofits often work with volunteers, part-time staff, and small content teams.
CapCut Pro for Teams can help them organize campaign videos, event clips, awareness content, and social media posts in one shared workspace.
6. Educators and Training Teams
Teachers, coaches, and training teams can use CapCut Pro for Teams to create learning videos, course clips, internal training materials, and student-friendly content.
The main benefit is that multiple people can help prepare, review, and organize the content without relying on one person’s account.
7. Client Review Workflows
CapCut Pro for Teams can also help when a client, manager, or business owner needs to review a video before it goes live.
Instead of sending random versions of the same video, your team can keep the project organized and move toward one approved final version.
CapCut Teams Limitations You Should Know
CapCut Pro for Teams can make collaboration easier, but it is not perfect.
Before you build your whole team workflow around it, you should understand the main limitations.
1. It Is Not Full Google Docs-Style Editing
CapCut Teams can help multiple people work around the same project, but you should not expect every teammate to freely edit the same timeline at the exact same second.
In many workflows, one person controls the main edit at a time while others review, comment, or take over when needed.
This is still useful, but it is not the same as fully simultaneous live editing.
2. You Need a Stable Internet Connection
Because team workflows depend heavily on cloud access and syncing, a weak internet connection can slow things down.
Large video files may take time to upload, sync, or open on another device.
If your team works with big files, 4K footage, long videos, or many assets, this is something to keep in mind.
3. Storage Can Fill Up Quickly
Video projects are heavy.
If your team uploads lots of clips, music, templates, exports, and drafts, your cloud storage can fill up faster than expected.
To avoid this, clean up old drafts, remove unused files, and keep only important assets in the shared workspace.
4. Some Features May Vary by Device
CapCut works across mobile, desktop, and web, but every feature may not appear in the same place on every device.
Some team settings, billing options, or workspace controls may be easier to manage from CapCut Online or desktop than from the mobile app.
So if you cannot find a team setting on your phone, check the web or desktop version before assuming the feature is missing.
5. Project Sharing Can Confuse Beginners
A common mistake is sending someone an exported video and thinking they now have the editable project.
They do not.
An exported video is just the finished file. If someone needs to continue editing, the project should be shared through the right workspace or team workflow.
6. Pricing and Team Limits Can Change
CapCut’s pricing, storage limits, seat limits, free workspace limits, and Pro feature access can vary by account, country, billing cycle, and current CapCut updates.
That is why you should always confirm the latest details inside your own CapCut account before upgrading or inviting your whole team.
7. It May Not Replace Professional Editing Suites
CapCut Pro for Teams is great for social videos, short-form content, branded clips, ads, and quick team workflows.
But if your team needs advanced color grading, complex audio mixing, heavy VFX, offline production workflows, or professional film editing, tools like DaVinci Resolve, Adobe Premiere Pro, or Final Cut Pro may still be better suited for that level of work.
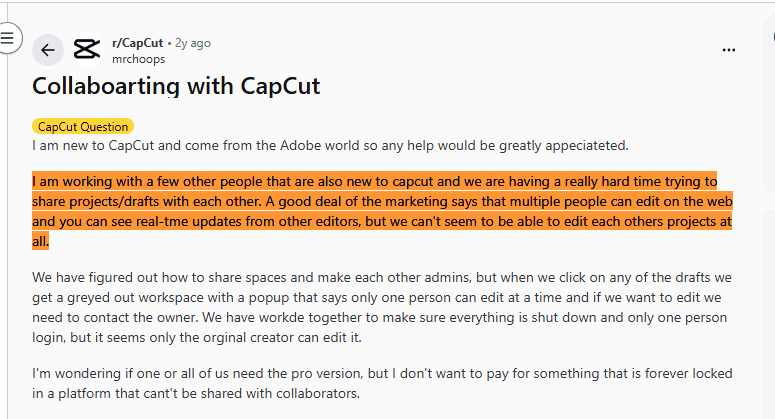
However, not every team experience is smooth. mrchoops on Reddit said: “I am working with a few other people that are also new to CapCut and we are having a really hard time trying to share projects or drafts with each other.”
Is CapCut Pro for Teams Worth It?
If your team’s goal is to create fast, polished video content for social platforms, marketing campaigns, or educational materials, CapCut Pro for Teams is absolutely worth it.
It gives your entire group access to a shared creative space where assets stay organized, videos stay on-brand, and collaboration feels seamless.
However, if your team needs advanced control, full offline access, or integration with enterprise tools like Slack, Trello, or Adobe Creative Cloud, you may eventually outgrow it.
For small to mid-sized teams that value speed, simplicity, and consistency, CapCut Pro for Teams hits the sweet spot.
FAQs
FAQs About CapCut Pro for Teams
Can two people edit the same CapCut project at the same time?
Two people can collaborate on a CapCut project, but it may not work like full live editing in Google Docs. In many CapCut team workflows, one person controls the main edit at a time while others review, comment, access shared assets, or take over editing when needed.
How do I share a CapCut project with someone else?
The best way to share a CapCut project for editing is to use a Teamspace or shared workspace. If you only export and send the final video, the other person can watch the video, but they cannot edit your full CapCut timeline.
Does CapCut have Teamspace?
Yes. CapCut has Teamspace or workspace features that allow people to work together in a shared area. Teamspace can help with shared projects, assets, drafts, templates, and collaboration. The exact features and limits may vary by account, region, app version, and plan.
Do CapCut Teams members get Pro features?
Team members can access Pro features when they are part of the correct paid CapCut Pro for Teams workspace. If a teammate cannot use a Pro feature, check that they accepted the team invite, are logged into the right account, have the correct permission, and are working inside the team workspace.
How much does CapCut Pro for Teams cost?
The CapCut Teams is priced $24.99 per month for 2 seats, which equals $12.49 per month per seat. The yearly option shows $214.99 for 2 seats, which equals about $8.96 per month per seat.
What is the difference between CapCut Pro and CapCut Pro for Teams?
CapCut Pro is mainly for one person. CapCut Pro for Teams is for groups that need shared projects, shared assets, team storage, collaboration features, and a more organized workflow. If you edit alone, CapCut Pro may be enough. If multiple people are involved in the video process, CapCut Pro for Teams is usually the better fit.
Is there a free way to collaborate on CapCut?
CapCut may allow limited free collaboration through Teamspace, but the limits can change. CapCut says newly created free team spaces may allow only one additional member, meaning two people total including the owner. Larger teams usually need a paid Teams subscription.
Can I use CapCut Pro for Teams on mobile?
You may be able to access some team content on mobile, but not every team setting may appear in the mobile app. For full team management, member limits, roles, and billing controls, CapCut Online is usually the better place to check.
Why can’t my teammate access my CapCut project?
This usually happens because the project is not inside the team workspace, the teammate has not accepted the invite, the permission level is wrong, or the project was shared as a finished video instead of an editable project. It can also happen if the project uses Pro assets, missing media files, or a feature that is not available on your teammate’s device or account.
Is it safe to share my CapCut Pro login instead of using Teams?
No. If more than one person needs access, it is better to use a proper team workspace instead of sharing one personal login. This keeps your account safer, makes permissions clearer, and helps prevent confusion around projects, billing, and access.
Is CapCut Pro for Teams worth it?
CapCut Pro for Teams is worth it if your team regularly creates videos together and needs shared assets, team storage, Pro tools, project access, and a cleaner review process. It may not be necessary if you are a solo creator or if only one person handles all the editing.
Final Takeaway
CapCut Pro for Teams is worth considering if more than one person helps create, review, or approve your videos.
It gives your team a shared place to manage projects, assets, feedback, and final exports, which can reduce version confusion and make collaboration easier.
If you edit alone, a regular CapCut Pro plan may be enough. But for creator duos, social media teams, small agencies, educators, nonprofits, and businesses, CapCut Pro for Teams can make the video workflow much cleaner.