
Most people open CapCut to edit videos. But here’s the part that surprises a lot of creators: you can also edit photos in CapCut, and it’s actually useful when you want fast, social-ready edits.
So, can you edit photos on CapCut? Yes. You can import photos, crop and resize them, adjust lighting and color, apply filters, add text and stickers, and even animate photos to create slideshows and Reels-style edits.
What CapCut is best at is turning photos into content: clean edits, captions, motion, transitions, and export-ready files for TikTok, Instagram, and YouTube.
Table of Contents
- Quick Tip: How to edit photos on CapCut
- Can You Edit Photos on CapCut?
- What CapCut photo editing is best for (and what it’s not)
- How to edit photos on CapCut (step-by-step)
- How to Save an Edited Photo From Capcut (When You Want an Image, Not a Video)
- Advanced Photo Editing Features in Capcut (That Actually Matter)
- Why use CapCut for photo editing?
- Creative ways to use CapCut for photo editing
- Common Problems When Editing Photos in CapCut
- Should You Edit Photos on CapCut or Use a Dedicated Photo Editor?
- Frequently Asked Questions
- Conclusion
- Official Resources
Quick Tip: How to edit photos on CapCut
- Start a new project and import your photo(s)
- Crop/resize and set the right aspect ratio (1:1, 9:16, 16:9)
- Adjust brightness, contrast, saturation, and sharpness
- Add filters, text, stickers, or overlays
- Add animation (optional) for motion and transitions
- Export (CapCut saves as video if animation/transitions are used)
Can You Edit Photos on CapCut?
Yes, you can edit photos on CapCut! Although the app is known for its video editing features, CapCut supports photo editing and allows users to add photos to their projects.
You can enhance your photos with filters, transitions, stickers, and even text overlays, making it an excellent choice for creating visual content beyond videos.
In CapCut, you can:
- Apply filters to your photos
- Add text, stickers, and music to enhance your images
- Adjust photo brightness, contrast, and saturation
- Create photo montages or slideshows
- Animate photos to bring them to life with transitions
What CapCut photo editing is best for (and what it’s not)
CapCut is a great choice when you want to make photos look good for social media and you don’t want to switch apps.
CapCut is great for: quick edits, captions, stickers, overlays, slideshows, and animated photo posts.
CapCut is not ideal for: detailed retouching, advanced brush work, pro masking, or heavy background removal like Photoshop-style edits.
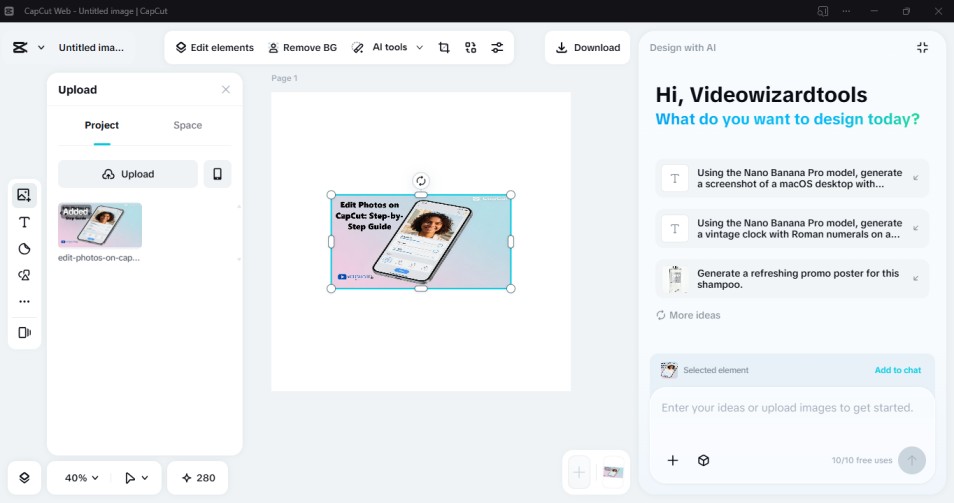
Quick note: The featured image on this post was edited in CapCut using the same steps below, so you’re not reading theory. This is exactly how I build clean, social-ready photo edits.
How to edit photos on CapCut (step-by-step)
Before you start: choose the right size (so your photo doesn’t look weird on Instagram or TikTok)
Most “bad” photo edits happen because the size is wrong. Pick the format first:
- Instagram post: 1:1 (square) or 4:5 (portrait)
- Stories / Reels / TikTok: 9:16
- YouTube thumbnail/landscape: 16:9
Once your canvas is right, your crop, text placement, and exports will look clean.
Step 1: Start a new project and import your photo
Open CapCut and tap New Project, then select your photo(s). If you’re making a slideshow, import multiple photos at once.
Step 2: Crop, resize, and set the right aspect ratio
Tap the photo on the timeline, then use Edit and Crop to frame it properly. This is where you decide if it’s for 1:1, 9:16, or 16:9.
Step 3: Fix lighting and color (the edits that make the biggest difference)
Tap Adjust and tweak the basics:
- Brightness/Exposure: lift dark photos gently
- Contrast: add depth so the image doesn’t look flat
- Saturation: keep it natural (too much looks fake fast)
- Sharpness: a small boost can help, but don’t overdo it
Step 4: Add filters (optional) and keep them subtle
Use Filters if you want a consistent look. Lower the intensity so the photo still looks real and clear.
Step 5: Add text, stickers, and overlays
Use Text for captions and titles, and Stickers for extra style. If you want a clean look, keep text readable and avoid stacking too many effects.
Step 6: Add motion (optional) with animation and transitions
If you want the photo to feel alive, use Animation (zoom, fade, pan) or add transitions between photos in a slideshow.
Step 7: Export
If your project includes animation or transitions, CapCut will export as a video. That’s normal, and it’s perfect for Reels, TikTok, and Shorts.
How to Save an Edited Photo From Capcut (When You Want an Image, Not a Video)
CapCut is video-first, so many photo edits end up exporting as MP4, especially if you used animation or transitions.
If you need a clean image file:
- Option 1: Export the project, then grab a still frame from the exported video (most phones let you save a frame or screenshot cleanly).
- Option 2: Avoid animations/transitions and keep it as a single photo edit, then save using your device’s best “save frame” method.
Tip: If your text looks soft after export, keep the text large, avoid tiny fonts, and export at the highest quality available.
Advanced Photo Editing Features in Capcut (That Actually Matter)
If you want more than basic brightness and filters, CapCut includes a few powerful tools that can make your photo edits stand out.
Keyframe Animation (Add Controlled Movement)
Keyframes let you create smooth zoom-ins, pans, or position changes over time. This is perfect for turning a static photo into a dynamic Reel or slideshow.
How to use it:
- Select your photo on the timeline
- Tap the keyframe icon at the starting point
- Move forward on the timeline and adjust size or position
- CapCut automatically creates smooth motion between points
Blending Modes (Combine Photos Creatively)
Blending modes let you layer images and control how they interact. This is useful for overlays, light effects, texture backgrounds, or double-exposure style edits.
How to use it:
- Add a photo as an overlay
- Tap “Blend”
- Test modes like Multiply or Overlay
- Adjust opacity until it looks natural
If you’re layering photos or creating composite-style edits, you might also want to learn how to remove or replace backgrounds. See our step-by-step guide on how to edit green screen in CapCut to take your photo projects further.
Multi-layer editing (build simple collages)
You can stack multiple images, resize them, and control opacity to create collages, posters, or layered social content.
While it’s not as advanced as Photoshop, it’s more than enough for creative social media designs.
Why use CapCut for photo editing?
CapCut isn’t a professional photo retouching app. But for fast, social-ready edits, it has some clear advantages:
- Free to use: Most features are available without paying.
- Beginner-friendly: Simple controls and visual timeline.
- All-in-one tool: Edit photos and videos in the same app.
- High-quality exports: Supports HD and 4K video output for slideshows and animated posts.
If your goal is quick content creation instead of heavy photo manipulation, CapCut makes the process simple.

Creative ways to use CapCut for photo editing
CapCut isn’t built for heavy photo retouching. It’s built for turning photos into content. Here’s where it really shines:
Create photo slideshows with music
Import multiple photos, add smooth transitions, and sync them to background music. This is perfect for birthday videos, travel recaps, event highlights, or simple presentation-style content. (For ready-made structures, check out the best CapCut template for photos.)
Design social media posts and Stories
Use text, stickers, overlays, and aspect ratio presets (1:1, 4:5, 9:16) to create Instagram posts, Reels covers, TikTok visuals, or YouTube thumbnails. CapCut makes it easy to design content that fits each platform correctly.
Add motion to still photos
Use animation effects like zoom, pan, or fade to give still images movement. This works especially well for Reels, Shorts, and TikTok, where static images feel flat.
Make simple posters, quote graphics, or announcements
Add bold text, adjust colors, and layer elements to create clean promotional graphics, announcements, or quote posts without switching to another app.
CapCut works best when your goal is speed, movement, and social-ready content rather than deep, Photoshop-style editing.
Common Problems When Editing Photos in CapCut
CapCut is easy to use for photo edits, but a few small mistakes can make the final result look blurry, cropped, or overedited. Here are the common problems and how to fix them quickly.
My Photo Looks Blurry After Export
If your photo looks blurry after export, start by checking the original image quality. A low-resolution or heavily compressed photo will not become sharp just because you edit it in CapCut.
Use the highest suitable export quality, avoid cropping too far into the image, and do not stack too many filters or effects. If you add sharpness, keep it subtle because too much sharpening can make the photo look harsh or grainy.
My Text Looks Pixelated
Small, thin text is usually the first thing to look soft after export or upload. Use a thicker font, increase the text size, and keep strong contrast between the text and background.
If the photo is for Instagram, TikTok, Reels, or Shorts, preview it on your phone before posting. Text that looks fine while editing may be too small once it appears on a mobile screen.
My Colors Look Too Strong or Weird
This usually happens when saturation, filters, or temperature settings are pushed too far. Lower the filter intensity first, then reduce saturation slightly.
If skin tones look too orange, yellow, green, or unnatural, adjust the temperature and tint carefully instead of adding another filter on top. Small changes usually look more professional than heavy color edits.
CapCut Cropped My Photo Weirdly
This usually happens when the aspect ratio is set after you have already placed and edited the photo.
Set the correct aspect ratio first, then crop and position the image. Use 1:1 or 4:5 for Instagram feed posts, 9:16 for Stories, Reels, TikTok, and Shorts, and 16:9 for YouTube thumbnails or landscape content.
My Photo Edit Looks Too Busy
CapCut makes it easy to add filters, stickers, text, animations, overlays, and effects, but using too many at once can make the edit look messy — and stacking too much is usually the biggest reason people can tell your photos were edited in CapCut.
For a cleaner result, choose one main style. Use one readable text style, one subtle filter, and only one or two extra design elements. Simple edits usually look more polished than crowded ones.
Should You Edit Photos on CapCut or Use a Dedicated Photo Editor?
Use CapCut if your goal is fast, clean, social-ready content. It works well for photo slideshows, animated posts, Reels covers, TikTok visuals, text overlays, stickers, filters, and simple color adjustments.
Use a dedicated photo editor if you need detailed retouching, advanced masking, brush tools, professional background removal, skin cleanup, object removal, or precise image manipulation.
In simple terms, CapCut is best when you want to turn photos into content. A dedicated photo editor is better when you need to deeply edit the photo itself.
Frequently Asked Questions
Can you edit photos on CapCut?
Yes. You can edit photos on CapCut by importing images into a project, then cropping, resizing, adjusting brightness and color, adding filters, placing text, using stickers, and adding motion or transitions for social media content.
Can you edit photos on CapCut without making a video?
You can edit a single photo inside a CapCut project, but CapCut is still a video-first editor. If you add animations, transitions, music, or motion effects, the final export will usually be a video file instead of a still image.
Can CapCut save an edited photo as an image file?
CapCut may not always export photo edits as a normal image file like JPG or PNG. The easiest workaround is to export the project, then save a still frame or take a clean screenshot from the final result if you need an image.
Can I make a photo slideshow in CapCut?
Yes. Import multiple photos into CapCut, arrange them on the timeline, add transitions, apply music, and export the final slideshow as a video. This works well for birthday videos, travel recaps, event memories, and social media posts.
Does CapCut support PNG and JPEG photos?
Yes. CapCut supports common image formats like PNG and JPEG, so you can import photos, graphics, screenshots, transparent images, and other visual assets into your project.
Is CapCut good for Instagram photo posts and Stories?
Yes, especially if you set the right aspect ratio before editing. Use 1:1 or 4:5 for Instagram feed posts, and 9:16 for Stories, Reels, TikTok, and Shorts. This helps avoid awkward cropping and keeps text easier to read.
Why does my photo look blurry after editing in CapCut?
Your photo may look blurry if the original image is low resolution, the project is cropped too much, the export quality is low, or too many filters and effects are stacked. Start with a sharp image and export at the highest suitable quality.
Why does my text look pixelated on a CapCut photo edit?
Small or thin text can look soft after export, especially on social platforms that compress content. Use larger text, thicker fonts, stronger contrast, and high-quality export settings to keep text clear.
Should I use CapCut or a dedicated photo editor?
Use CapCut if you want quick social media edits, photo slideshows, animated posts, text overlays, stickers, and simple color adjustments. Use a dedicated photo editor if you need advanced retouching, brush tools, professional masking, or detailed background removal.
Conclusion
So yes, you can edit photos on CapCut, and it’s a solid choice when your goal is fast, social-ready content.
You can crop, adjust lighting and color, add text and stickers, apply filters, and even animate photos for slideshows and short-form videos.
If you need deep retouching or pro-level photo masking, a dedicated photo editor will be better. But if you want quick edits and content that’s ready for Instagram, TikTok, or YouTube, CapCut gets the job done.