

Ever filmed a great clip… then watched it back and it looked grainy, dark, or kind of blurry? That feeling is the worst, especially when you know the moment was good.
So let’s answer the big question: can you improve video quality on CapCut?
Yes, you can, as long as you use the right tools in the right order. CapCut won’t magically turn a totally out-of-focus video into real 4K detail, but it can make your footage look cleaner, sharper, brighter, and way more watchable.
I’ll show you exactly what to tap and what to adjust on both mobile and desktop, plus the export settings that stop your video from looking worse after you save it.
Table of Contents
- What “Better Video Quality” Means (So You Know What to Fix)
- How to Get the Best Quality on CapCut
- Does CapCut Enhance or Improve Video Quality?
- Use CapCut AI tools to upscale and remove noise (when your footage is soft or grainy)
- Before you edit: 3 things that decide how good CapCut can make your video look
- How to Increase Video Quality in CapCut (Step-by-Step for Desktop)
- How to Increase Video Quality Better in CapCut Mobile
- How to Export Higher Quality Video from CapCut
- Will You Pay More to Improve Video Quality on CapCut?
- Expert Tips to Get the Best Quality Possible in CapCut
- Why Does CapCut Ruin My Video Quality?
- When to Use Other Tools Alongside CapCut
- Frequently Asked Questions
- Final Thoughts
What “Better Video Quality” Means (So You Know What to Fix)
Before jumping into CapCut’s tools, it helps to understand what “better quality” really means in video editing terms.
Good video quality isn’t just about resolution (1080p, 2K, 4K). It’s a combination of several things:
- Sharpness: How clear the details look.
- Brightness and contrast: Whether the lighting feels balanced or flat.
- Color grading: The mood and tone created by color adjustments.
- Stability: Whether the footage is smooth or shaky.
- Noise reduction: How clean the image looks, especially in dark scenes.
CapCut has features that target each of these areas — some automatic, others manual — that can make your footage look significantly better even if it wasn’t shot perfectly.
How to Get the Best Quality on CapCut
Yes. You can improve video quality on CapCut by fixing lighting, adding controlled sharpness, reducing grain, stabilizing shaky footage, and exporting with the right bitrate so your video doesn’t get crushed.
Here’s what CapCut can help with:
- Improve clarity with sharpness + enhance tools
- Fix dull or dark clips using exposure/brightness/contrast
- Make colors look more natural using basic color correction
- Smooth shaky footage using stabilization
- Make exports look cleaner with higher resolution + higher bitrate
But here’s the limit: CapCut can’t bring back detail that was never captured. If the footage is out of focus, it can only help so much.
Does CapCut Enhance or Improve Video Quality?
Yes. CapCut can genuinely improve video quality through its AI Enhance tool, manual adjustments like brightness, contrast, and sharpness, noise reduction, and stabilization.
It won’t recover detail that was never captured, but for most footage it makes a noticeable difference.
The key is using the right tools in the right order and exporting with a high bitrate so the improvements aren’t lost at save.
Fast checklist: Improve Video Quality in CapCut in 5 minutes
If you only do five things, do these:
- Fix lighting first (Exposure, Brightness, Contrast)
- Reduce grain/noise (only if the clip is noisy)
- Add a small amount of sharpness
- Use AI Enhance/Upscale only when needed
- Export in 1080p (or 4K if your original is 4K) with high bitrate
That order matters. If you sharpen before fixing noise, you can make the grain look worse.
Improving video quality is great, but what if you want to level up your entire editing game? Read our full guide on CapCut Features and Capabilities and learn all the essential tools that take your videos from good to great.
Use CapCut AI tools to upscale and remove noise (when your footage is soft or grainy)
If your video looks a little blurry, muddy, or noisy, CapCut’s AI tools can help. This is best for clips that were filmed in low light, older videos, or footage that got compressed (like something sent on WhatsApp).
1) AI Upscale (to improve clarity on low-res clips)
AI Upscale can make 480p or 720p footage look sharper on modern screens. It won’t create perfect “real 4K,” but it can improve edges and reduce that fuzzy look.
- Use it when faces look soft or details look smeared.
- Keep sharpening low after upscaling, or the video can look crunchy.
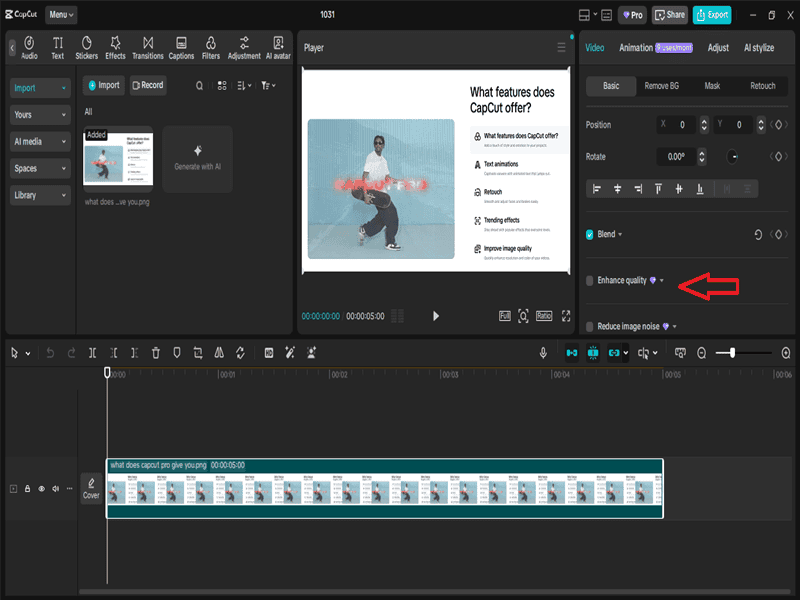
2) AI Denoise / Reduce image noise (to remove grain)
If your video was shot indoors or at night, the grain is usually the real problem, not the resolution. Denoise smooths out that messy texture while keeping the image cleaner.
- Use it before adding Sharpness.
- Don’t push it too hard, or skin can start looking waxy.
Best order: Denoise first → fix lighting → slight sharpness → export with high bitrate.
Before you edit: 3 things that decide how good CapCut can make your video look
CapCut can improve video quality, but your starting clip sets the ceiling. If you know what you’re working with, you’ll get better results faster.
1) Resolution (how much detail you actually captured)
If the original clip is 720p, exporting in 4K won’t magically add real detail. You can still make it look cleaner, but you can’t invent missing pixels.
2) Lighting (the real secret)
Bad lighting creates noise and blur. Fixing exposure and contrast often makes a bigger difference than sharpening.
3) Compression damage (the “WhatsApp effect”)
If the clip was sent through messaging apps, it may already be crushed. AI Upscale + Denoise can help, but it won’t fully restore what compression removed.
How to Increase Video Quality in CapCut (Step-by-Step for Desktop)

The desktop version of CapCut gives you the most control and precision. Here’s how to use it to make your video quality noticeably better.
Step 1: Create a New Project
As usual, open CapCut on your computer and click Create Project. Import your video file and drag it to the timeline.
Step 2: Adjust Resolution Settings
Before editing, check your project settings.
Go to the Export settings or click the resolution icon on the top bar ( see image below).

- Choose 1080p or 4K (if your hardware supports it).
- Set FPS (frames per second) to match your source (30 or 60 for smooth motion).
Step 3: Use the “Enhance” Feature
Select your clip in the timeline. In the right-hand menu, look for Enhance (or sometimes called “AI Enhance”). You will have to scroll down to see it.
- Toggle it on.
- Adjust the strength slider to a moderate setting usually gives the best results without over-sharpening.
Step 4: Fine-Tune Brightness and Contrast
Click Adjust in the toolbar and tweak these settings:

- Brightness: brighten dark footage slightly.
- Contrast: make details pop.
- Saturation: bring color to life, but don’t overdo it.
- Sharpen: adds clarity, but keep it under 50% to avoid noise.
Step 5: Apply Filters or LUTs
Under Filters or Color, apply a preset or custom LUT to enhance color tone. Choose filters that match the mood cinematic, warm, cool, or natural.
Step 6: Stabilize Shaky Footage
If your clip looks wobbly, select it and click Stabilize. Adjust the intensity to smooth out camera movement.
Step 7: Preview and Export
Play back the video to check your results. When exporting, choose High Quality mode and set the bitrate to 15 Mbps or higher for sharp detail.
How to Increase Video Quality Better in CapCut Mobile

Step 1: Open a New Project
- Launch the CapCut app.
- On the home screen, tap “New Project“, it’s the large button usually at the top or center of the screen.
- Select the video clip you want to enhance from your phone’s gallery, then tap “Add” in the bottom-right corner.
Step 2: Go to Adjustments
- Once your clip loads into the timeline, tap the video clip on the timeline to bring up the bottom toolbar.
- Swipe through the toolbar from left to right until you find “Adjust” (the icon looks like sliders).
- Tap “Adjust” to open all the manual enhancement options.
Step 3: Manually Tweak the Settings
Inside the Adjust menu, you’ll see sliders for various image properties. Here’s what each does:
- Brightness: Fixes dark or underexposed scenes.
- Contrast: Adds sharper definition between light and dark areas.
- Saturation: Makes colors more vivid.
- Exposure: Lightens up shadows and mid-tones.
- Sharpen: Highlights edges and fine details for a crisper image.
After adjusting each slider, tap the checkmark (✔) at the bottom-right corner to apply the changes.
Step 4: Use the “Enhance” Feature (if available)
- Go back to the main toolbar below the preview screen.
- Scroll until you see “AI Tools” (it’s often located toward the right end of the toolbar).
- Tap “AI Tools” → “Enhance.”
- Toggle it on — CapCut will automatically clean up lighting, contrast, and clarity for a polished look.
(Note: If you don’t see “Enhance,” update CapCut to the latest version.)
Step 5: Add Filters and Effects
- Return to the bottom toolbar and tap “Filters.” It’s usually beside the “Effects” option.
- Browse through the filter categories such as Life, Food, Retro, or Cinematic.
- Tap on any filter to preview it on your video.
- Use the intensity slider (just above the toolbar) to control how strong the filter appears.
- Tap ✔ to confirm.
- For more creative touches, you can also go to “Effects” → “Video Effects” and add subtle enhancements like Glow, Lens Flare, or Blur.
Step 6: Set the Best Export Settings
- When you’re done editing, tap the “Export” button, it’s the upward arrow icon at the top-right corner of your screen.
- Before saving, check these settings that appear above the “Export” button:
- Resolution: Choose 1080p or 4K for high-quality playback.
- Frame rate: Select 30fps for standard videos or 60fps for smoother motion.
- Bitrate: Set to High for better clarity (though file size will increase).
- Tap “Export” again to save your enhanced video to your device.
How to Export Higher Quality Video from CapCut
A lot of people enhance their clip, then ruin it at export. If your final video looks worse after saving, it is usually because the bitrate is too low or the resolution does not match the original footage.
Best general export settings (safe for most videos)
- Resolution: 1080p for most videos. Use 4K only if your original footage was actually shot in 4K — exporting a 1080p clip in 4K does not add real detail, it just makes the file larger.
- Frame rate: match your original footage, usually 30fps or 60fps. Changing the frame rate at export can create weird motion blur or jitter.
- Bitrate: choose High, Highest, or set a custom bitrate if CapCut allows it. This is the setting most people overlook and it makes the biggest difference to how sharp the final file actually looks.
- Format: MP4 (H.264) for the best balance of quality and upload compatibility across all platforms.
Platform tip (this matters)
TikTok, Instagram Reels, and YouTube Shorts all re-compress your video after upload. That means you want a clean, high bitrate export so the platform has more detail to work with before it applies its own compression.
Quick rule: if your video has fast movement, text on screen, or lots of fine detail like hair, grass, or patterns, export with the highest bitrate your phone or PC can handle without crashing.
Will You Pay More to Improve Video Quality on CapCut?
For most quality improvements, no. You can adjust resolution, fix brightness and contrast, apply filters, use color correction, and control bitrate entirely for free. Those settings cover the majority of what makes a CapCut export look sharp or soft.
Where Pro makes a difference is AI-powered enhancement. The paid version unlocks advanced AI tools like upscaling and noise reduction, smoother rendering on heavier projects, and 4K export, which is genuinely useful if your original footage was shot in 4K and you want to preserve that detail. If your source footage is 1080p, unlocking 4K export will not improve how it looks.
For everyday social media editing, the free version is enough to get clean, sharp exports. If you create content professionally, handle a lot of low-light or compressed footage, or want the AI tools to do more of the heavy lifting, Pro is worth considering.
For a full breakdown of what each plan actually includes, see the CapCut pricing plans guide.
Expert Tips to Get the Best Quality Possible in CapCut
- Start with good footage. Even the best editor can’t fix extremely blurry or out-of-focus videos.
- Use natural light when filming. It reduces noise and gives you more to work with later.
- Don’t over-sharpen. It can make your video look grainy or fake, the same over-editing signs people notice in edited CapCut photos apply to video too.
- Match resolution and frame rate. Exporting in higher resolution than the source won’t add real detail.
- Avoid re-exporting multiple times. Each export can slightly reduce quality — always work from your original.
- Use the preview window at 100%. It helps you see true clarity before exporting.
Why Does CapCut Ruin My Video Quality?
CapCut does not degrade, downgrade, or decrease video quality by default. The issues people notice almost always come from export settings or source footage.
The most frequent causes are low export resolution, a bitrate set too low, source footage that was already compressed before import, over-sharpening or stacked filters, and platform compression after upload. Each one has a different fix.
- Low resolution or bitrate at export: check the export window before saving. Resolution should be 1080p or higher, and bitrate should be set to High or Highest.
- Compressed source footage: if the original clip came from WhatsApp, TikTok, Instagram, or a messaging app, it was already compressed before you imported it. CapCut cannot restore what was removed before editing began.
- Too many stacked effects: beauty filters, glow, blur, and heavy sharpening on top of each other can make the export look worse than the raw footage. Remove one effect at a time until the problem clears. If you started from a template and aren’t sure how to strip a baked-in filter without redoing the whole edit, see our guide on removing a filter from a CapCut template.
- Platform compression after upload: if the saved file looks clean but the posted version looks degraded, TikTok, Instagram, or YouTube compressed it on their end. That is not a CapCut problem. Export with the highest bitrate you can and let the platform work with a cleaner file.
If your export keeps looking soft or degraded after trying these fixes, the full breakdown in the CapCut blurry export guide covers every cause in detail.
When to Use Other Tools Alongside CapCut
CapCut does a great job for social content TikToks, YouTube Shorts, Reels, and vlogs.
But if you’re working on larger projects (like cinematic videos or commercial work), you might want to pair it with other software:
- Use CapCut for initial cleanup (color, sharpness, stabilization).
- Then move to a pro editor like Premiere Pro or DaVinci Resolve for color grading or advanced upscaling.
CapCut is amazing for quick, impactful improvements — especially when your goal is to make social videos look crisp and professional fast.
Frequently Asked Questions
Can I improve video quality on CapCut automatically?
Yes. CapCut’s AI Enhance tool can help improve clarity, contrast, and overall sharpness quickly. For the best result, still do a quick manual adjustment afterward: fix lighting first, reduce noise if needed, then add a small amount of sharpness.
Does CapCut Decrease or Degrade Video Quality?
Not by default. CapCut does not intentionally reduce quality. If your export looks degraded, the cause is almost always low bitrate, low resolution at export, compressed source footage, or platform re-compression after upload — not CapCut itself.
Why does my video look worse after exporting from CapCut?
This usually happens because of low export quality, low bitrate, mismatched frame rate, or repeated re-exporting. Go back to the original project and export again at 1080p or the same resolution as your source, match the original frame rate, and choose a high bitrate.
Why does CapCut make my video look worse after export?
If your video looks worse after exporting from CapCut, the most common causes are a low bitrate setting, a resolution mismatch, heavy stacked effects, or compression applied by the platform you uploaded to. Check the saved file on your device before uploading anywhere. If the saved file already looks bad, the problem is inside CapCut — start with resolution and bitrate. If the saved file looks fine but the upload looks bad, the platform compressed it on their end.
Does exporting in 4K improve quality if my video is 720p or 1080p?
Not in a true-detail way. Exporting a 720p or 1080p clip in 4K may make the file larger, but it will not create real detail that was never captured. You will usually get better results from fixing lighting, reducing noise, adding subtle sharpness, and exporting with a strong bitrate.
How do I make a blurry video clearer in CapCut?
Start by fixing exposure, brightness, and contrast. Then add a small amount of sharpness. If the clip is blurry because of low-light grain, reduce noise before sharpening so you do not make the grain look worse.
How do I fix grainy or noisy videos in CapCut?
Use Denoise or Reduce Image Noise if your CapCut version has it. Keep the strength moderate because too much noise reduction can make skin and details look waxy. The safest order is denoise first, then adjust exposure and contrast, then add sharpness last.
How do I fix export problems in CapCut?
Most CapCut export problems come from one of four things: the resolution is too low, the bitrate is too compressed, the source footage is weak, or the device does not have enough storage or processing power to complete the export. Start by checking resolution and bitrate in the export window, then try exporting a short test section before rendering the full video. If the app crashes or freezes during export, close background apps and free up storage space first.
Why does my CapCut preview look blurry?
CapCut may lower preview quality while editing so the timeline plays smoothly. Judge the real quality from the exported file, not only the preview window. If the exported video is also blurry, increase the bitrate and confirm you exported at the correct resolution.
What are the best CapCut export settings for TikTok, Reels, and Shorts?
For most short-form videos, use 1080p, vertical 9:16 format, MP4, H.264, and match your original frame rate, usually 30fps or 60fps. Choose High bitrate so TikTok, Instagram, or YouTube has a cleaner file to compress.
Can sharpening in CapCut make video quality worse?
Yes. Too much sharpening can make skin look rough, edges look harsh, and grain more visible. Use only a small sharpness boost, especially if the original clip is noisy or low-light.
Can CapCut enhance old or compressed videos?
Yes, but with limits. CapCut can improve brightness, contrast, color, sharpness, and sometimes reduce the messy look of compression. But it cannot fully restore detail that was removed by heavy compression or fix footage that was badly out of focus.
Final Thoughts
So yes, you can improve video quality on CapCut. Just don’t fall for the “export in 4K and hope for a miracle” move.
The biggest upgrades usually come from simple fixes: clean up the lighting, remove grain if the clip is noisy, add a little sharpness, then export with a high bitrate so CapCut doesn’t throw away your details.
If your footage is already decent, these tweaks can make it look seriously polished. And if your footage is rough, CapCut can still make it more watchable, just know there’s a limit if the original video is out of focus or heavily compressed.
Do the steps in the right order, keep your edits subtle, and your videos will look cleaner, sharper, and more professional every time.
Once your footage looks clean and sharp, you can push the creative side further too — loop it seamlessly with our how to loop a video on CapCut guide, or try reversing a clip for a different creative effect.