
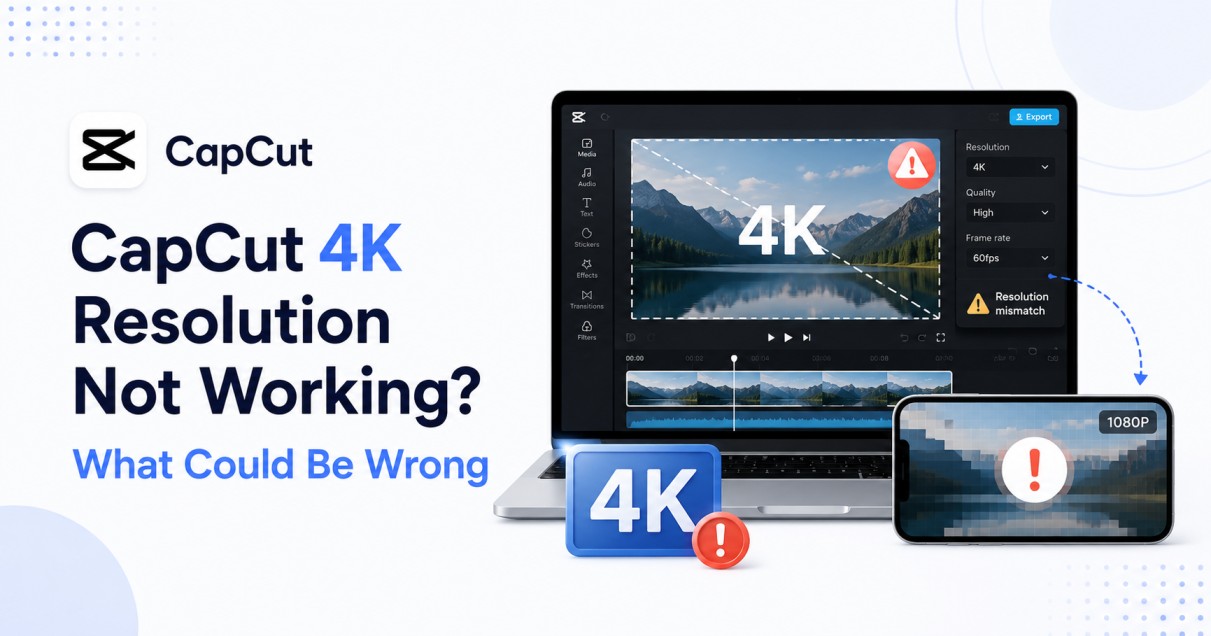
Did you choose 4K in CapCut, export your video, and still think, “Wait… why does this look almost the same?”
I get why that feels annoying. You expect 4K to look crisp, clean, and sharp. Maybe you even paid for CapCut Pro because you wanted better-looking gaming videos, YouTube clips, or social media edits.
But here’s the thing: 4K does not always mean better quality. Sometimes it only makes a soft video bigger.
So no, you’re probably not crazy. CapCut may not be “broken.” The real problem is usually source quality, bitrate, compression, or expecting 4K to fix details that were never there.
What “CapCut 4K Resolution Not Working” Usually Means
When people say CapCut 4K resolution is not working, they usually do not mean the export button is missing or the file failed to save.
Most of the time, they mean this:
They selected 4K. They chose 60fps. They exported the video. Then they watched it and thought, “Why does this still look blurry, soft, or low quality?”
That is a different problem.
CapCut can export a video at a 4K frame size, but that does not mean the video will suddenly have real 4K detail.
Think of it like stretching a small photo onto a giant poster. The poster is bigger, yes. But the face in the photo does not magically become clearer. It may even look worse because the flaws are easier to see.
Video works the same way.
If your original clip was recorded in low quality, downloaded from TikTok, screen-recorded with weak settings, cropped too much, or already compressed, exporting it in 4K will not rebuild the missing detail.
This is why the issue feels so confusing. The export says 4K, but your eyes say, “This is not sharp.”
And honestly? Your eyes may be right.
Quick Troubleshooting Checklist for CapCut 4K Resolution Problems
If your CapCut 4K export still looks blurry, run through this checklist before exporting again.
- Check if the original video was actually recorded in 4K.
- Watch the original file outside CapCut to see if it was already blurry.
- Avoid using downloaded TikTok, Instagram, YouTube, or WhatsApp videos as your source file.
- Use 4K only when the source video is clean enough.
- Increase the bitrate when exporting in 4K.
- Use 60fps only for fast motion, gaming, sports, or screen recordings.
- Do not crop or zoom too much unless the original file has extra detail.
- Export a short 10-second test before exporting the full video.
- Check the exported file in your gallery or file manager before uploading.
- Remember that TikTok, Instagram, and YouTube may compress the video again after upload.
If the video looks bad before you upload it, the problem is probably your source footage, CapCut export settings, or compression during export.
If the video looks good in your gallery but bad after posting, the platform compression is probably the bigger issue.
Why Your CapCut 4K Export Still Looks Low Quality
Let’s clear up the biggest reasons this happens. These are the usual culprits when CapCut 4K export looks blurry, flat, soft, or almost the same as a normal 1080p export.
1. Your Original Video Was Not True 4K
This is the first thing to check.
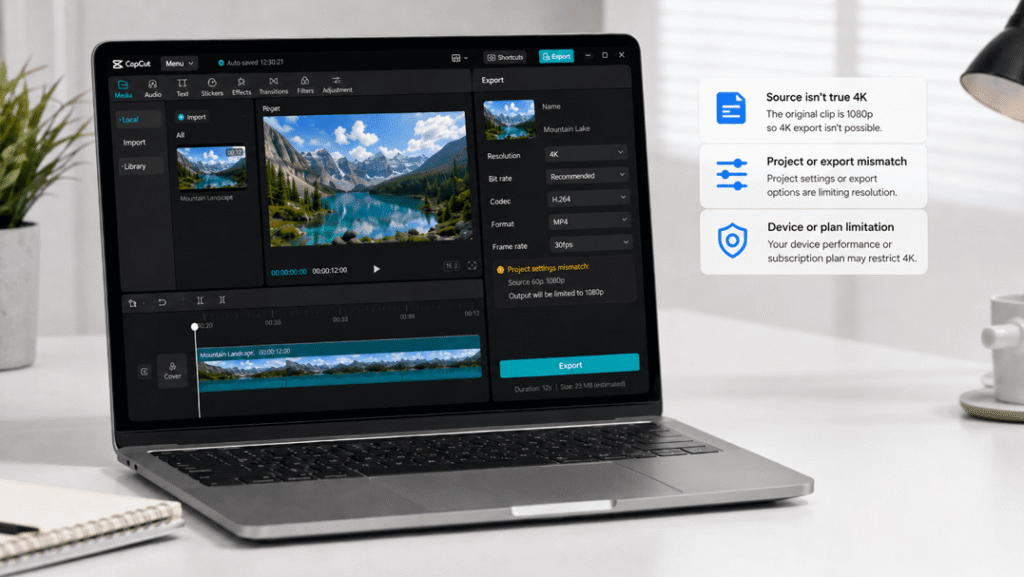
If your original video is not true 4K, CapCut cannot turn it into true 4K just because you picked 4K during export.
For example, if your clip was recorded at 1080p, exported from another app, downloaded from Instagram, saved from WhatsApp, or screen-recorded at a low bitrate, it may already be missing a lot of detail.
CapCut can make the final file larger, but it cannot fully restore what was lost before the edit even started.
This is where many people get caught.
They think:
“I exported in 4K, so the video should look 4K.”
But the better way to think about it is:
“4K export can protect detail that already exists. It cannot create real detail from nothing.”
So if your source clip is soft, the 4K export will usually be a bigger soft video.
2. 4K Resolution Does Not Automatically Mean Sharp Video
Resolution is only one part of video quality.
4K simply means the video frame has more pixels than 1080p. That sounds powerful, and it can be. But sharpness also depends on how much detail is inside those pixels.
Here’s a simple way to picture it.
Imagine two cups. One is small. One is large. If you pour muddy water into the large cup, it is still muddy water. The cup got bigger, but the water did not become clean.
That is what happens when you export poor footage in 4K.
The video frame may be bigger, but the actual image can still look muddy, blocky, noisy, or soft.
This is why a clean 1080p video can sometimes look better than a fake-looking 4K video. A sharp 1080p clip with good bitrate, good lighting, and clean motion can beat a stretched 4K export from weak footage.
So when CapCut 4K does not look sharp, do not only ask, “Did I choose 4K?”
Ask, “Was there enough real detail in the video before I exported it?”
3. Your Bitrate May Be Too Low
Bitrate is one of the biggest reasons a 4K video can still look bad.
Think of bitrate as the amount of video information saved every second. Higher bitrate usually gives the video more room to keep detail. Lower bitrate squeezes the video harder, which can make it look blurry, blocky, or smeared.
This matters a lot for 4K.
A 4K video has more pixels to describe. If the bitrate is too low, CapCut has to compress all those pixels into too little space. That is when you start seeing weird softness, messy shadows, pixel blocks, and that ugly “melted” look in fast-moving scenes.
This is also why some people export at 4K and still feel disappointed. They changed the resolution, but the bitrate did not give the video enough data to stay clean.
For a full settings breakdown, you can check this guide on the best CapCut export settings. But for this specific 4K problem, remember this:
4K with a low bitrate can still look bad. 1080p with a strong bitrate can look cleaner.
4. 60fps Does Not Make the Video Clearer
This one trips up a lot of people, especially gamers.
60fps can make motion look smoother. It can make gameplay, sports clips, screen recordings, and fast camera movement feel more fluid.
But 60fps does not automatically make the image sharper.
Frame rate and sharpness are not the same thing. Frame rate controls how many frames play each second. Sharpness depends more on the source quality, focus, bitrate, compression, lighting, and how much detail survives the edit.
So if your video looks soft at 30fps, switching to 60fps will not magically fix it. It may only give you a smoother soft video.
And there is another catch.
4K at 60fps needs more data than 4K at 30fps. You are asking CapCut to save more frames every second. If the bitrate does not rise with it, the quality can suffer because each frame gets less room to breathe.
That is why some 4K 60fps exports look worse than expected. The settings sound premium, but the video is being squeezed too hard.
5. CapCut May Still Compress the Video During Export
Even when you choose 4K, CapCut still has to package your edit into a final video file. That process usually includes compression.
Compression is not always bad. Without it, video files would be huge. The problem starts when the video gets compressed too much.
That compression can make fine details disappear. Hair, grass, shadows, smoke, water, game textures, and small text can start to look softer than they did in the original clip.
Your device can also play a role. Some phones or computers may limit export choices based on hardware, app version, operating system, storage, or performance. So two people using CapCut may not always get the exact same 4K export behavior.
This is why it helps to test a short clip first instead of exporting a full project right away. A 10-second test can quickly show whether your 4K settings are actually helping or just making a larger file with the same quality problem.
6. Gaming Videos Need More Bitrate Than Normal Clips
Gaming clips are a special case.
A simple talking-head video may have one person sitting in front of a plain background. That is easy for compression to handle.
Gaming footage is different.
You may have fast movement, grass, trees, shadows, explosions, particles, motion blur, weapon effects, quick turns, tiny map details, and bright UI elements all moving at once.
That is a lot of detail for CapCut to save.
So when someone says, “I exported my gaming video in 4K 60fps and it still looks bad,” bitrate is one of the first things I would suspect.
The video may technically be 4K. But if the bitrate is not high enough, all that game detail gets crushed. Grass turns mushy. Shadows break apart. Fast movement looks smeared. Small text loses its edge.
This is not always a CapCut Pro problem. It is often a data problem.
4K gaming footage needs enough bitrate to survive the export.
7. Your Phone Screen May Hide the Difference
Sometimes the 4K export is working, but you may not notice a huge difference on your phone screen.
On a small screen, clean 1080p and 4K can look very close, especially if you are watching in a normal phone gallery or inside a social media app.
The difference becomes easier to see when you zoom in, watch on a larger screen, or compare fine details like text, edges, textures, and background objects.
But if the source video was already compressed, even a bigger screen may not help. It may only reveal the softness more clearly.
So before you assume CapCut ignored your 4K setting, check the actual exported file details. Look at the resolution, file size, and bitrate if your device lets you.
The file may be 4K, but the visible quality may still be limited by the original clip.
8. Uploading to TikTok, Instagram, or YouTube Can Reduce Quality Again
Another frustrating part is this: your CapCut export may look decent in your phone gallery, then look worse after you upload it.
That can happen because social platforms process and compress videos after upload.
So the quality chain looks like this:
Original clip → CapCut edit → CapCut export → platform upload → platform compression → final public video.
Every step can reduce quality.
This is why people sometimes blame CapCut when the real damage happens after the video reaches TikTok, Instagram, or YouTube.
To be fair, CapCut settings still matter. A weak export gives the platform a weak file to compress. But even a strong export can look slightly different after upload because the platform has its own processing system.
If your main issue is general blur after exporting, not just the 4K setting, you may also want to read this guide on why CapCut videos look blurry after export.
Is CapCut Pro Required for 4K Export?

This is where things can get confusing.
CapCut Pro may give you access to extra tools, effects, cloud features, or certain premium options depending on your device and region. But paying for Pro does not mean every video will suddenly look sharper.
Pro cannot fix a low-quality source clip by itself.
Pro cannot turn a badly compressed download into real 4K.
Pro cannot make 60fps add detail that was never captured.
And Pro cannot stop TikTok, Instagram, or YouTube from compressing your upload after it leaves CapCut.
So if you paid for Pro and your 4K export still looks almost the same, it does not always mean your subscription failed.
It may mean the original video, bitrate, export choices, or upload platform is holding the quality back.
For a clearer breakdown of what the paid plan actually includes, you can read this guide on what CapCut Pro gives you.
The main thing to remember is simple:
CapCut Pro can give you more options, but it cannot make weak footage look like true 4K footage on its own.
How to Fix CapCut 4K Export Not Looking Sharp

Now that we know 4K is not a magic “make this sharp” button, let’s fix the real problem.
The goal is not just to export a bigger file. The goal is to give CapCut clean footage, enough bitrate, and the right settings so the final video actually looks close to what you expected.
Step 1: Check the Original Clip Quality First
Before changing export settings, check the video you imported into CapCut.
This matters because CapCut can only work with what you give it. If the original clip already looks soft, blocky, pixelated, or washed out, exporting in 4K will not fix the root problem.
Open the original video in your gallery, file manager, or media player. Look closely at small details like text, faces, trees, grass, road lines, game UI, or background edges.
Ask yourself:
- Was this clip actually recorded in 4K?
- Was it downloaded from TikTok, Instagram, YouTube, or WhatsApp?
- Was it screen-recorded with low-quality settings?
- Was it cropped or zoomed in before editing?
- Does the original already look blurry before CapCut touches it?
If the original file already looks weak, the 4K export is not the real issue. The video was already damaged before export.
In that case, you may need to improve the footage first instead of only changing the resolution. I have a separate guide on how to make video quality better in CapCut that fits this part better.
Step 2: Export at 4K Only When It Makes Sense
I know this sounds strange, but you do not always need 4K.
Use 4K when your original footage is 4K, very clean 2K, or high-quality 1080p that still has plenty of detail.
In those cases, 4K export may help protect quality, especially if you plan to upload to YouTube or watch the video on a larger screen.
But if your clip came from a compressed social media download, old screen recording, blurry phone camera, or a low-quality gameplay capture, 4K may not help much.
It can even make the problem more obvious.
Think of it like taking a tiny, blurry profile picture and printing it on a big banner. The banner is bigger, but the blur is bigger too.
So here’s the simple rule:
Export in 4K when the source video has enough detail to deserve 4K.
If the source is not clean, a strong 1080p export may look better, load faster, upload faster, and avoid making the flaws stand out.
Step 3: Increase the Bitrate
If your 4K export looks blurry, bitrate is one of the first settings to check.
Resolution decides the size of the video frame. Bitrate decides how much data is used to keep that frame clean.
A low-bitrate 4K video is like trying to paint a giant wall with one tiny cup of paint. You can cover the wall, but it will look thin, rough, and patchy.
When exporting from CapCut, choose a higher bitrate if the option is available. If CapCut gives you a “recommended,” “higher,” or “custom” bitrate option, pick the higher setting for 4K videos, especially if the footage has fast movement.
This is extra important for:
- Gaming videos
- Sports clips
- Drone footage
- Screen recordings
- Fast camera movement
- Videos with grass, water, smoke, shadows, or small text
If the bitrate is too low, CapCut has to squeeze too much detail into too little space. That is when 4K starts looking mushy instead of sharp.
Do not only raise the resolution. Raise the bitrate too.
Step 4: Use 60fps Only for Fast Motion
60fps is great when you need smoother movement. But it is not always the best choice for every video.
Use 60fps for gameplay, sports, action clips, fast screen recordings, dance videos, or anything with quick movement. It can make motion feel smoother and more natural.
But for slower videos, 30fps is often enough.
This includes talking-head videos, simple tutorials, product shots, aesthetic edits, photo slideshows, and basic social media clips.
The reason is simple: 4K 60fps asks CapCut to save a lot more frames every second. If the bitrate is not high enough, each frame may get less data. That can make the final video look softer than expected.
So do not use 60fps just because it sounds better.
Use it when the video actually needs smoother motion.
Step 5: Avoid Re-Editing Downloaded Social Media Videos
If you downloaded a video from TikTok, Instagram, Facebook, WhatsApp, or YouTube, it has probably already been compressed.
Then when you edit it in CapCut and export it again, it gets compressed again.
And if you upload it to another platform after that, yes, it may get compressed one more time.
That is how a video slowly falls apart.
The first version may look okay. The second version looks a little softer. The third version starts looking blurry, blocky, or flat.
This is why a downloaded 1080p social media video often does not become “real 4K” inside CapCut. It may only become a larger copy of an already-compressed file.
Whenever possible, edit from the original file. Use the camera file, the original gameplay recording, or the first exported version from your screen recorder.
The cleaner the file you start with, the better your 4K export can look.
Step 6: Test a Short Clip Before Exporting the Full Video
This little step can save you a lot of time.
Instead of exporting a full 10-minute video and waiting forever, export a short 10-second section first. Pick a part of the video with movement, detail, shadows, text, or anything that usually looks bad after export.
Then watch that test file in your phone gallery or on your computer before uploading it anywhere.
Do not judge it only inside CapCut. The preview can look different from the final file.
Check these things:
- Does the video look sharper than the 1080p version?
- Do small details still look clean?
- Does fast movement turn blurry or blocky?
- Does text stay readable?
- Is the file size much larger without a clear quality gain?
If the 10-second test still looks bad, do not waste time exporting the full project with the same settings. Adjust the bitrate, frame rate, source clip, or resolution first.
Best CapCut 4K Export Settings for Gaming Videos
Gaming videos need special care because they are packed with movement and tiny details.
A normal vlog might have one person sitting still. A gaming clip might have fast camera turns, shadows, grass, smoke, explosions, weapon effects, UI text, and moving enemies all fighting for space in the same frame.
That is why gaming footage often looks bad even when you export in 4K.
Use these settings as a starting point:
| Setting | Recommended Option | Why It Helps |
|---|---|---|
| Resolution | 4K | Best when the original gameplay is 4K or very clean. |
| Frame Rate | 60fps | Good for fast gameplay and smooth motion. |
| Bitrate | High or custom high bitrate | Helps protect detail during fast movement. |
| Codec | Best available option your device supports | Helps balance file size and quality. |
| HDR | Only use if the original video is HDR | Avoids weird color or brightness problems. |
For gaming videos, the most important pair is 4K plus high bitrate. Do not rely on 4K alone.
If the bitrate is too low, your gameplay may still look smeared during motion. This is why grass, trees, shadows, and dark areas often look ugly after export. Those areas need more data to stay clean.
Also, be careful with extra edits.
Heavy filters, sharpening, effects, overlays, zooms, and color changes can make compression more noticeable. A little editing is fine. But if you push the footage too hard, the final 4K export may look worse, not better.
My honest advice?
Export one short test at 4K 60fps with high bitrate. Then export the same short test at 1080p 60fps with high bitrate. Compare them side by side.
If the 4K version does not look clearly better, use 1080p and save yourself the huge file size.
Best CapCut 4K Export Settings for Normal Videos
Not every video needs gaming-level settings.
If you are editing a vlog, tutorial, talking-head video, product clip, recipe video, or simple social media edit, your settings can be a little simpler.
| Video Type | Resolution | Frame Rate | Bitrate |
|---|---|---|---|
| YouTube video | 4K if source is 4K | 30fps or 60fps | High |
| TikTok or Reels | 1080p or 4K test export | 30fps or 60fps | High |
| Talking-head video | 1080p or 4K | 30fps | Medium to high |
| Slow aesthetic edit | 1080p or 4K | 30fps | Medium to high |
| Fast action clip | 4K if source is clean | 60fps | High |
The best setting depends on the source file. That is the part most people skip.
If your original footage is clean, 4K can help. If your original footage is weak, 4K may only make the weak parts easier to see.
So, before blaming CapCut, compare the original file and the exported file. If the original already looks bad, export settings can only help so much.
Why Your CapCut 4K Export Looks Bad After Uploading
Sometimes your CapCut export looks fine on your phone, then turns blurry after you post it online.
That is a different problem.
TikTok, Instagram, YouTube, Facebook, and other platforms process videos after upload. They may reduce file size, change playback quality, or compress the video so it loads faster for viewers.
So even if your CapCut file is 4K, the uploaded version may not look exactly the same.
This is why you should always check the exported file before uploading. If the file looks sharp in your gallery but bad on the platform, CapCut may not be the main problem.
To reduce quality loss, start with the cleanest file possible, export with strong settings, avoid repeated downloads, and give the platform a high-quality file to work with.
Still, expect some quality loss after upload. That is normal.
The goal is not to stop all compression. You cannot control everything the platform does. The goal is to upload a file strong enough to survive that compression better.
When 1080p Is Better Than 4K in CapCut
This may sound wrong at first, but sometimes 1080p is the smarter choice.
A clean 1080p export can look better than a messy 4K export, especially when the original video was not true 4K. Bigger does not always mean better. It only means bigger.
Use 1080p instead of 4K when your source video is already soft, downloaded from social media, heavily cropped, screen-recorded at low quality, or full of compression marks.
In those cases, exporting at 4K may only make the flaws easier to see. The blur looks larger. The blocks stand out more. The soft edges become more obvious.
1080p can also be better when you are posting to platforms that mainly show videos on phones. Most viewers will not notice a huge difference between clean 1080p and 4K on a small screen, but they will notice ugly compression, lag, or muddy movement.
So here is the simple rule:
Choose 4K when the original video is clean enough to benefit from it. Choose 1080p when 4K only makes the problems bigger.
This is not “lower quality thinking.” It is smart editing.
Common Mistakes That Make CapCut 4K Exports Look Worse
Sometimes the 4K setting is fine, but small editing choices damage the final video.
One common mistake is zooming in too much. If you zoom into a 1080p clip and then export it at 4K, CapCut has to stretch the cropped part. That can make the final video look soft, even though the export says 4K.
Another mistake is adding too much sharpening. A little sharpening can help some clips, but too much can create harsh edges, noise, and weird grain. Then compression makes those problems even uglier.
Heavy filters can also hurt quality. Some filters crush shadows, brighten noise, or make colors look flat after export. This is more obvious in gaming videos, night clips, and videos with lots of movement.
Reusing already-compressed clips is another big one. If a video has already been downloaded, edited, exported, uploaded, downloaded again, and edited again, 4K export will not save it. At that point, the video has been squeezed too many times.
So before chasing higher resolution, clean up the basics first. Use the best source file, avoid extreme zooms, keep effects under control, and export with enough bitrate.
Frequently Asked Questions
Why is CapCut 4K resolution not working?
CapCut 4K resolution may seem like it is not working because 4K only changes the video frame size. It does not create real detail if the original clip was low quality, heavily compressed, cropped too much, or exported with a low bitrate.
Does CapCut really export in 4K?
Yes, CapCut can export in 4K on supported devices and versions. But the final video quality still depends on your source footage, bitrate, frame rate, device, and where you upload the video after export.
Why does my CapCut 4K video look low quality?
Your CapCut 4K video may look low quality because the original clip was not true 4K, the bitrate was too low, the footage was already compressed, or the video was uploaded to a platform that compressed it again.
Is 4K 60fps always better in CapCut?
No. 4K 60fps is helpful for gaming, sports, screen recordings, and fast movement. But for slower videos, 30fps may be enough. If the bitrate is too low, 4K 60fps can still look soft or low quality.
Can CapCut turn 1080p into real 4K?
No. CapCut can export a 1080p video as a 4K file, but it cannot create true 4K detail that was not in the original footage. A clean 1080p video can still look good, but it is not the same as real 4K footage.
Does CapCut Pro improve 4K export quality?
CapCut Pro may unlock extra tools or export options depending on your device and account, but it does not automatically make every video look sharper. Source quality, bitrate, compression, and upload platform settings still matter.
Why does my gaming video look bad even at 4K 60fps?
Gaming videos need more bitrate because they have fast motion, shadows, textures, grass, particles, and small UI details. If you export gaming footage at 4K 60fps with low bitrate, the video can still look soft, smeared, or compressed during movement.
Should I export in 4K or 1080p for TikTok and Instagram?
For TikTok and Instagram, clean 1080p is often enough. You can test 4K if your source video is very sharp, but do not expect 4K to fix weak footage. A strong 1080p export with good bitrate can look better than a poor 4K export from a low-quality clip.
Final Thoughts: Your CapCut 4K Setting May Not Be the Real Problem
If CapCut 4K resolution is not working the way you expected, the setting itself may not be broken.
Most of the time, the real issue is simpler: the original video was not clean enough, the bitrate was too low, the clip had already been compressed, or the platform crushed the quality after upload.
4K is not a magic repair tool. It is more like a bigger canvas. If the image you place on that canvas is sharp, 4K can help it shine. But if the image is already blurry, 4K only gives you a bigger blurry video.
Start with the best source file you can. Use 4K only when the footage is clean enough. Raise the bitrate. Test a short clip first. And for gaming videos, remember that 4K 60fps needs enough data to survive fast movement.
Once you understand that, CapCut’s 4K export starts to make a lot more sense.
And honestly, sometimes the smartest fix is not forcing 4K. Sometimes it is making a clean 1080p video that actually looks good.