
Best CapCut Export Settings for TikTok, Reel & Shorts [2026]
Export settings are where a lot of creators accidentally ruin a great edit.
Your video can look perfect inside CapCut… then come out soft, cropped, or lower quality after you post. And most of the time, it’s not your footage. It’s the export setup.
This guide gives you the best CapCut export settings for the platforms people actually upload to: TikTok, Instagram Reels, and YouTube Shorts. You’ll also learn when to choose 30fps vs 60fps, whether you should export 1080p or 4K, and if MP4 vs MOV (or H.264 vs HEVC) really matters.
Quick note: this post is a settings hub. If your video still turns blurry after export or upload, use the full fix guide here: Enhance Video Quality in CapCut.
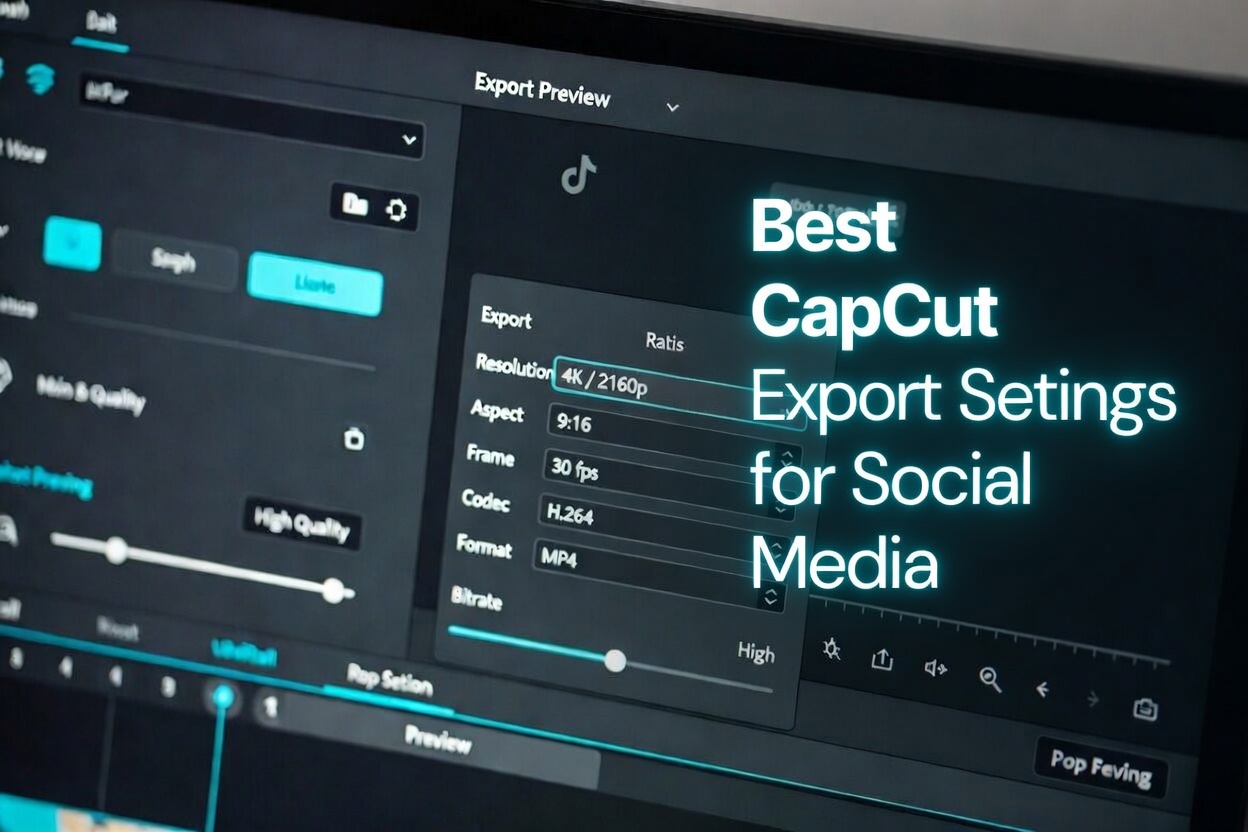
Quick Answer: Best CapCut Export Settings
For most short-form videos (TikTok, Reels, Shorts), these settings are the safest default:
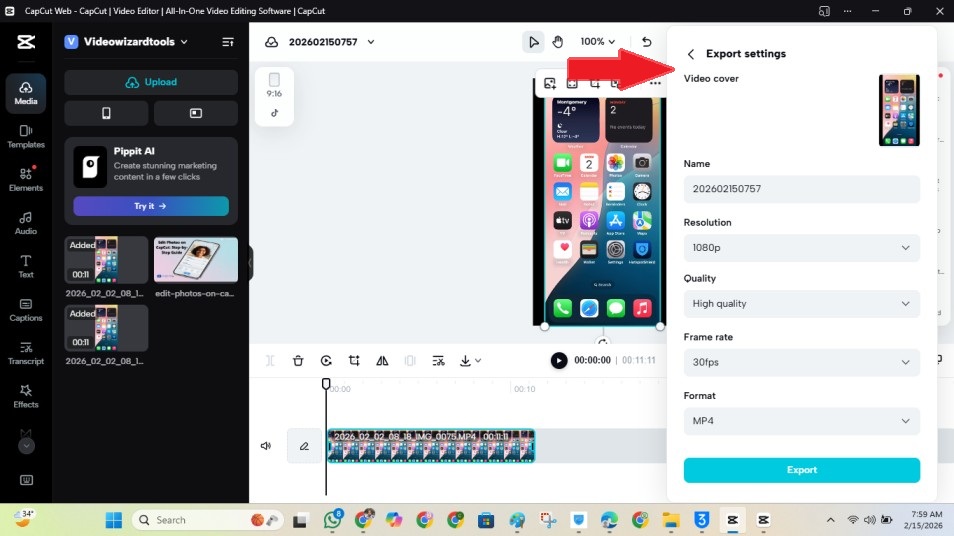
- Aspect ratio: 9:16
- Resolution: 1080 × 1920 (1080p)
- Frame rate (FPS): match your footage (30 or 60)
- Format: MP4
- Quality/bitrate: High / Highest (max it if there’s a slider)
- Codec (if available): H.264 (best compatibility)
If you use these defaults, your videos usually stay sharper after export and hold up better after upload compression.
CapCut Export Settings for TikTok
These are the best settings to export from CapCut for TikTok (sharp, full-screen, and upload-friendly).
- Aspect ratio: 9:16
- Resolution: 1080 × 1920 (1080p)
- Frame rate (FPS): match your footage (30fps or 60fps)
- Format: MP4
- Quality/bitrate: High / Highest
- Codec (if available): H.264
TikTok export notes
- Keep captions higher: TikTok UI covers the bottom area, so don’t place text too low.
- Only export 60fps if you filmed 60fps: exporting 60fps from 30fps footage won’t add smoothness—just file size.
- Upload the original export: don’t re-download from another platform and re-upload (extra compression makes videos softer).
Want the full TikTok editing workflow (templates, captions, pacing)? See: How To Use CapCut for TikTok.
CapCut Export Settings for Instagram Reels
Instagram Reels compress uploads hard, so exporting clean settings matters. Use these defaults for the best balance of sharpness and compatibility.
- Aspect ratio: 9:16
- Resolution: 1080 × 1920 (1080p)
- Frame rate (FPS): match your footage (30fps or 60fps)
- Format: MP4
- Quality/bitrate: High / Highest
- Codec (if available): H.264
Reels export notes
- Keep text out of the UI zone: Reels UI can cover the bottom and the right side, so keep captions higher and away from the right edge.
- Don’t export 4K “just because”: 1080×1920 is the sweet spot for most Reels uploads.
- Export once: re-exporting multiple times can slowly reduce detail.
Want the full Reels workflow (9:16 setup, captions, pacing, upload tips)? See: CapCut for Instagram Reels Guide.
CapCut Export Settings for YouTube Shorts
YouTube Shorts should look full-screen and clean on mobile. These settings keep your Shorts sharp and correctly formatted.
- Aspect ratio: 9:16
- Resolution: 1080 × 1920 (1080p)
- Frame rate (FPS): match your footage (30fps or 60fps)
- Format: MP4
- Quality/bitrate: High / Highest
- Codec (if available): H.264
Shorts export notes
- Watch for accidental cropping: make sure your video isn’t zoomed in or trimmed weirdly before export.
- Keep captions higher: captions too low can clash with Shorts UI on some screens.
- Match FPS to your footage: 30→30, 60→60 for best results.
Want the YouTube workflow (16:9 vs Shorts, export choices, upload tips)? See: How to Use CapCut for YouTube.
30fps vs 60fps in CapCut (What to Use and When)
This is one of the most important export choices. The rule is simple: match what you filmed.
Use 30fps when:
- You filmed in 30fps (most phones default here)
- You’re making talking-head videos, tutorials, or simple edits
- You want smaller file sizes with smooth playback
30fps is the safest default for most short-form content.
Use 60fps when:
- You filmed in 60fps
- Your video has fast motion (sports, dancing, action, quick camera movement)
- You want smoother movement
Don’t export 60fps if your footage is 30fps. It won’t add real smoothness—it usually just increases file size.
Should You Export 4K in CapCut?
4K sounds better, but it only helps when your original footage actually has 4K detail. Otherwise, you’re mostly creating a bigger file.
Export 1080p when:
- Your original footage is 1080p
- You’re posting to TikTok, Reels, or Shorts (1080×1920 is the sweet spot)
- You want faster exports and smaller file sizes
Export 4K only when:
- Your original footage was recorded in 4K
- You want extra detail for repurposing later (YouTube long-form, ads, archives)
Exporting 4K from a 1080p clip won’t magically improve quality. It mainly makes a bigger file.
MP4 vs MOV in CapCut Export (Which Is Better?)
For most creators, MP4 is the best choice because it’s the most compatible format for social uploads.
Use MP4 when:
- You’re uploading to TikTok, Reels, or Shorts
- You want the most compatible format across phones and apps
- You want smaller file sizes with strong quality
Use MOV when:
- You’re working in Apple-heavy workflows (AirDrop, iPhone-to-Mac editing)
- You specifically need MOV for an editing pipeline or client delivery
For social media uploads, MP4 is usually the safest default.
CapCut Export Codec: H.264 vs HEVC (If You See It)
If CapCut gives you a codec option, choose this based on what you’re doing with the file.
H.264 (best compatibility)
- Safest choice for uploads and sharing
- Works reliably across most phones, apps, and platforms
- Best default for TikTok, Reels, and Shorts
HEVC / H.265 (smaller files)
- Usually smaller file sizes at similar quality
- Can cause compatibility issues in some workflows/devices
- Better if you know your device and workflow supports it
For TikTok, Reels, and Shorts: pick H.264 as the safest default.
Best Quality/Bitrate Setting in CapCut (What to Pick)
If CapCut shows a Quality option or a Bitrate slider, choose High or Highest.
This setting protects the details that get destroyed first when quality is too low:
- Faces: so skin doesn’t look “soft” or smeared
- Text: so captions don’t look fuzzy or jagged
- Motion: so backgrounds don’t break into blocks when things move
For short-form uploads, the best combo is:
- 1080×1920
- Match FPS (30 or 60)
- MP4
- High/Highest quality/bitrate
Quick Export Checklist (Before You Upload)
- Canvas/format: 9:16 (TikTok/Reels/Shorts) or 16:9 (YouTube long-form)
- Resolution: 1080×1920 for short-form (or 1080p for 16:9 videos)
- FPS: match your footage (30 or 60)
- Format: MP4
- Codec (if available): H.264
- Quality/bitrate: High / Highest (max it if there’s a slider)
- Text placement: captions not too low; keep important text away from the right edge
- Final check: preview the exported file once in your gallery before uploading
Posting to multiple platforms? Our CapCut for social media hub breaks down workflows for TikTok, Reels, and Shorts.
CapCut Export Settings for Horizontal Videos (YouTube 16:9)
If you’re exporting a normal YouTube video (not Shorts), use these settings:
- Aspect ratio: 16:9
- Resolution: 1080p (or 4K only if recorded in 4K)
- Frame rate (FPS): match your footage (30fps or 60fps)
- Format: MP4
- Quality/bitrate: High / Highest
- Codec (if available): H.264
If your content is originally vertical and you’re repurposing it for YouTube long-form, don’t stretch it. Use a clean background (blur or branded frame) so it still looks intentional.
Common CapCut Export Mistakes (And What to Do Instead)
Most “low-quality” exports come down to one of these mistakes. Fix the settings, and your video usually looks better immediately.
1) Exporting the wrong aspect ratio
If you export 16:9 for a Short/Reel/TikTok, the platform may crop it or add black bars. Do this instead: export 9:16 for short-form platforms.
2) Exporting lower than 1080×1920
720p often looks soft after upload. Do this instead: export 1080×1920 (1080p vertical) for TikTok/Reels/Shorts.
3) Exporting 60fps when your footage is 30fps
60fps won’t improve a 30fps clip—it usually just increases file size. Do this instead: match your footage (30→30, 60→60).
4) Leaving captions in the “danger zone”
Platform UI can cover low captions and right-edge text. Do this instead: keep captions a bit higher and important text away from the right side.
5) Choosing low quality to “save space”
Low quality crushes detail—especially in motion. Do this instead: choose High/Highest quality/bitrate whenever possible.
6) Exporting MOV when you don’t need it
MOV can be fine, but it isn’t necessary for most uploads. Do this instead: use MP4 for the most compatibility.
7) Uploading a re-downloaded copy
Downloading from another platform and re-uploading adds extra compression. Do this instead: upload the original exported file straight from your device.
Frequently Asked Questions
Conclusion
If you want the best export settings in CapCut, keep it simple: export in the exact format your platform expects, then protect quality at the final step.
For TikTok, Instagram Reels, and YouTube Shorts, your safest “always works” setup is 9:16, 1080×1920, MP4, and High/Highest quality—while your FPS matches your footage (30→30, 60→60).
That combo keeps motion smooth, captions crisp, and the upload looking clean on mobile.
Where most people slip up is with tiny choices that add up: exporting 720p, picking low quality to save space, placing captions in the UI danger zone, or uploading a re-downloaded copy instead of the original export.
Fix those habits once, and you’ll spend way less time re-exporting and way more time posting videos that look consistently sharp across platforms.
Now that your export looks sharp, want to master every major tool in CapCut? Check out our complete guide on the Best CapCut Features and Capabilities.