

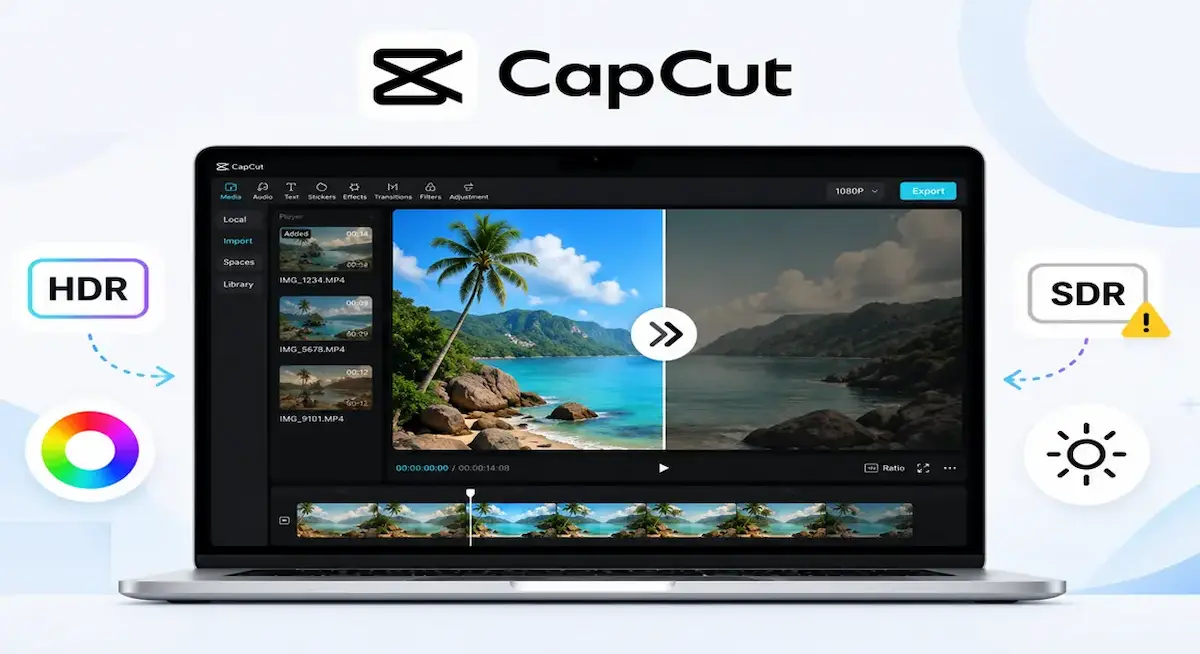
So you finished editing, the preview looks exactly how you want it, and then the exported file comes out darker, washed out, oddly tinted, or like a filter got slapped on top that you never added.
If that sounds familiar, you’re dealing with one of the most commonly reported export issues in CapCut, and in almost every case, it traces back to the same root cause.
Table of Contents
- Why Is My CapCut Video Darker or Washed Out After Export? (Quick Answer)
- The Real Cause: HDR-to-SDR Conversion Errors in CapCut
- HDR vs. SDR Explained: Why Tone-Mapping Breaks Your Colors
- iPhone, Android, and PC: Where This Issue Shows Up Differently
- How to Fix CapCut's Color/Darkening Issue (Step-by-Step)
- How to Prevent Color Issues in Future CapCut Exports
- Common Mistakes That Make CapCut Color Problems Worse
- CapCut Desktop Export Settings: Color Profile, Bit Depth & Codec
- When It's Not CapCut: Instagram, TikTok & WhatsApp Recompression
- Frequently Asked Questions
- Final Thoughts
- Sources
Why Is My CapCut Video Darker or Washed Out After Export? (Quick Answer)
The most common cause is an HDR-to-SDR mismatch. If your original footage was recorded in HDR (common on modern iPhones and Android flagships by default), CapCut can fail to convert it correctly for standard displays during export, resulting in darker, washed-out, or oddly colored video.
Other contributing causes include CapCut’s “AI Ultra HD” or Auto Enhance toggles altering color automatically, repeated re-exporting of already-compressed files, and platforms like Instagram or WhatsApp recompressing your video after upload — each covered in detail further down this guide, along with the exact setting to check on desktop.
The Real Cause: HDR-to-SDR Conversion Errors in CapCut
Most modern phone cameras record in HDR by default because it looks great on HDR-capable screens.
The problem is that CapCut and plenty of other editing and social apps don’t always process that HDR footage correctly for SDR (Standard Dynamic Range) output, which is what most screens and platforms actually display.
The result is video that looks fine in your camera roll but comes out darker or flatter once exported and viewed somewhere else.
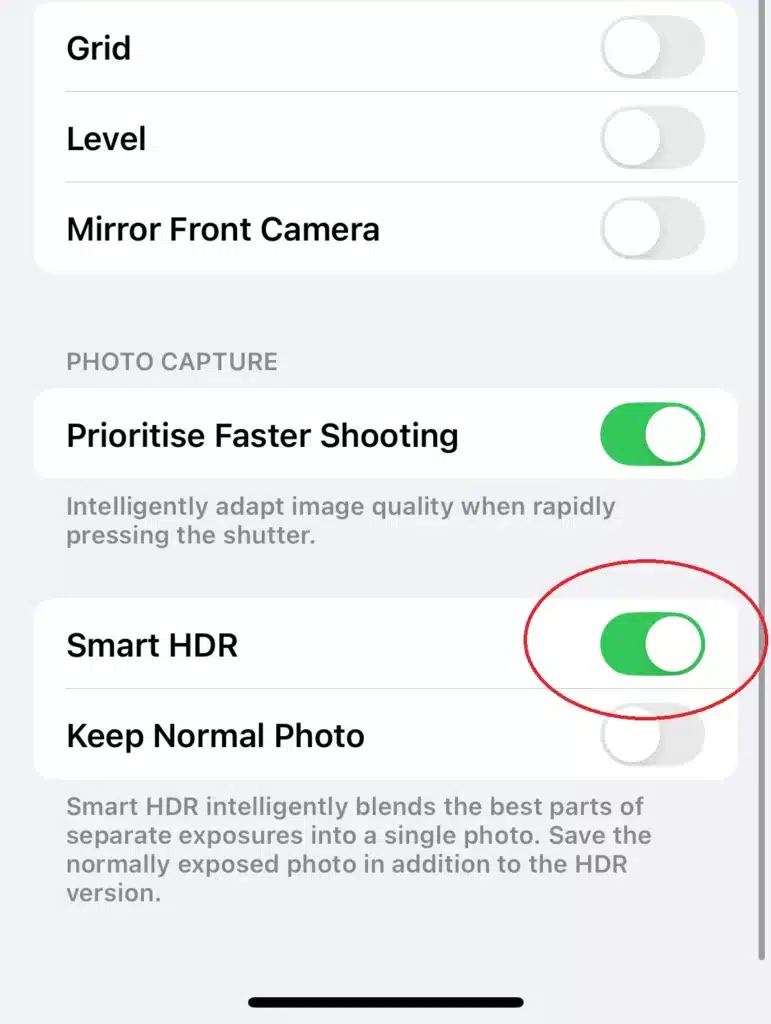
The easy fix we recommend: Turn off HDR recording in your phone’s camera settings before filming (look for “Smart HDR,” “HDR Video,” or similar), or disable any HDR toggle inside CapCut’s export settings if your version has one.
HDR vs. SDR Explained: Why Tone-Mapping Breaks Your Colors
It helps to actually understand what’s happening rather than just flipping toggles blindly.
HDR (High Dynamic Range) footage stores a much wider range of brightness and color information than SDR (Standard Dynamic Range) — that’s exactly why HDR video looks so vivid on a compatible screen.
The catch is that this extra information has to be deliberately “tone-mapped” down to SDR for it to display correctly on the much larger number of screens, apps, and platforms that only support SDR.
When that tone-mapping step doesn’t happen correctly during export — whether that’s CapCut, a different editor, or the platform you’re uploading to — the result is video that looks compressed into too narrow a brightness range, which shows up as either crushed, dark shadows or flat, washed-out highlights, depending on which direction the conversion went wrong.
This is why some users report darker video and others report video that’s too bright from what looks like the same underlying issue: it’s the same broken conversion step, just manifesting differently depending on the footage and device.
iPhone, Android, and PC: Where This Issue Shows Up Differently
iPhone users are especially likely to run into this because recent iPhones record in HDR (specifically Apple’s “HDR with Dolby Vision”) by default for video.
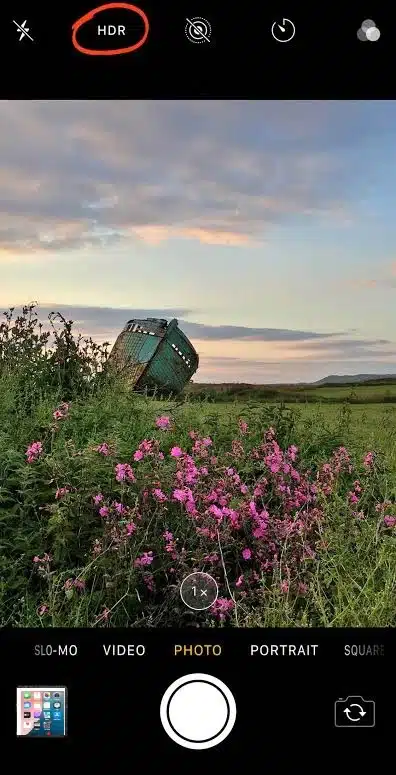
Go to Settings > Camera > Record Video and check whether HDR is enabled — turning it off before filming avoids the issue at the source rather than fixing it after the fact.
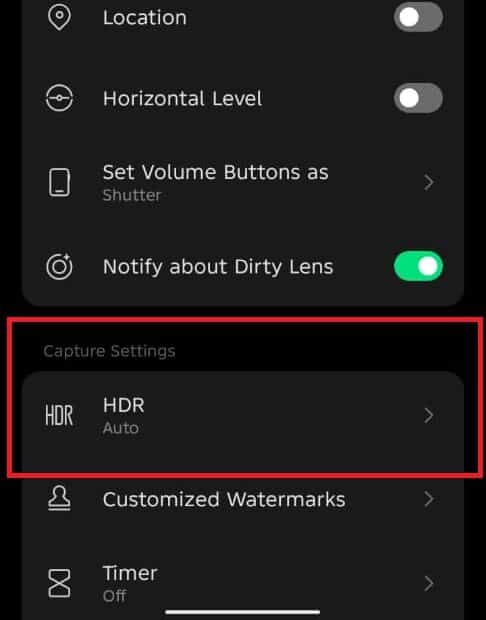
Android users on flagship devices increasingly default to HDR10 or similar formats too, though the exact camera settings menu varies by manufacturer. Look for an HDR toggle in your camera app’s video settings. (Open the Camera app, look for settings and click it, from the next menu displayed look for HDR)
Desktop/PC users are less likely to be dealing with footage shot in HDR, but more likely to run into color space and gamma issues, see the desktop export settings breakdown further down this guide. If you’re deciding which version to edit in altogether, our comparison of CapCut online vs. desktop vs. mobile covers the tradeoffs.
How to Fix CapCut’s Color/Darkening Issue (Step-by-Step)
- Turn off HDR recording on your phone before shooting new footage.
- In CapCut mobile, disable “AI Ultra HD,” Auto Enhance, and any HDR toggle in the Export panel. On CapCut Desktop, set your project’s Color Space to SDR/Rec.709 (see the Desktop Export Settings section below for the exact steps).
- Always edit from your original footage, never re-import an already-exported file to keep editing.
- Export once, at your intended settings, and preview on the actual platform you’re posting to before assuming something’s wrong.
- If colors still look off, manually adjust Brightness, Contrast, Highlights, and Shadows slightly in the Adjust panel and re-export a short test clip first rather than the full video.
How to Prevent Color Issues in Future CapCut Exports
Once you’ve fixed a color issue, it’s worth building a few habits into your workflow so you’re not troubleshooting the same thing every time you export:
- Check your camera’s HDR setting before you start filming, not after you’ve already shot the footage. It’s much easier to disable HDR upfront than to color-correct around it later.
- Do a short test export before exporting your full project. A 5-10 second test clip exports in a fraction of the time and lets you catch a color issue before you’ve waited through a full render.
- Keep one “master” export of every finished project at full quality, and treat any platform-specific version (for Instagram, TikTok, YouTube, etc.) as a copy made from that master, not from a re-edit of a previous export.
- Preview on the actual device or platform you’re publishing to before assuming the export is wrong. A surprising number of “CapCut changed my colors” reports turn out to be the destination platform’s own compression, not anything CapCut did.
Common Mistakes That Make CapCut Color Problems Worse
A few things tend to muddy the troubleshooting process and are worth ruling out early:
Judging color from your phone’s screen instead of a calibrated reference.
Phone screens vary a lot in how they render brightness and saturation out of the box.
If you’re comparing the “before” and “after” on the same device where you edited, you’re seeing it through the same display bias both times — which can hide or exaggerate the actual change.
Applying color adjustments twice without realizing it
If you used CapCut’s “Auto Adjust” feature and then manually tweaked brightness or contrast on top of it, you’re stacking two separate corrections, which can push the image further from natural than either adjustment alone would.
Mixing footage from different cameras or devices in the same project
If one clip was shot in HDR and another in SDR, applying the same export settings to both can make one look correct and the other look off, since they started from different baselines.
CapCut Desktop Export Settings: Color Profile, Bit Depth & Codec
If you’re on CapCut for Windows or Mac, the export window gives you more granular control than the mobile app, which is both a benefit and a place where a wrong setting can introduce a color issue that mobile users wouldn’t hit.
How to check and fix your project’s Color Space in CapCut Desktop:
- Click into an empty area of the timeline so nothing is selected, this is what surfaces the project-level panel instead of a clip-level one.
- Look for the “Modify” panel near the top right, close to the Import button.
- Find “Color Space” in that panel and set it to SDR / Rec.709 for standard social or web output.
- Even if it already shows SDR/Rec.709, try re-selecting it explicitly — this can clear a stuck HDR flag that’s causing the mismatch.
Beyond color space, a few other export settings are worth checking:
- Bit depth: 8-bit is standard for most social content; 10-bit can preserve more color detail but isn’t always handled correctly by every platform you might upload to afterward.
- Codec: H.264 remains the most broadly compatible choice across platforms; H.265/HEVC can produce smaller files but occasionally runs into compatibility quirks depending on where you’re uploading. See our full breakdown of file formats CapCut supports if you’re unsure which one fits your project.
None of these settings will “fix” an HDR-sourced color problem on their own, but leaving them on automatic/default when your footage has mixed sources is one more variable that can compound the issue rather than help it. For more on getting these settings right across the board, see our guide on best CapCut export settings.
When It’s Not CapCut: Instagram, TikTok & WhatsApp Recompression
Instagram, TikTok, and WhatsApp all apply their own compression after upload, which can shift colors and brightness independently of anything CapCut did.
If your export looks correct on your own device but changes only after uploading, the issue is happening on the platform’s end, not CapCut’s.
It’s worth saying plainly: if you’ve ruled out HDR, double-corrections, and re-exporting already-compressed files, and confirmed the export looks correct on your own device, and the color still shifts only after uploading to a specific platform, the remaining variable is that platform’s own compression and color handling — which is outside CapCut’s control entirely.
At that point, the most useful thing you can do is check whether other creators are reporting the same issue on that specific platform around the same time, since platforms occasionally roll out compression changes that affect everyone uploading through them, not just CapCut users.
If you’re also seeing quality loss alongside the color shift, it’s worth checking our guide on improving video quality in CapCut, and if the issue is blurriness specifically rather than color, see our separate guide on CapCut video blurry after export.
And if your export is freezing or stuttering on top of everything else, that’s covered separately in our guide on CapCut video freezing after export.
Frequently Asked Questions
Why does CapCut darken my video?
This is almost always caused by an HDR-to-SDR mismatch — your footage was recorded in HDR, and CapCut didn’t convert it correctly for standard display output. Turning off HDR recording on your phone, or any HDR toggle in CapCut’s export settings, usually fixes it.
Why does CapCut make my videos too bright?
This is often the same HDR issue working in the opposite direction, or it’s caused by “AI Ultra HD” or Auto Enhance automatically adjusting brightness during export. Disable those toggles and re-export.
Why does CapCut put a filter on my video that I didn’t add?
It’s usually not an actual filter — it’s a color shift from an HDR/SDR mismatch or an automatic enhancement feature, which can look like an unintended filter or tint was applied.
Why does my CapCut video look different after exporting?
The preview in the editor reflects your original footage’s color space, while the export process converts it for standard playback. If that conversion doesn’t handle HDR footage correctly, the exported file can look noticeably different from what you saw while editing.
Why does CapCut change the color of my video on Instagram or TikTok specifically?
If the export looks correct on your device but changes only after uploading, the platform itself is recompressing your video and may be shifting colors independently of anything CapCut did.
Final Thoughts
Darker or washed-out exports feel like a CapCut bug, but in almost every case it comes down to one thing: your footage was shot in HDR and never got converted correctly for the SDR screens most people actually watch on.
Turn off HDR at the source (your phone’s camera settings), double-check the enhancement toggles and color space settings inside CapCut, and always export from your original footage instead of an already-compressed file.
If you’ve worked through the steps above and the export still looks correct on your own device, the last variable left is the platform you’re uploading to — and that one’s outside CapCut’s control.
Do a short test export before committing to a full render, keep a full-quality master of every project, and preview on the actual platform before assuming something’s broken.
That habit alone will save you the most time the next time this happens.
Sources
CapCut’s official Help Center on editing and exporting (capcut.com/help/editing-and-exporting) and CapCut’s official resource page on HDR (capcut.com/resource/high-dynamic-range-photography); independent CapCut community forum discussion on HDR-related darkening after export.
