
My 5-Step CapCut Workflow for Viral Short-Form Videos
Stop letting your videos flop. Here’s the exact system top creators use to edit faster, hold attention longer, and actually go viral.
Let me be direct: most short-form videos fail before the algorithm even gets a chance to test them.
Not because the idea was bad. Not because the creator lacked talent. But because the editing workflow was broken.
Slow intros, messy pacing, captions you can’t read, and exports that look blurry after upload.
If you’re spending 3 hours editing a 30-second clip that gets 200 views, you don’t have a content problem. You have a system problem.
The good news? With the right CapCut workflow for short-form videos, you can transform your editing from chaotic guesswork into a repeatable machine that produces scroll-stopping videos in under 30 minutes.
This isn’t theory. This is the exact 5-step system that separates videos that get buried from videos that get shared.
New to CapCut? Build your foundation with our complete CapCut for social media guide, then return here to lock in your viral workflow.
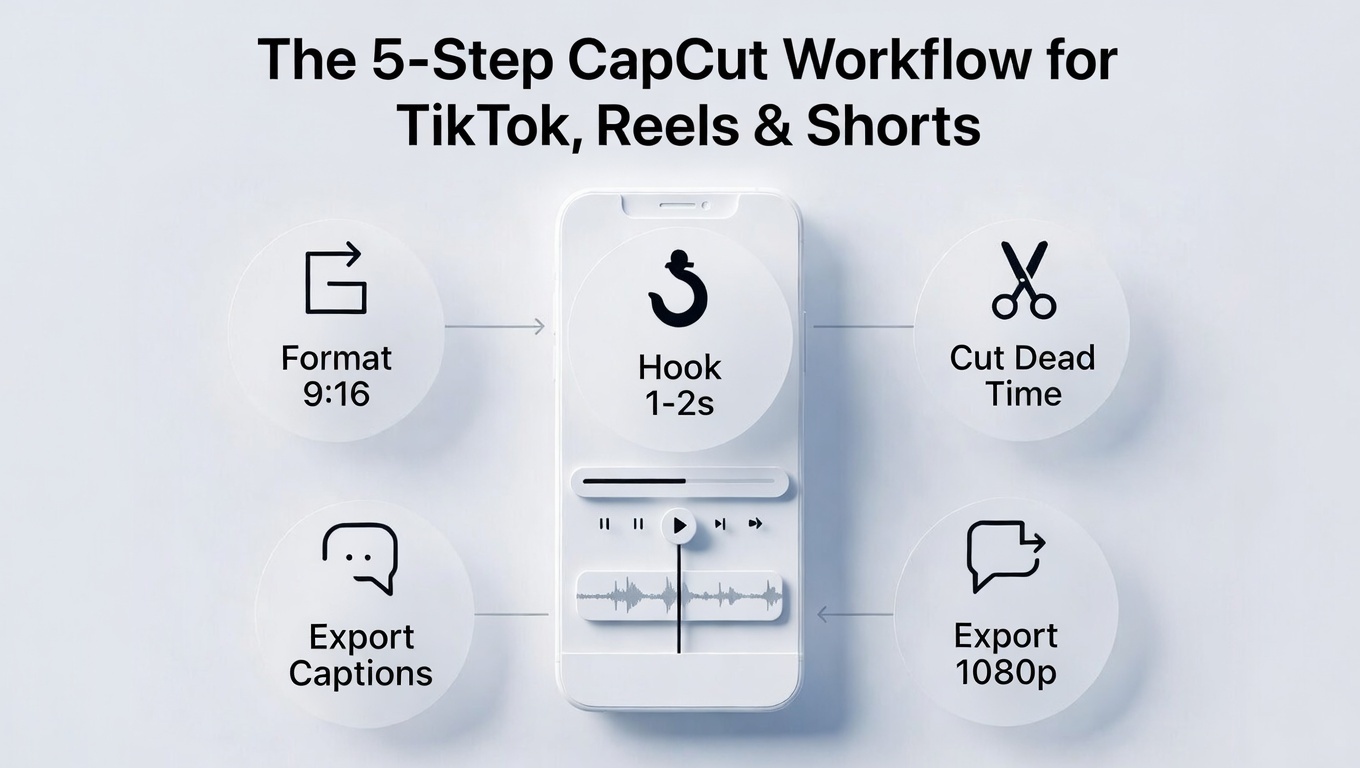
Quick Answer: The 5-Step CapCut workflow for short-form videos (At a Glance)
| Step | Action | Time Target |
|---|---|---|
| Step 1 | Set up project (9:16 + timeline structure) | 2–3 min |
| Step 2 | Build scroll-stopping hook (0–2 sec rule) | 3–5 min |
| Step 3 | Cut for retention (aggressive dead-time removal) | 10–15 min |
| Step 4 | Add captions + on-screen text | 5–7 min |
| Step 5 | Polish audio + export (platform-ready) | 3–5 min |
This workflow is designed for TikTok, Instagram Reels, and YouTube Shorts, but the principles work anywhere attention is the currency.
Before You Start: The 3 Rules That Make Videos Go Viral
Before you open CapCut, understand these three non-negotiable rules. They frame every decision in this workflow and separate viral-potential content from digital noise.
Rule 1: Clarity Beats Creativity
You don’t need the most clever edit. You need the clearest edit.
Viewers shouldn’t wonder what they’re watching or why they should care. Every frame should answer: What is this? Why now? What’s next?
Fancy transitions and trendy effects only work when they serve the message. When in doubt, choose obvious over artistic.
Rule 2: Speed = Retention
The algorithm rewards watch time. Watch time requires momentum.
Every millisecond of dead air is a chance to lose someone. Every unnecessary word, every slow zoom, every “hey guys”—it all compounds into a reason to swipe.
Fast pacing isn’t about being rushed. It’s about being ruthless.
Rule 3: Every Second Must Earn Attention
Before you keep any clip, ask: Does this second deserve to exist?
If it doesn’t advance the story, deliver value, or create curiosity—cut it. No mercy. Your viewer’s attention is expensive. Don’t spend it on filler.
How to Create a Viral Short-Form Video in CapCut (The Exact Workflow)
Step 1: Set Up Your Project (So Nothing Breaks Later)
What kills workflows? Starting the edit without structure, then trying to “find the video” in the mess.
What saves workflows? Building the skeleton first, then adding the muscle.
What to Do:
1. Lock in your technical foundation
- Open CapCut → New Project
- Set aspect ratio to 9:16 (vertical)
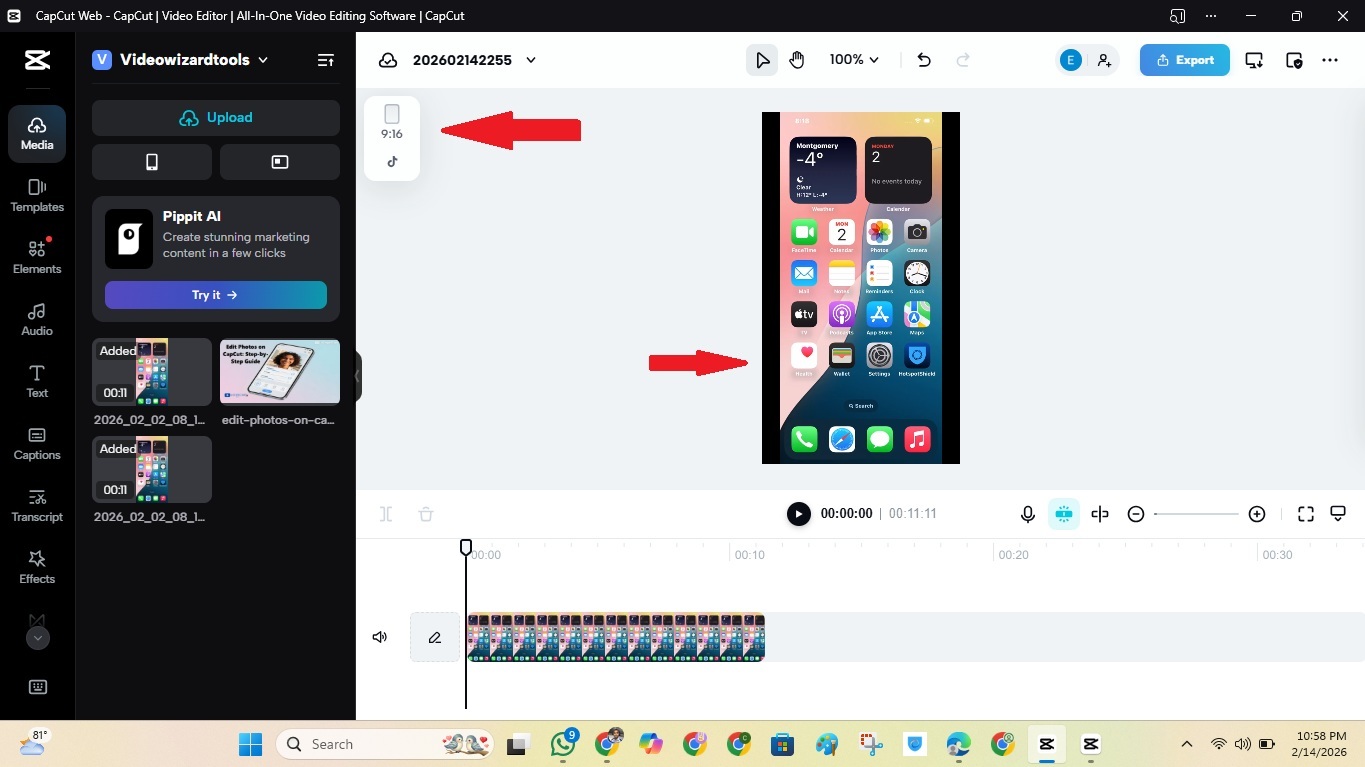
Set your CapCut canvas to 9:16 for TikTok, Reels, and Shorts - Resolution: 1080 × 1920
- Frame rate: Match your footage (usually 30fps or 60fps)
This is non-negotiable for TikTok, Reels, and Shorts. Start wrong here, and everything downstream suffers.
2. Import and rough-order your clips
- Select all footage before entering the timeline
- Drag clips into a logical sequence: Hook → Value → Payoff
- Don’t micro-edit yet. Just establish flow.
3. Build your timeline structure
| Section | Purpose | Typical Length |
|---|---|---|
| Hook | Stop the scroll, create curiosity | 0–2 seconds |
| Value | Deliver the promise, teach, entertain | 10–25 seconds |
| Payoff | Resolution, CTA, or memorable close | 2–5 seconds |
Decision Rules:
| If your content is… | Then… |
|---|---|
| Talking-head / tutorial | Keep clips tighter, plan for caption space |
| Visual-heavy (product, transformation) | Leave breathing room for overlays and text |
Common Mistake to Avoid:
“I’ll figure out the structure as I edit.”
No, you won’t. You’ll create a Frankenstein timeline that takes 3x longer to fix. Structure first, polish second. Always.
Step 2: Build the Hook (First 1–2 Seconds Decide Everything)
Here’s the brutal truth: 60% of viewers are gone by second two.
Not because your video is bad. Because your hook didn’t grab them.
In CapCut, your hook isn’t just what you say, it’s what you show, how fast you show it, and what text stops the thumb.
What to Do:
1. Start with a result, a bold claim, or a problem
- Open with the outcome (not the journey)
- Lead with tension or curiosity
- Never, ever start with “Hey guys” or “So today I wanted to…”
2. Cut intros completely
- If your first clip has a warm-up, delete it
- Start mid-sentence if needed
- The first frame should already be in motion
3. Add 6–10 word hook text
- Big, high-contrast text overlay
- Appears within the first 1 second
- Example: “This edit doubled my views” or “Stop making this mistake”
Retention Insight:
Most viewers decide whether to stay or swipe in less than 2 seconds. Your hook isn’t the first 5 seconds, it’s the first impression, period.
Hook Examples:
| ❌ Bad Hook | ✅ Good Hook |
|---|---|
| “Hey everyone, welcome back to my channel…” | “This edit doubled my views” |
| “So I was thinking about making a video…” | “3 mistakes killing your retention” |
| “Today I want to talk about…” | “I wasted 6 months on bad edits” |
Micro-Techniques for Maximum Impact:
| Technique | How to Execute in CapCut |
|---|---|
| Zoom punch | Add slight scale keyframe (1.0 → 1.05) on first 0.5 seconds. Read How to Use Keyfram in CapCut |
| Contrast text | White text + black outline/shadow, placed center-frame |
| Motion start | Begin with clip already in action (never static setup shots) |
Step 3: Cut for Retention (This Is Where Videos Win or Die)
This step separates editors from editors who understand the algorithm.
You can have perfect captions, great audio, and a strong hook—but if the middle drags, you’ve lost.
What to Do:
1. Remove pauses, filler, and slow sections aggressively
- “Ums,” “ahs,” breaths between sentences—gone
- Dead air longer than 0.5 seconds—cut
- Moments where energy drops—speed up or delete
2. Keep only high-energy moments
- Enthusiasm peaks
- Key information delivery
- Visual reveals or transformations
3. Use speed control strategically
- Speed up slow explanations (1.5x–2x)
- Slow down impact moments for emphasis
- Jump cuts between sentences to maintain momentum
Decision Rules:
| If… | Then… |
|---|---|
| Clip doesn’t add value | Delete it |
| It feels slow | Speed it up or cut it |
| Same info is said twice | Keep the better delivery, kill the other |
Timing Targets:
| Element | Target |
|---|---|
| Dead air between sentences | < 0.5 seconds |
| Pause for emphasis | 0.5–1 second max |
| Total video length (Shorts/Reels/TikTok) | 15–60 seconds sweet spot |
Before vs. After:
| Loose Edit | Tight, Punchy Edit |
|---|---|
| “So… um… today I want to show you how I edit my videos in CapCut, which is a really great app that I’ve been using for about six months now…” | “CapCut workflow. 5 steps. 30 minutes. Let’s go.” |
| Slow zooms, long takes | Quick cuts, constant motion |
The goal: Your viewer never has a moment to consider swiping.
Step 4: Captions + Text That Keep People Watching
80%+ of social video is watched without sound.
If your captions are tiny, slow, or missing, you’ve automatically lost most of your audience. This step isn’t optional—it’s essential for retention.
What to Do:
1. Generate auto-captions
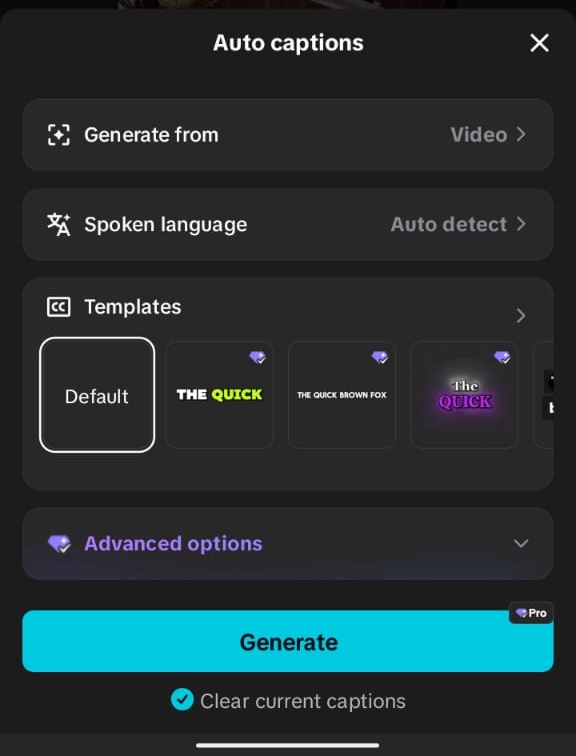
- Tap Text → Auto Captions in CapCut
- Select your language
- Let CapCut process (usually 10–30 seconds)
2. Fix errors immediately
- Scan for name misspellings, slang, and technical terms
- CapCut gets 90% right, but that 10% looks unprofessional
- Fix timing if captions appear too early/late
3. Style for readability
- Font: Bold, sans-serif (Montserrat, Roboto, or similar)
- Size: Large enough to read on a phone held at arm’s length
- Color: White text with black outline or shadow
- Position: Slightly above bottom edge (avoid platform UI)
4. Keep it scannable
- 1–2 lines maximum per caption block
- Break long sentences into chunks
- Highlight key words in contrasting colors
Performance Rules:
| Rule | Why It Matters |
|---|---|
| Big text = better retention | Small text forces viewers to work harder |
| Highlight key words | Creates visual rhythm, emphasizes punchlines |
| Place above UI safe zone | Prevents platform buttons from covering text |
When to Use What:
| Video Type | Caption Strategy |
|---|---|
| Talking-head / tutorial | Full captions throughout |
| Visual-heavy / product | Text highlights for key moments only |
| Trend/meme remix | Minimal text, let visuals drive |
Mistake to Avoid:
Tiny, low-contrast captions placed at the very bottom.
This is the #1 retention killer. If viewers can’t read it without squinting, they won’t read it at all.
For a complete walkthrough on generating and styling subtitles, see our dedicated guide on how to add captions on CapCut.
Step 5: Audio + Final Polish (Make It Feel Professional)
Bad audio makes good video feel amateur. Good audio makes decent video feel premium.
This final step is about clarity and cohesion—not adding more, but refining what you have.
What to Do:
1. Balance your audio layers
- Voice: Loudest layer (should be crystal clear)
- Music: 20–30% lower than voice (background texture, not competition)
- Sound effects: Subtle accents, not distractions
2. Sync cuts to beats (if using music)
- Identify beat drops or transitions in your track
- Place key visual cuts on those beats
- Creates subconscious “professional” feel
3. Add subtle sound effects
- Whoosh for transitions
- Pop for text appearances
- Subtle zoom sound for emphasis moments
Keep it light: One effect per 5–10 seconds maximum. Overuse feels chaotic.
Simple Polish Stack:
| Element | Action | Tool in CapCut |
|---|---|---|
| Motion | Light zoom keyframes on static shots | Keyframe → Scale |
| Color | Basic tweak for consistency | Adjust → Brightness/Contrast/Saturation |
| Transitions | Clean cuts (90% of the time) | Split → Delete gap |
The Golden Rule:
If an effect doesn’t improve clarity, remove it.
Every zoom, every transition, every sound effect must serve the message. Decoration without purpose is distraction.
Want pro-level sound? Master CapCut’s audio tools with our complete guide on how to edit audio on CapCut.
Export Settings That Keep Your Video Sharp
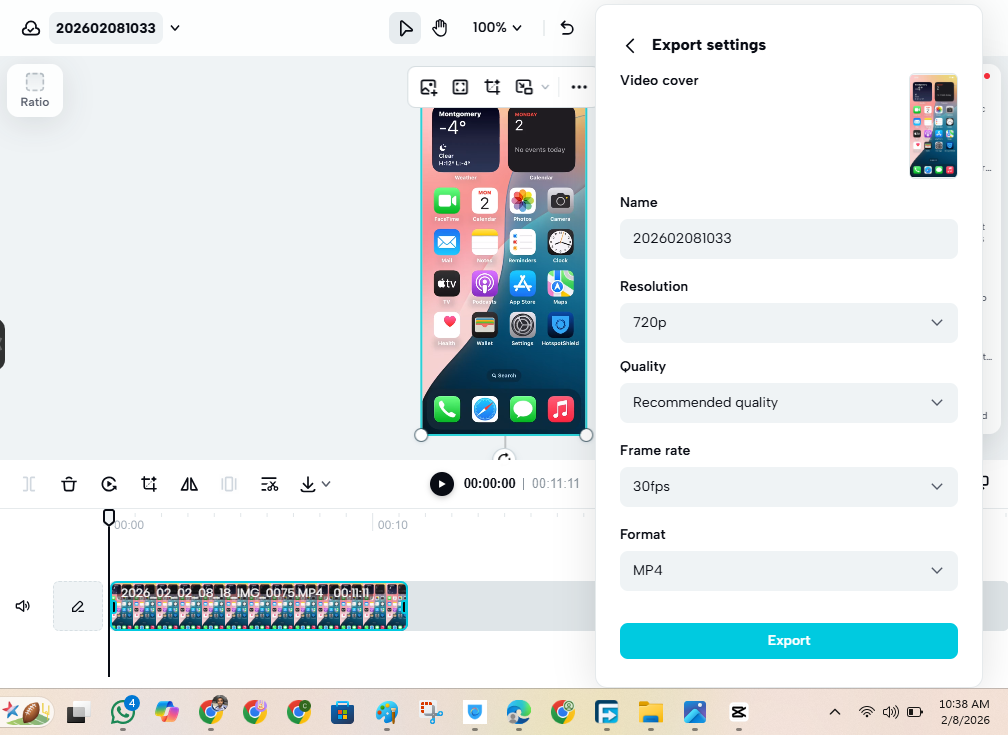
Your edit is only as good as your export. The wrong settings turn crisp footage into blurry mush after platform compression.
Quick Reference:
| Setting | Value |
|---|---|
| Aspect ratio | 9:16 |
| Resolution | 1080 × 1920 |
| Frame rate | 30fps (or match footage) |
| Bitrate | High / Recommended |
| Format | MP4 (H.264) |
Critical: Keep text and key visuals within the safe zone—away from the bottom 15% and the right-side 10% where the platform UI lives.
For complete export specifications for every platform, see our detailed guide on best CapCut settings for TikTok, Reels, and Shorts.
3 Plug-and-Play Workflow Templates
Use these as starting frameworks. Once you internalize the structure, you can adapt to any content type.
Template 1: Talking-Head Tutorial
| Section | Content | Length |
|---|---|---|
| Hook | “I wasted 6 months on [mistake]” or “Stop doing [common error]” | 1–2 sec |
| Value | 3–5 rapid-fire tips, each with mini-example | 20–30 sec |
| Payoff | “Follow for part 2” or “Save this for later” | 2–3 sec |
Key: Cut every breath. Speed up explanations. Caption everything.
Template 2: Before/After Transformation
| Section | Content | Length |
|---|---|---|
| Hook | Show “after” result immediately + “How I did it” text | 1–2 sec |
| Value | Quick process montage (3–5 key steps) | 15–25 sec |
| Payoff | Final result + CTA | 3–5 sec |
Key: Use speed ramping for process. Slow motion for final reveal. Music builds to climax.
Template 3: Trend Remix
| Section | Content | Length |
|---|---|---|
| Hook | Match trend format exactly + your unique angle in text | 1–2 sec |
| Value | Your content delivered in trend’s rhythm/style | 15–30 sec |
| Payoff | Twist ending or niche-specific CTA | 2–4 sec |
Key: Honor the trend’s timing. Add your differentiation in content, not format.
How to Turn One Video Into 3–5 Shorts (Advanced Workflow)
Smart creators don’t make one video. They make content systems.
Here’s how to multiply your output without multiplying your filming time:
Step 1: Film with multiple hooks in mind
- Record 3–5 different intros for the same core content
- Each intro targets a different pain point or curiosity gap
Step 2: Find natural break points
- Identify 3–5 distinct “value chunks” in your longer content
- Each chunk should stand alone as useful information
Step 3: Split and rebuild
- Create separate CapCut projects for each chunk
- Add unique hook text to each version
- Vary the music or pacing slightly for platform diversity
Step 4: Reuse structure, vary specifics
- Same editing rhythm, different opening lines
- Same caption style, different highlighted words
- Same export settings, slightly different thumbnails/hooks
Result: One filming session → 3–5 distinct videos → algorithm tests multiple angles → you learn what resonates → double down on winners.
Common Workflow Mistakes That Kill Short-form Video Views
| Mistake | Why It Hurts | The Fix |
|---|---|---|
| Slow intros | Loses viewers before value appears | Cut first 3 seconds unless they’re pure hook |
| Over-editing | Feels chaotic, distracts from message | One effect style per video, max |
| Bad captions | 80% watch without sound; unreadable = invisible | Big, high-contrast, above UI |
| Poor audio balance | Music drowns voice; viewers leave | Voice 30% louder than background |
| Wrong pacing | Dead air creates exit opportunities | Cut pauses >0.5 sec, speed up slow sections |
Final Checklist (Before You Export)
Print this. Use it. Every single video.
- [ ] Hook is clear in 2 seconds (text visible, curiosity established)
- [ ] No dead time (pauses cut, pacing tight)
- [ ] Captions readable (big, contrasted, positioned above UI)
- [ ] Audio clean (voice clear, music balanced, no distortion)
- [ ] Format correct (9:16, 1080×1920, high quality)
Save this checklist. Return to it before every export. It’s your quality control system.
Conclusion
Here’s what you need to remember:
Simple systems beat fancy edits. Every time.
You don’t need to master every CapCut feature. You need to master five steps, repeated consistently:
- Set up right (9:16, structured timeline)
- Hook fast (0–2 seconds, no mercy)
- Cut ruthlessly (dead time is the enemy)
- Caption clearly (80% watch without sound)
- Polish audio (clarity over complexity)
The creators winning right now aren’t necessarily the most talented. They’re the most consistent—and consistency requires systems, not inspiration.
Run this workflow 10 times. It’ll feel slow at first. By the 10th video, you’ll be editing in your sleep. By the 50th, you’ll have a sixth sense for what retains attention.
Your next video won’t go viral because you hope it will. It will go viral because you built it to.
Now open CapCut. Start at Step 1. And stop letting your edits hold your content back.