

Background noise can ruin an otherwise perfect video. Whether it’s fan hum, wind, or room echo, unwanted sounds make your content feel unprofessional, and with video projected to make up 82% of consumer internet traffic, clean audio isn’t optional anymore.
The good news: CapCut’s Noise Reduction, Voice Enhancer, and audio extraction tools can clean up your sound without expensive software or re-recording.
This tutorial shows you exactly how to reduce or remove background noise in CapCut on both mobile and desktop, with settings that preserve your natural voice. Plus, what to do when the first fix isn’t enough.
CapCut Audio Features for Noise Control (Complete Breakdown)
If your audio sounds rough, like there’s background noise, uneven volume, or unclear speech, CapCut actually gives you a few simple tools that can fix most of it without stress.
Here’s a quick breakdown of the key audio features and how to use them:
| Features | What It Does | Use it for |
|---|---|---|
| Noise Reduction (Denoise) | Removes constant background noise like hum, hiss, or static | AC noise, fan sounds, light background hiss |
| Voice Enhancer | Boosts clarity and makes voices sound sharper and more present | Quiet, muffled, or unclear dialogue |
| Volume Envelopes | Lets you adjust volume levels over time for smoother audio | Fixing uneven loudness or sudden volume jumps |
| Audio Extraction | Separates audio from video so you can edit it independently | Fine-tuning sound without affecting visuals |
| Speech Recognition | Converts audio into text for captions | Creating accurate subtitles and improving accessibility |
Now here’s the part that really makes a difference:
Most beginners rely on just one tool, and that’s why their audio still sounds off.
But clean audio actually comes from combining the right features.
Noise Reduction removes what you don’t want.
Voice Enhancer strengthens what you do want.
When you use both together, your audio instantly sounds clearer, louder, and more professional — without over-editing.
And if your audio levels are inconsistent, that’s where Volume Envelopes come in to smooth everything out so your viewers don’t have to keep adjusting their volume.
One more thing, if you’re planning to add captions (which you should), always clean your audio first. Better audio = more accurate captions with Speech Recognition.
What Counts as Background Noise (So You Know What to Target)
Background noise is any sound that’s not the main thing you want people to hear.
Most of the time, your “main sound” is your voice. So anything competing with it is background noise.
Here are the usual culprits:
- Constant noises: fan or AC hum, laptop noise, steady hiss, light static
These are the easiest to reduce because they’re consistent. - Random noises: people talking, traffic honks, plates clinking, dogs barking, sudden wind bursts
These are harder because they change every second, and noise removal can accidentally chew up your voice too.
A simple way to think about it:
If the noise sounds like one long “ssss” or “hmmmm,” CapCut can usually help a lot. If it sounds like a busy street with surprises every second, you’ll need a lighter touch and a few extra tricks.
Before You Edit: Two Quick Checks That Make Noise Removal Work Better
Before you turn on noise reduction, do these two checks first. They take a minute, but they can save your audio from sounding thin or “underwater.”
Check 1: Make Sure Your Voice Is Loud Enough
If your voice is too quiet, noise reduction can’t separate it from the background very well. It will try, but your voice may get flattened along with the noise.
What to do:
- Play the clip and listen: does your voice sound clear, or does it feel far away?
- If your voice is low, raise the clip volume slightly before you apply noise reduction.
Check 2: Identify the Noisy Parts
Sometimes the noise is only bad in one section (like a gust of wind or a loud AC kick).
What to do:
- Scrub through the timeline and find where the noise is worst.
- If it’s only in one part, you’ll get better results by fixing that section instead of over-processing the entire audio.
How to Remove or Reduce Background Noise in CapCut on Mobile
Step 1: Extract Audio (Optional but Recommended)
If your video has complex audio, extract it first for isolated processing:
- Tap your video → Audio → Extract
- This creates a separate audio layer you can process independently
Step 2: Apply Noise Reduction
- Open CapCut and create a project
- Tap New Project, select your video, and tap Add
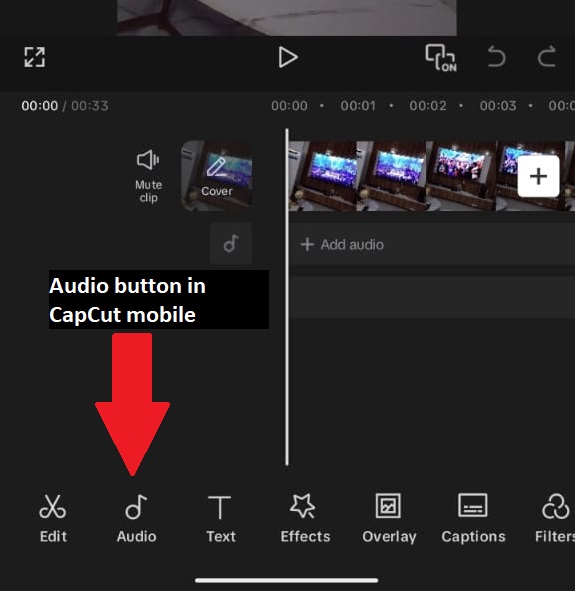
- Tap your clip on the timeline to select it
- On the bottom menu, scroll to the right till you see Reduce Noise (as shown below)
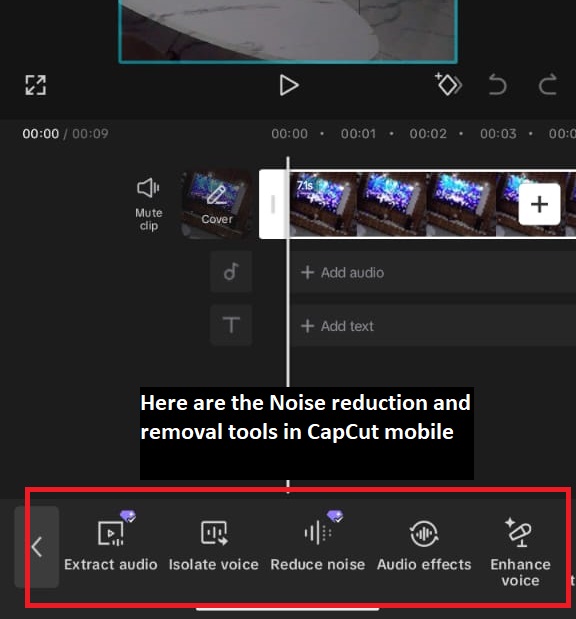
- Adjust strength: Low for light hum, Medium for steady noise, High for heavy interference (use carefully)
Step 3: Enhance Voice (If Needed)
If voices still sound muddy after noise reduction:
- In the same Audio menu, tap Voice Enhancer
- Select Clear or Warm preset
- Adjust intensity until dialogue sounds present but natural
Step 4: Preview and Export
- Loop the noisiest section
- Check that voices don’t sound “underwater” or robotic
- Tap Export when satisfied
Note: In recent versions of CapCut, the Noise Reduction feature is only available to Pro users. If you don’t have CapCut Pro yet, you can follow this guide to get started.
How to Remove Background Noise in CapCut on Desktop
Step 1: Extract Audio for Isolated Processing
- Import your video and drag to timeline
- Right-click the clip → Extract Audio
- The audio now appears as a separate layer—select it for targeted editing
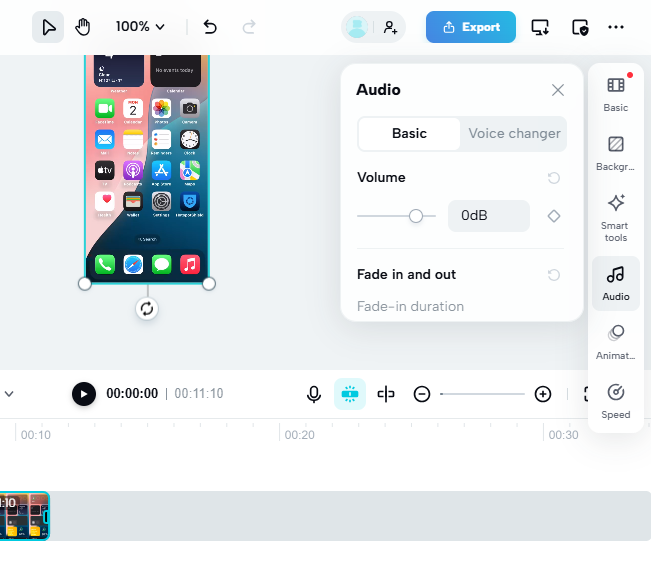
Step 2: Apply Noise Reduction
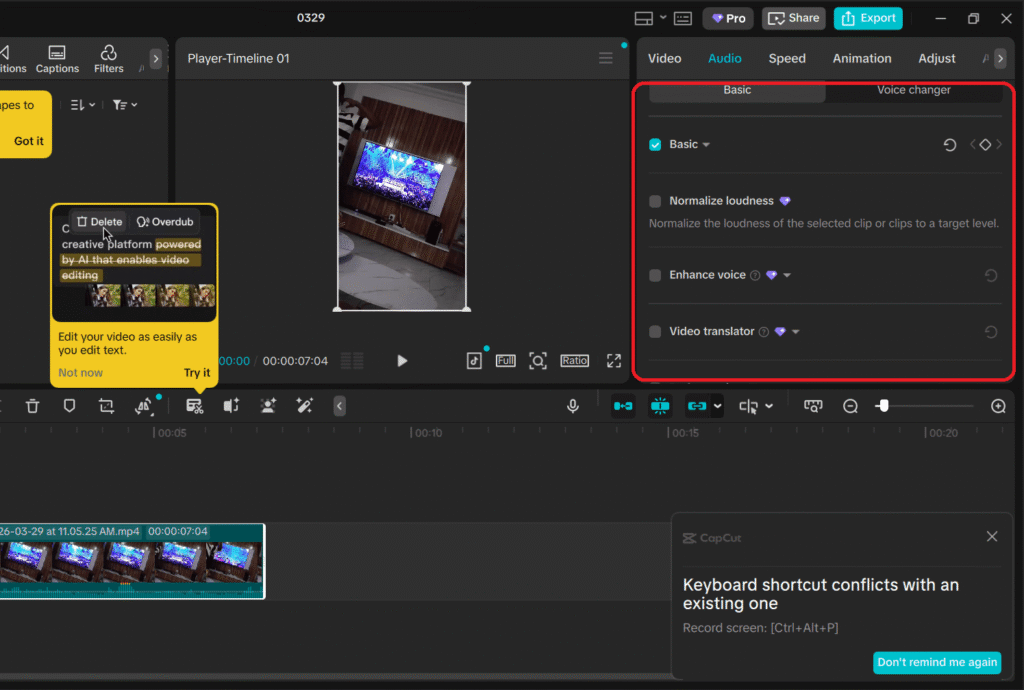
- Open the Audio panel on the right sidebar
- Click on Basic to access controls like Volume, Fade in, and Fade out
- Scroll down to explore additional audio tools:
- Normalize loudness – balances overall audio levels
- Enhance voice – makes speech clearer and sharper
- Video translator – translates spoken audio into other languages
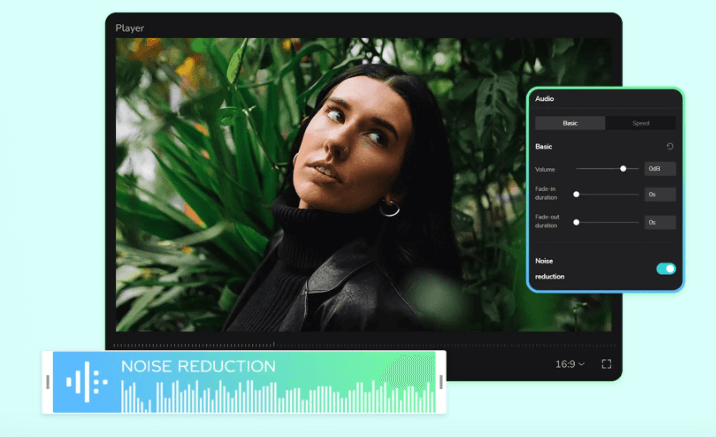
- Reduce noise – removes background noise (main tool to use)
- Separate audio – extracts audio from the video clip
- Tap on Reduce noise
Step 3: Use Voice Enhancer for Clarity
- In the same Audio panel, enable Voice Enhancer
- Choose preset: Clear Voice for dialogue, Warm for podcasts
- Fine-tune until voices cut through without sounding processed
Step 4: Volume Envelopes for Dynamic Control
If noise varies throughout:
- Click the audio layer → Volume → Add Keyframe
- Create volume dips during noisy sections, boosts during quiet dialogue
- This automates “riding the fader” without manual adjustment
Step 5: Export
Click Export → select resolution → save
CapCut Noise Reduction vs Voice Enhancer: Which One Should You Use?
This is where a lot of people get stuck.
You open CapCut, see both Noise Reduction and Voice Enhancer, and think… which one do I actually use?
Here’s the simple way to look at it:
| Scenario | Use This | Why It Works |
|---|---|---|
| Constant hum, hiss, or AC noise | Noise Reduction | Removes steady background sounds by targeting unwanted frequencies |
| Muddy or unclear dialogue | Voice Enhancer | Brings your voice forward and improves clarity |
| Noise and unclear voice | Use both together | Clean the noise first, then enhance the remaining voice |
| Uneven volume (some parts loud, others quiet) | Volume Envelopes | Lets you manually balance audio over time |
| Wind or random background sounds | Light Noise Reduction + background music | Heavy filtering can damage voice quality, so masking works better |
Now here’s the part most people don’t realize:
Using the right tool matters, but how you use it matters even more.
If you crank everything to max, your audio starts to sound fake and overprocessed.
A better approach?
Start simple.
Use Noise Reduction first, and keep it low. Just enough to clean the background.
Then listen.
If your voice starts to feel thin or weak, bring in Voice Enhancer to add back clarity and strength.
That balance is what makes your audio sound natural… not edited.
Best Settings for CapCut Noise Reduction
Now that you know when to use Noise Reduction and Voice Enhancer, let’s talk about how to actually set them without ruining your audio.
Here’s the truth: there’s no single “perfect” setting.
The right setup depends on how bad your audio is and what kind of noise you’re dealing with. But once you understand the pattern, it gets really easy to fix almost any clip.
Use this as your starting point:
Light AC Hum or Faint Background Noise
Noise Reduction: Low (10–20%)
Voice Enhancer: Off or Low
Result: Clean and natural, no overprocessing
Steady Room Noise
Noise Reduction: Medium (30–50%)
Voice Enhancer: Low (Clear preset)
Result: Balanced audio with good clarity
Heavy Background Interference
Noise Reduction: High (60–75%)
Voice Enhancer: Medium (Warm preset)
Result: Cleaner, but slightly processed sound
Wind Noise + Weak Voice
Noise Reduction: Medium (around 40%) + slight EQ cut on highs
Voice Enhancer: Medium
Result: Reduces wind while keeping voice audible
Now listen, this next part will save your audio:
If your voice starts to sound watery, metallic, or robotic, your Noise Reduction is too high.
Pull it back immediately.
Perfectly silent audio means nothing if your voice sounds unnatural.
Clean and natural will always sound better than overprocessed.
A Simple Way to Find the Right Settings (Step-by-Step)
If you’re unsure where to start, do this:
First, find the worst part of your audio — the noisiest 5 seconds.
Loop it.
Now slowly increase Noise Reduction until the background noise drops.
Pause and listen.
If your voice starts losing strength, bring in Voice Enhancer just a little to restore clarity.
Then stop right there — don’t keep tweaking.
You’re aiming for two things only:
- The noise is reduced
- Your voice still sounds natural
Once you hit that balance, you’re done.
Common Problems (And Quick Fixes)
You Can’t Find Noise Reduction or Denoise
This usually comes down to one of three things: you’re not selecting the right layer, you’re in the wrong menu, or your app version looks different.
Fix it:
- Tap/click the clip on the timeline first so it’s selected.
- Go to Audio settings and look again for Noise Reduction or Denoise.
- Update CapCut, then reopen the project.
Your Voice Sounds Underwater, Metallic, or Robotic
That’s a classic sign the noise reduction strength is too high.
Fix it:
- Reduce the strength until your voice sounds natural again.
- If the noise comes back a bit, that’s fine. Clean and natural beats “perfectly silent” but weird-sounding.
The Background Noise Is Only in One Part of the Video
If you apply strong noise reduction to the whole clip, you can damage good sections too.
Fix it:
- Split the clip around the noisy section.
- Apply noise reduction only to the noisy part.
- Keep the clean sections lighter or untouched.
The Noise Gets Quieter, But Your Voice Gets Quieter Too
Noise reduction can lower everything if your voice and the noise sit in the same range.
Fix it:
- Use lighter noise reduction.
- Then raise the volume slightly.
- If you use EQ, boost clarity gently instead of pushing noise reduction harder.
You Still Hear Wind or People Talking
Random noise is harder to remove without harming voice quality.
Fix it:
- Use light to medium noise reduction.
- Add low background music to smooth it out.
- If the voice is totally buried, consider recording a clean voice-over and placing it on top.
| Problem | Cause | How to Fix Using CapCut Features |
|---|---|---|
| Voice sounds robotic after denoise | Noise Reduction set too high | Lower the Noise Reduction strength, then add Voice Enhancer on Low to restore natural voice |
| Can’t find Noise Reduction | Wrong audio layer selected or using an outdated app version | Make sure you select the specific audio layer, and update CapCut to the latest version |
| Noise varies throughout the clip | Uniform processing doesn’t handle changing noise | Use Volume Envelopes or split the clip into sections, applying Noise Reduction to each part |
| Voice and noise are at similar volume | Noise and voice frequencies overlap | Extract the audio, apply lighter Noise Reduction, then boost the voice with Voice Enhancer |
| Wind still audible after denoise | Random noise is irregular, unlike constant hum | Use EQ to cut the 2–4kHz range where wind is prominent; avoid maxing out Noise Reduction |
| Audio sounds “hollow” after processing | Over-processing removed too many frequencies | Apply the Warm Voice Enhancer preset to restore body and natural tone |
Frequently Asked Questions
Conclusion
Background noise can make a good video feel sloppy fast, even if your visuals are perfect. The fix is usually simple.
Start with the basics: make sure your voice is loud enough, then apply Noise Reduction/Denoise lightly and preview the worst part of the clip. If your voice starts sounding robotic, back off. Clean and natural always wins.
And when noise reduction isn’t enough, don’t force it. Use the quick helpers inside CapCut like small EQ tweaks, smarter volume control, or a low background music layer to smooth out what’s left.
Once you get the hang of it, removing background noise in CapCut becomes a quick habit, and your videos instantly sound more professional.