
How to Remove Background Noise in CapCut (2026 Guide)

Struggling with background noise that makes your CapCut videos sound messy?
I’ve been there. You record what feels like a great clip, then you play it back, and it’s wind, fan hum, chatter, and your voice fighting for its life.
Here’s the good news: you can clean that up inside CapCut, and it doesn’t take forever. A few settings can make your audio sound way clearer without turning your voice into a robot.
And since video is only getting bigger, clean sound matters more than ever. Cisco projected that video would make up about 82% of consumer internet traffic.
Now let me show you the fastest way to remove background noise in CapCut on both mobile and desktop, plus what to do when the first fix isn’t enough.
What Counts as Background Noise (So You Know What to Target)
Background noise is any sound that’s not the main thing you want people to hear.
Most of the time, your “main sound” is your voice. So anything competing with it is background noise.
Here are the usual culprits:
- Constant noises: fan or AC hum, laptop noise, steady hiss, light static
These are the easiest to reduce because they’re consistent. - Random noises: people talking, traffic honks, plates clinking, dogs barking, sudden wind bursts
These are harder because they change every second, and noise removal can accidentally chew up your voice too.
A simple way to think about it:
If the noise sounds like one long “ssss” or “hmmmm,” CapCut can usually help a lot. If it sounds like a busy street with surprises every second, you’ll need a lighter touch and a few extra tricks.
Before You Edit: Two Quick Checks That Make Noise Removal Work Better
Before you turn on noise reduction, do these two checks first. They take a minute, but they can save your audio from sounding thin or “underwater.”
Check 1: Make Sure Your Voice Is Loud Enough
If your voice is too quiet, noise reduction can’t separate it from the background very well. It will try, but your voice may get flattened along with the noise.
What to do:
- Play the clip and listen: does your voice sound clear, or does it feel far away?
- If your voice is low, raise the clip volume slightly before you apply noise reduction.
Check 2: Identify the Noisy Parts
Sometimes the noise is only bad in one section (like a gust of wind or a loud AC kick).
What to do:
- Scrub through the timeline and find where the noise is worst.
- If it’s only in one part, you’ll get better results by fixing that section instead of over-processing the entire audio.
How to Remove Background Noise in CapCut on Mobile
- Open CapCut and create a project
Tap New Project, then select your video and tap Add. - Tap your video on the timeline
Your video will appear at the bottom (the timeline). Tap the clip once so it’s highlighted. - Open the audio controls
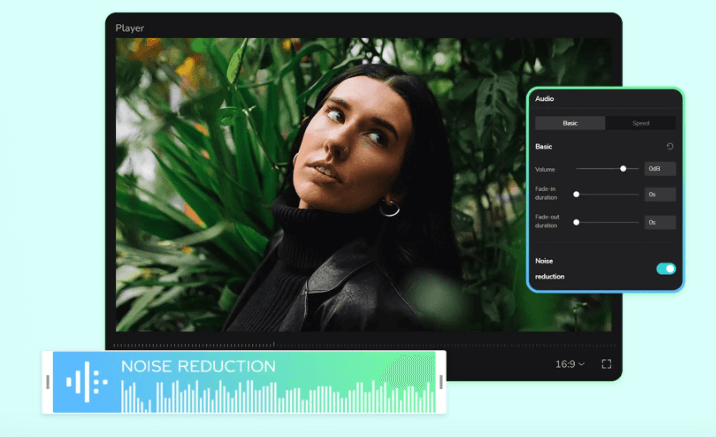
In the bottom menu, tap Audio (or Volume/Audio depending on your version). - Turn on noise reduction
Look for Noise Reduction or Denoise and tap it to enable. - Adjust the strength (if there’s a slider)
Start on a low setting, then increase slowly until the noise drops but your voice still sounds normal. - Preview the noisiest part
Play the section with the worst noise.
If your voice sounds watery, metallic, or robotic, reduce the strength a bit. - Export your video
Tap the export button (usually top right), choose your settings, and save.
How to Remove Background Noise in CapCut on Desktop
- Open CapCut on your computer
Launch CapCut, then click New Project. - Import your video
Click Import (or drag your video into the media area), then drag the clip down into the timeline. - Select the audio you want to clean
Click the clip in the timeline.
If you see a separate audio layer under it, click the audio layer too. - Open the audio settings panel
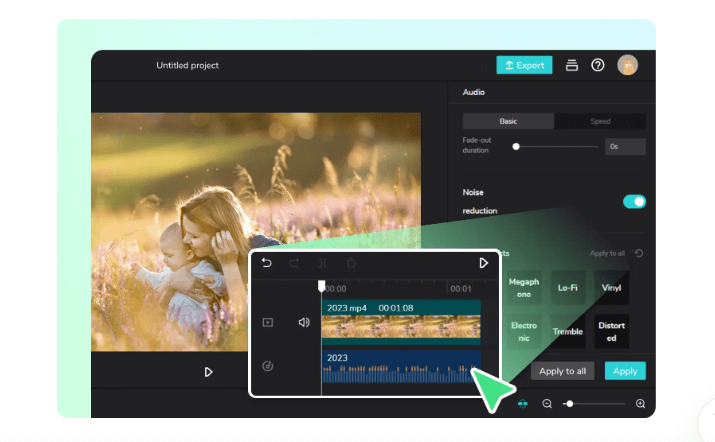
Look for an Audio panel or Audio settings on the right side. Click it. - Turn on Noise Reduction / Denoise
Find Noise Reduction or Denoise, then toggle it on. - Adjust the strength (if available)
Start low, then increase slowly. Stop as soon as the noise drops but your voice still sounds natural. - Preview and listen closely
Play the section with the worst noise.
If your voice sounds robotic, muffled, or “underwater,” reduce the strength. - Export when it sounds right
Click Export, choose your resolution, then save.
Best Settings: How Strong Should You Go?
Noise reduction is one of those tools that works best when you don’t overdo it.
If you crank it too high, the background noise drops, but your voice can start to sound weird. Like it’s underwater, metallic, or “robot-like.”
A simple way to set it right is to match the strength to the type of noise.
Light Noise (Use Low Strength)
Use this when the noise is small and steady:
- soft fan or AC hum
- light hiss
- quiet room static
Goal: clean it up without changing your voice.
Medium Noise (Use Medium Strength)
Use this when the noise is obvious but not overpowering:
- steady outdoor wind
- loud room hum
- constant background buzz
Goal: reduce the noise while keeping your voice natural.
Heavy Noise (Use High Strength Carefully)
Use this only when the noise is really distracting:
- strong wind hitting the mic
- very loud background hiss
- noisy rooms where your voice is still louder than the noise
Important: heavy settings can damage your voice quality fast. If your voice starts sounding thin or “watery,” back it down.
The best method is always the same:
Find the noisiest part of your clip, loop it, and increase the strength slowly until it sounds clean. Then stop.
Below, I’ll show you what to do if noise reduction still isn’t enough, using quick fixes you can do inside CapCut.
If Noise Reduction Isn’t Enough: Three Quick Fixes Inside CapCut
Sometimes noise reduction gets you 70% of the way there, but the audio still feels a little rough. When that happens, these quick fixes can save the clip without making your voice sound weird.
1) Lower the Clip Volume, Then Raise It Gently
If your audio is too loud, background noise can sound louder too.
What to do:
- Lower the clip volume slightly.
- Then raise it little by little until your voice feels clear again.
This keeps the noise from jumping out after denoise.
2) Use the Equalizer to Reduce Harsh Noise
A lot of annoying background noise lives in the “hissy” high end.
What to do:
- Open Equalizer (EQ).
- Reduce the high/treble side a little.
- Preview and stop as soon as the hiss calms down.
Small changes are enough. Big EQ drops can make your voice dull.
3) Add Low Background Music the Right Way
This isn’t about hiding bad audio with loud music. It’s about adding a soft layer that makes small leftover noise less noticeable.
What to do:
- Add a music track.
- Lower it until it’s barely there.
- Make sure your voice is always the loudest thing.
If you can clearly “hear the music,” it’s probably too loud.
Common Problems (And Quick Fixes)
You Can’t Find Noise Reduction or Denoise
This usually comes down to one of three things: you’re not selecting the right layer, you’re in the wrong menu, or your app version looks different.
Fix it:
- Tap/click the clip on the timeline first so it’s selected.
- Go to Audio settings and look again for Noise Reduction or Denoise.
- Update CapCut, then reopen the project.
Your Voice Sounds Underwater, Metallic, or Robotic
That’s a classic sign the noise reduction strength is too high.
Fix it:
- Reduce the strength until your voice sounds natural again.
- If the noise comes back a bit, that’s fine. Clean and natural beats “perfectly silent” but weird-sounding.
The Background Noise Is Only in One Part of the Video
If you apply strong noise reduction to the whole clip, you can damage good sections too.
Fix it:
- Split the clip around the noisy section.
- Apply noise reduction only to the noisy part.
- Keep the clean sections lighter or untouched.
The Noise Gets Quieter, But Your Voice Gets Quieter Too
Noise reduction can lower everything if your voice and the noise sit in the same range.
Fix it:
- Use lighter noise reduction.
- Then raise the volume slightly.
- If you use EQ, boost clarity gently instead of pushing noise reduction harder.
You Still Hear Wind or People Talking
Random noise is harder to remove without harming voice quality.
Fix it:
- Use light to medium noise reduction.
- Add low background music to smooth it out.
- If the voice is totally buried, consider recording a clean voice-over and placing it on top.
Frequently Asked Questions
Conclusion
Background noise can make a good video feel sloppy fast, even if your visuals are perfect. The fix is usually simple.
Start with the basics: make sure your voice is loud enough, then apply Noise Reduction/Denoise lightly and preview the worst part of the clip. If your voice starts sounding robotic, back off. Clean and natural always wins.
And when noise reduction isn’t enough, don’t force it. Use the quick helpers inside CapCut like small EQ tweaks, smarter volume control, or a low background music layer to smooth out what’s left.
Once you get the hang of it, removing background noise in CapCut becomes a quick habit, and your videos instantly sound more professional.