
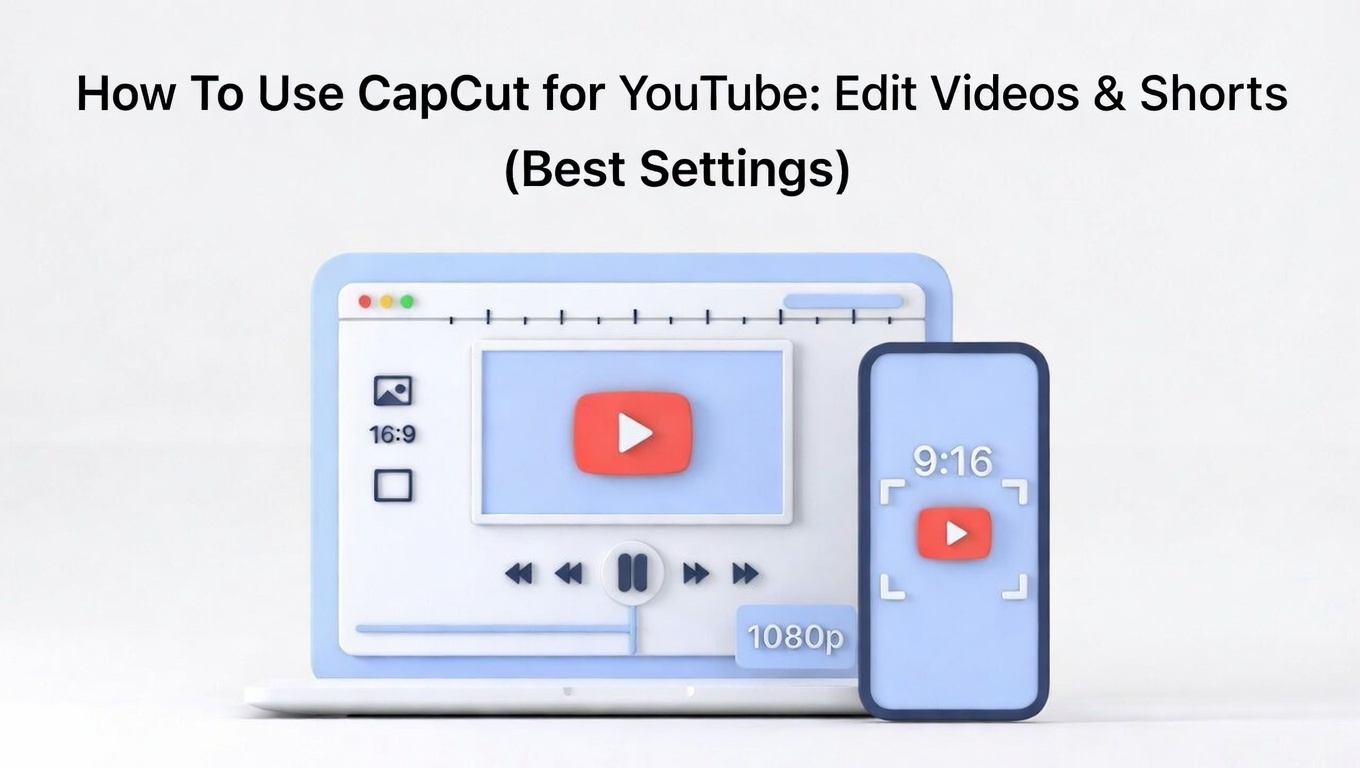
How to Use CapCut for YouTube (16:9 + Shorts Workflow)
Want to edit YouTube videos in CapCut without your content looking “mobile” or messy?
You can use CapCut for YouTube to edit both standard videos (16:9) and YouTube Shorts (9:16)—without jumping into complicated software.
In this guide, you’ll learn the exact CapCut workflow for YouTube: the right canvas size, the key tools that matter, and the best export settings so your videos upload sharp and look great on any screen.
Can You Edit YouTube Videos on CapCut?
Yes, you can edit YouTube videos on CapCut easily, and it works for both standard YouTube videos and YouTube Shorts.
If you need clean cuts, smooth pacing, captions, music, voiceovers, and sharp exports, CapCut covers the basics really well without feeling complicated.
It’s especially useful if you want:
- Fast editing for vlogs, tutorials, reviews, and talking-head videos
- Shorts-style pacing (zoom cuts, captions, quick transitions)
- Simple effects and text overlays that look modern
And if you’re editing longer videos, CapCut can still work—just keep your project organized and export in the right settings so your upload stays sharp.
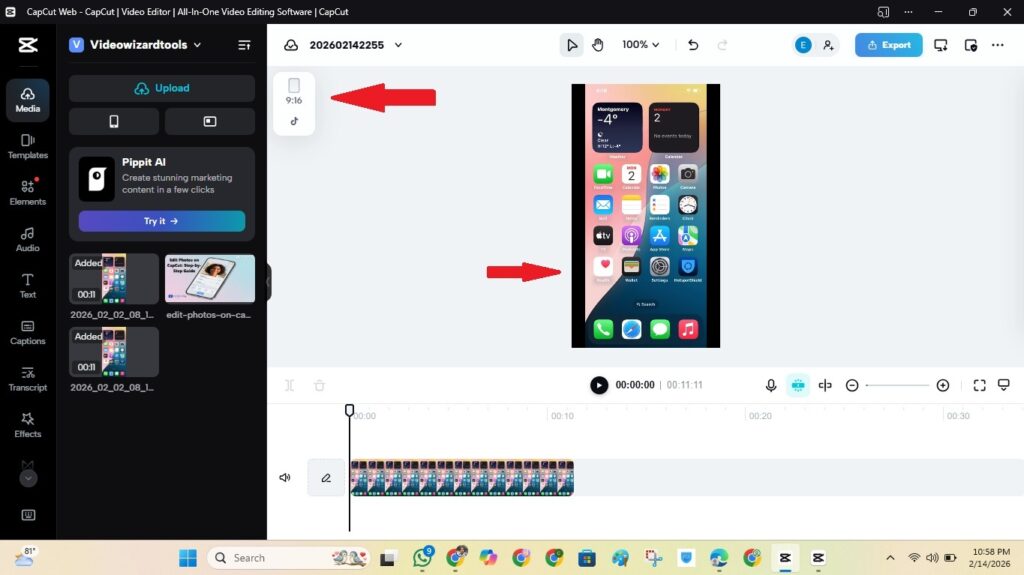
CapCut for YouTube: Pick Your Format First (16:9 vs Shorts)
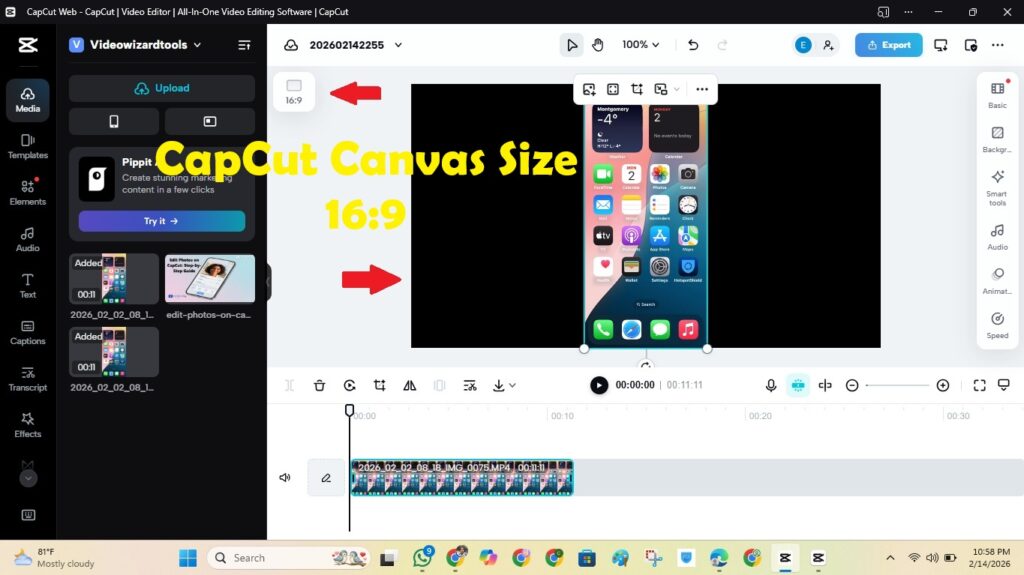
Before you edit anything, decide what you’re making. This one step makes the whole project easier—and stops weird cropping later.
Standard YouTube videos (long-form)
- Use: 16:9
- Best for: tutorials, vlogs, reviews, gaming, talking-head videos
- Tip: keep titles and important text inside the “safe” middle area so it looks good on phones and TVs
YouTube Shorts
- Use: 9:16 (vertical)
- Best for: quick tips, highlights, clips, reactions
- Tip: keep captions away from the very bottom so YouTube’s buttons don’t cover them
Once your format is set, you can use CapCut for YouTube with the right project settings and export options so your upload stays sharp.
If you also edit for TikTok or Reels, see our guide on CapCut for social media
Best CapCut Settings for YouTube Quality
The fastest way to make your uploads look professional is to set your project correctly, then export with the right settings.
Project settings (do this first)
- Choose the right canvas: 16:9 for standard YouTube videos, 9:16 for Shorts
- Match your frame rate: use the same FPS your footage was recorded in (usually 30fps or 60fps)
- Keep it consistent: mixing FPS and random clip sizes can make motion look less clean
Best export settings for standard YouTube videos (safe defaults)
- Resolution: 1080p (use 4K only if your original footage is 4K)
- FPS: match your footage (30 or 60)
- Quality/bitrate: High / Best (avoid “smaller file”)
- Format: MP4
Best export settings for YouTube Shorts
- Resolution: 1080 × 1920
- FPS: match your footage (30 or 60)
- Quality/bitrate: High / Best
- Format: MP4
Quick rule: exporting 4K from a 1080p clip won’t create real detail. It usually just makes a bigger file.
Next, let’s edit your video using a simple workflow that works for both long videos and Shorts.
Step-by-Step: Edit a YouTube Video in CapCut
If you follow this workflow, your edits will feel cleaner, faster, and more “YouTube-ready” (instead of random clips glued together).
Step 1: Import your footage and get organized
- Tap New Project and import your clips.
- Put your best clip first (hook), then arrange the rest in order.
- Trim obvious mistakes before you add effects.
Step 2: Cut for pacing (the part that makes videos bingeable)
- Remove long pauses, repeated lines, and dead space.
- Keep cuts tight—especially in the first 30 seconds.
- Use Split for quick jump cuts.
Step 3: Add B-roll, images, or screen recordings
- Use B-roll to cover cuts, add context, and keep attention.
- Zoom slightly on key moments (don’t overdo it).
- Use overlays for extra clips, reactions, or screenshots.
Step 4: Use transitions (but keep them minimal)
- Use simple transitions only when you change scenes or topics.
- Avoid stacking flashy transitions—it can make YouTube videos feel messy fast.
Step 5: Add text, titles, and on-screen labels
- Add short titles to introduce sections (especially for tutorials).
- Keep text big enough for phones.
- Stick to one or two fonts for a consistent look.
Step 6: Fix your audio (this matters more than effects)
- Add voiceover if needed and keep it clear and loud enough.
- Lower the background music so it doesn’t fight your voice.
- Add sound effects only when they help (not everywhere).
Step 7: Add captions (optional, but great for retention)
- Captions help viewers follow along—even without sound.
- Use auto-captions if available, then quickly correct mistakes.
- Keep captions away from the very bottom of the screen.
Step 8: Export with the right settings
Now you’re ready to export. If you want sharp uploads, don’t guess—use the export settings section above as your default.
Once you use CapCut for YouTube with this workflow, editing becomes a repeatable system you can use for every upload.
Captions, Titles, and On-Screen Text That Work on YouTube
Text can make your videos easier to follow—especially for tutorials, reviews, and talking-head content. The key is keeping it clean and readable.
Use text to guide the viewer (not decorate)
- Add short section titles to introduce what’s coming next.
- Use quick labels for steps, prices, tools, or key points.
- Keep words short—YouTube viewers don’t want to read paragraphs on-screen.
Make text mobile-friendly
- Use bigger font sizes than you think you need.
- Keep important text away from the edges of the screen.
- For Shorts, keep captions higher so buttons don’t cover them.
Captions (optional, but powerful)
- Captions can boost retention because people watch in noisy places or without sound.
- If you use auto-captions, do a quick pass to fix names and keywords.
- Keep caption style consistent across videos for a “channel look.”
Audio Setup That Makes Your YouTube Videos Feel “Pro”
On YouTube, people will forgive “okay” visuals. But bad audio makes them click off fast. So even if you keep the edit simple, get the sound right.
Voiceover and talking audio (keep it clear)
- Record in a quiet space and keep the mic close.
- If your audio sounds harsh or messy, lower it slightly and avoid boosting too much.
- If you see noise reduction options, use them lightly so your voice doesn’t sound robotic.
Background music (don’t let it fight your voice)
- Keep music low under speech, so every word stays clear.
- Fade music in and out at the start/end of sections so it feels smooth.
- Drop music even lower during important explanations or calls to action.
Sound effects (use them like seasoning)
- Add subtle effects for clicks, transitions, or emphasis.
- Avoid using effects on every cut—it gets annoying fast.
Once your audio is clean, the whole video feels higher quality—even before you add effects. That’s a big reason many creators use CapCut for YouTube as a fast, reliable editing workflow.
Upload Tips So Your Video Doesn’t Look Blurry on YouTube
Your export can be perfect and still look soft right after upload. That’s usually YouTube processing—not your edit.
1) Give YouTube time to finish processing
- Your video may appear blurry at first, then get sharper as HD finishes processing.
- Check again later before assuming something is wrong.
2) Upload the original exported file
- Don’t upload a version you already downloaded from TikTok/Instagram (those are already compressed).
- Avoid screen-recording your video—quality drops fast.
3) Don’t “fix” quality by re-exporting multiple times
- Repeated exports can reduce detail.
- Always export from your original project and original clips when possible.
4) Use the right format and settings every time
- Export in MP4, at 1080p (or 4K only if your footage is 4K).
- Match your FPS (30 or 60) so motion looks clean.
Once you use CapCut for YouTube with consistent export settings and clean uploads, your videos will look sharper and more professional across devices.
Frequently Asked Questions
Conclusion
If you want a simple workflow that actually works, use CapCut for YouTube like this: pick the right format first (16:9 or Shorts), cut for pacing, keep text readable, and clean up your audio.
Then export in 1080p (or 4K only if your footage is 4K), match your FPS, and choose High/Best quality so your upload stays sharp.
Do that consistently, and your videos will look more professional, feel easier to watch, and help your channel grow without needing expensive editing software.
Related CapCut Guides (Read Next)
Official Resources
- CapCut (Official Website)
- CapCut on the App Store (iPhone/iPad)
- CapCut on Google Play (Android)
- YouTube Creators (Official Hub)
- YouTube Help Center (Official)
- YouTube Upload & Encoding Recommendations (Official)
social media platforms, check out our full guide on using CapCut for social media to explore its full potential.