
Ever watched one of those videos where someone’s mouth moves perfectly to a song or voiceover and thought, “Wait, how did they sync that so well?” You’re not alone.
Lip-sync videos have taken over TikTok, YouTube Shorts, and Reels, and CapCut, being one of the most popular editing apps out there, has become a go-to for making them.
So, does CapCut have lip sync?
Yes, it does. CapCut includes both manual and AI-powered lip sync tools that let you match your video’s mouth movements to audio tracks or even generate talking videos using AI voices.
The catch? You need to know how and where to find the tools and how to make the sync look realistic. I will show you everything in the article.
Let’s break it down step-by-step so you can master CapCut’s lip sync like a pro.
Also read: CapCut Lip Sync Not Working? Step‑by‑Step Fix Guide
What Is Lip Sync in Simple Terms?
Before jumping into CapCut’s version of lip sync, let’s get the basics clear.
Lip sync is when you align a person’s lip movement in a video with audio — whether it’s dialogue, a song, or a sound clip. The goal is to make it look like the person is actually saying or singing the words.
There are two main ways creators do this:
- Manual syncing: You record or import your video, then adjust the timing of the audio clip frame by frame until everything lines up perfectly.
- Automatic (AI) syncing: The app uses artificial intelligence to analyze the mouth movement (or even generate it) and match it to the audio automatically.
Does CapCut Actually Have Lip Sync?
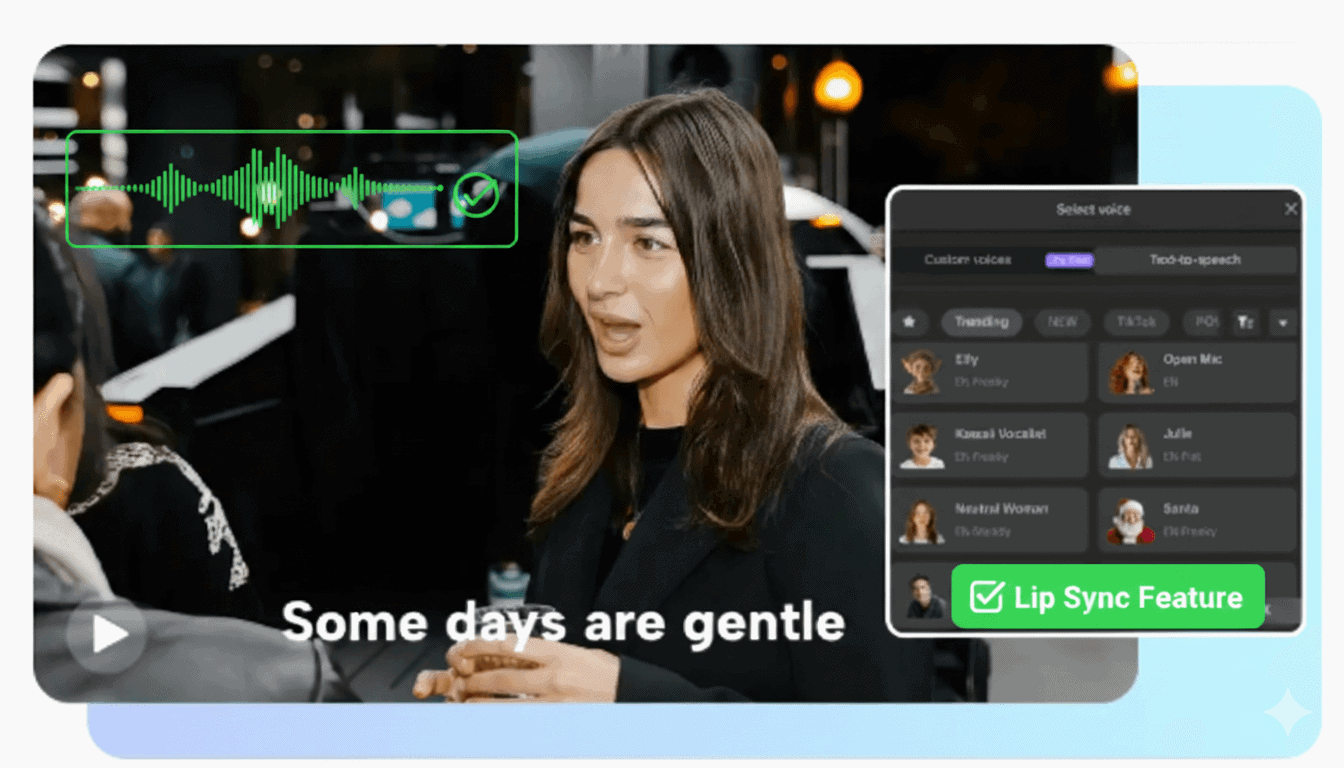
Yes, CapCut now includes a Lip Sync feature, available on both desktop and mobile (though it’s more advanced on desktop).
It uses AI to automatically generate mouth movements that match the words or lyrics of an audio clip.
It’s not magic, but it’s close. Here’s what you can do with it:
- Make a person or photo “talk” using text or recorded voice.
- Automatically match a recorded voice to a face in your video.
- Sync your mouth movements to music for lip-sync challenges.
However, like any AI tool, it has its limits. The results depend heavily on lighting, camera angle, and how clearly your mouth is visible in the clip.

How to Use Lip Sync Feature in CapCut (Step-by-Step for Desktop)
Here’s a beginner-friendly, super-clear guide to getting a still image or video to look like it’s talking using CapCut on desktop.
Read each step slowly and follow along, anyone can do this.
What you need first
- CapCut for Desktop (the PC app).
- An image or video clip you want to animate.
- Either text (for CapCut’s Text-to-Speech) or an audio file (your recorded voice or another voice clip).
Step By Step Tutorial:
1. Start a new project and import your media
Open CapCut → Create project → click Import (or drag your image/video into the Media panel).
Drop the media onto the timeline by clicking the green + or dragging it down.
Think of the timeline as your stage — you must place the picture where the show will happen.
2. Open the Lip Sync control
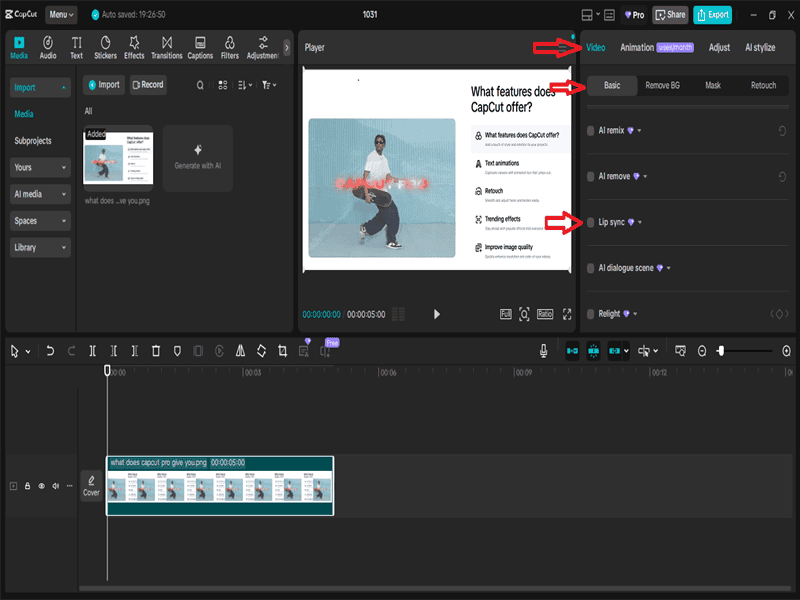
- Select the clip (image or video) on the timeline.
- On the right, go to Video → Basic and find Lip Sync down the list.
- Check the box next to Lip Sync to turn it on. (Refer to the image above for visual direction)
3. Choose how you’ll provide the audio
You have two simple options:
A — Text-to-Speech (TTS)
- Click the box to enter text. Type what you want the subject to say.
- Choose a voice from the list (click More voices to see more).
- (Optional) Use Custom voices to clone a voice — CapCut will ask you to record and accept terms.
B — Upload your own audio
- Click Add audio or upload an audio file from your computer.
- CapCut will read the audio and match the lips to it.
Tip: Uploaded natural audio (your own voice or a high-quality AI voice) usually produces better, more natural lip movements than simple TTS.
4. Pick a generation model: Standard vs Vivid
- Standard: keeps your original aspect ratio (e.g., 16:9). Faster to generate.
- Vivid: produces more natural face and mouth movement but makes the clip square (1:1) and takes longer.
If you want the most realistic result for a talking face, choose Vivid. If keeping the original size is more important, use Standard.
5. Generate and watch progress
Click Generate. You’ll see a processing percentage while the AI works. Wait until it finishes, then press play to preview.
6. Export your finished clip
When you’re happy, go to Export and choose resolution, format, and bitrate — then export the MP4.
Important extra notes (things beginners often miss)
- AI credits: Lip Sync uses CapCut AI credits. Longer audio or using Vivid costs more. Keep an eye on your credit balance. (CapCut Pro users get a monthly credit allowance.)
- Watermark notice: The editor may show an “AI Generate” overlay inside the project. You usually cannot remove it inside the same project. A common workaround: export the video, re-import that exported file into a new CapCut project, then crop or mask the watermark out.
- Head/face quirks: If you see odd hair or head parts not moving, try the Vivid model or a different audio/voice — some voices sync better than others.
- Quality tip: If TTS has weird pauses or mispronunciations, use a cleaner audio recording or a high-quality external voice generator and upload that audio instead.
How to Use Lip Sync on CapCut Mobile (Easy Step For Beginners)
Wether you are using Android or iPhone this step below is for you:
What You’ll Need
- The CapCut mobile app (latest version).
- A photo or video you want to animate.
- Either a voice recording, music, or text to generate speech.
Step-by-Step Tutorial
1. Open CapCut and Start a New Project
- Tap New project on the home screen.
- Select the photo or video you want to use.
- Tap Add to bring it into your timeline.
Tip: For best results, use a clear, front-facing photo where the mouth is visible.
2. Find the Lip Sync Feature
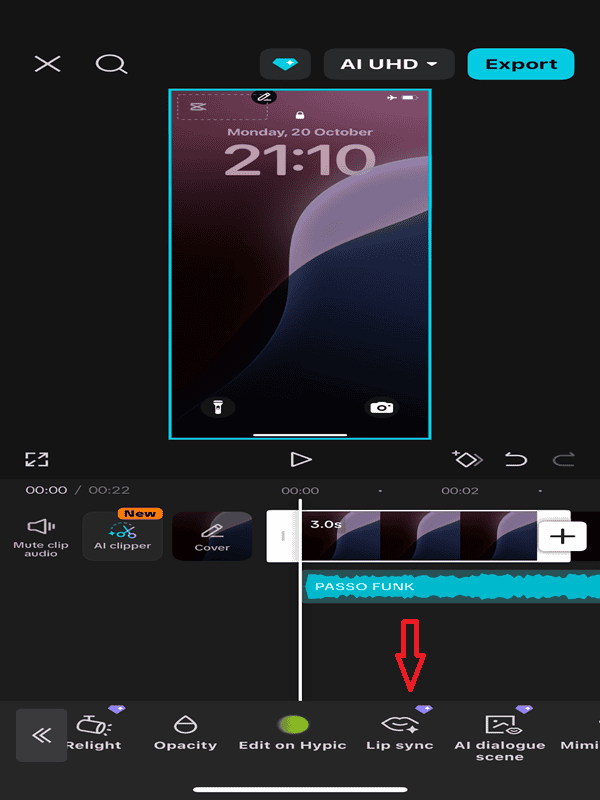
- Tap on your clip in the timeline.
- Look at the bottom toolbar and scroll sideways until you find Lip Sync.
- Tap it to open the Lip Sync control panel.
If you don’t see “Lip Sync,” update your CapCut app, the feature is still rolling out, and only appears in the latest versions.
3. Choose How You Want the Voice to Work
CapCut gives you two main ways to create lip sync:
Option A: Text-to-Speech (TTS)
- Tap Add text.
- Type what you want your image or clip to say.
- Choose a voice from the list (male, female, robotic, friendly, etc.).
- Tap Generate — CapCut will automatically move the lips to match the text.
Option B: Use Your Own Audio
- Tap Add audio → then Extracted or From device.
- Select your recorded voice or a sound from your gallery.
- CapCut will scan it and animate the lips automatically.
Using your own voice usually gives a more natural, expressive result (Highly recommended).
4. Pick Your Lip Sync Mode (Standard or Vivid)
After adding the voice, CapCut asks you to choose between:
- Standard: Keeps your original video size and exports faster.
- Vivid: Adds more realistic mouth and face movement, but makes your video square (1:1) and takes a bit longer to process.
If you want the best animation, pick Vivid.
If you care more about video layout, pick Standard.
5. Generate and Preview
Tap Generate. You’ll see a progress bar while CapCut’s AI works.
When it’s done, tap Play to preview your result.
- If the lip movement doesn’t match perfectly, try re-generating or using a different voice/audio.
- If your internet is slow, generation might take a minute — be patient!
6. Edit and Fine-Tune
You can now:
- Add text captions to match the speech.
- Add background music or sound effects.
- Adjust the speed or trim the clip.
- Add filters or transitions to make it more dynamic.
Everything else works just like a normal CapCut project.
7. Export Your Talking Clip
Once you’re happy with the lip sync:
- Tap the Export icon (top-right corner).
- Choose resolution (720p, 1080p, etc.).
- Tap Export again to save or share it directly to TikTok, Instagram, or YouTube.
Helpful Notes for Beginners
- AI Credits: Lip Sync uses CapCut’s AI feature, so you’ll need enough AI credits to generate. (Free users get a limited number; CapCut Pro users get more monthly credits.)
- Watermark Alert: Some generated clips may show an “AI Generate” watermark — this is normal. If it bothers you, crop it out after exporting.
- Photo Quality Matters: Blurry, low-resolution faces won’t sync well. Try using a sharper or brighter image.
- Voice Clarity Helps: If your audio is noisy or muffled, the animation may struggle to match. Record in a quiet space or use a clean voice file.
Quick Fixes For Common Issues With CapCut Lip Sync Feature
Even though CapCut’s Lip Sync feature is powered by smart AI, a few small issues can pop up especially if you’re using an older app version or a low-end device. Don’t worry, most problems are easy to fix.
1. Lip Sync option not showing?
If you can’t find the Lip Sync feature in your menu, it’s usually because your app isn’t updated.
Go to your app store and update CapCut to the latest version the Lip Sync tool is still being rolled out gradually, so new updates often include it.
After updating, restart the app and check again under the “Video” or “AI Tools” section.
2. Mouth not moving or syncing correctly?
If the lips don’t move properly or the timing feels off, it’s often due to unclear or noisy audio.
Try using a cleaner voice recording with less background noise, or re-generate using the Text-to-Speech option instead.
Also, make sure the face in your video or photo is well-lit, and front-facing AI lip tracking works best with visible mouth details.
3. App freezing or crashing during generation?
AI processing can be heavy on your device’s memory. If CapCut crashes while generating, close other open apps, clear some storage space, and try again.
You can also reduce your project’s length or resolution temporarily to make it easier for your phone or PC to handle.
Pro tip: CapCut’s AI Lip Sync feature requires a stable internet connection to process accurately. If generation fails or gets stuck, switch to a stronger Wi-Fi signal and retry.
Things You Must Do Before You Lip Sync in CapCut:
Even with AI, your results depend on how you set up your shot and edit. Here are a few things to keep in mind:
- Record clear, front-facing footage. The AI can’t sync lips it can’t see.
- Good lighting matters. Shadows or poor lighting can confuse the recognition system.
- Keep it short. The lip sync works best for clips under a minute.
- Match the emotion. If your voice sounds excited but your face doesn’t move much, it’ll feel off.
- Tweak manually. Even with AI, you’ll often need tiny manual adjustments to make it feel natural.
CapCut Lip Sync in Mobile vs Desktop — Which One’s Better?
Both the mobile and desktop versions of CapCut offer the AI Lip Sync feature, but they shine in slightly different ways.
If you’re editing on your phone, the mobile Lip Sync tool feels more instant and playful perfect for quick TikTok or Reels-style videos.
You can easily type text, choose a voice, and watch your photo or clip come alive in just a few taps. It’s designed for speed, simplicity, and sharing on the go.
On the other hand, CapCut for Desktop gives you more control. You get a bigger workspace, more editing layers, and detailed export settings.
It’s ideal when you want to polish your lip-synced video with effects, subtitles, or multiple clips before publishing.
Here’s the simple truth:
- Use CapCut Mobile when you want quick, social-ready results.
- Use CapCut Desktop when you need precision and a more professional finish.
Both versions use the same powerful AI engine, so whichever one you pick, your clips will still sync lips accurately — the choice depends on how and where you like to edit.
When CapCut’s Lip Sync Might Not Be Enough
CapCut’s AI Lip Sync tool is fantastic for creators who want to make short, engaging videos quickly, especially for TikTok, Instagram, or YouTube Shorts.
It handles most lip-syncing tasks automatically, giving you realistic mouth movement with very little effort.
However, if you’re creating professional-grade projects like commercials, short films, or high-end animation, you might eventually feel limited.
CapCut focuses on speed and simplicity, not frame-by-frame precision. For projects that require manual fine-tuning, like syncing exact syllables, adding layered sound design, or matching character expressions, you’ll get better results by starting your lip sync in CapCut, then exporting your clip to a more advanced editor such as Adobe Premiere Pro or DaVinci Resolve.
That said, for most social media creators, educators, and content marketers, CapCut’s Lip Sync is more than enough.
It’s fast, automated, and visually convincing, a perfect balance of quality and convenience for everyday videos.
Final Thoughts
So yes, CapCut does have lip sync, and it’s surprisingly capable. You can generate automatic mouth movements with AI or sync audio manually for total control.
It’s a creative tool for anyone making short-form videos, AI voiceovers, or meme-style clips where people or even pets appear to “talk.”
Just remember: keep your lighting good, your audio clean, and your clips short for the most realistic results. With a few tweaks, you’ll be creating seamless lip-sync videos that look effortless.
FAQs
Does CapCut lip sync require credits?
Yes, CapCut’s AI lip sync feature now requires credits to use. It was mostly free before, but in 2025, they switched to a credit system for AI tools like lip sync.
You get some free credits daily, but heavy use needs a Pro subscription or extra purchases. Check the app for your exact limits.
Is CapCut lip sync free?
Yes, CapCut’s AI lip sync tool is free to use. You can create synced videos without paying, though some advanced features or heavy use might need a Pro upgrade for extras like more voices or no watermarks.
Does the feature work on both mobile and desktop?
It’s available on both, but the desktop version has more options and usually better performance.
Can I upload my own voice to use with lip sync?
Absolutely. You can record or upload any voice track and sync it with your video.
Can I make a photo talk in CapCut?
Yes. Import a photo, go to Effects or AI tools, pick Talking Photo or Lip Sync, add text or audio, and the mouth moves.
Does it work with music or just speech?
Best with speech. It can sync to music for lip-sync videos, but results vary with songs.
What if my lip sync looks slightly delayed?
Open the timeline, zoom in, and drag the audio track left or right by a few frames to match.
Why can’t I find the lip sync option in my app?
Update CapCut to the latest version. Some regions or old installs hide it. Desktop version always has it.
Does CapCut’s AI lip sync support multiple languages?
Yes. It works with English, Spanish, French, Chinese, and more in the current version.
Can I use CapCut lip sync offline?
No for AI lip sync—it needs internet. You can adjust manually offline after generating online.
Can I apply lip sync to more than one clip?
Yes. Add the effect to each clip one by one.
How long can a lip-sync video be?
Up to 15 minutes, but best under 1 minute for sharp results.
Can I combine lip sync with other effects?
Yes. Use filters, stickers, text, or transitions together.
Is CapCut lip sync good enough for professional videos?
Good for social media and ads. For film or TV, use pro tools like Adobe After Effects.