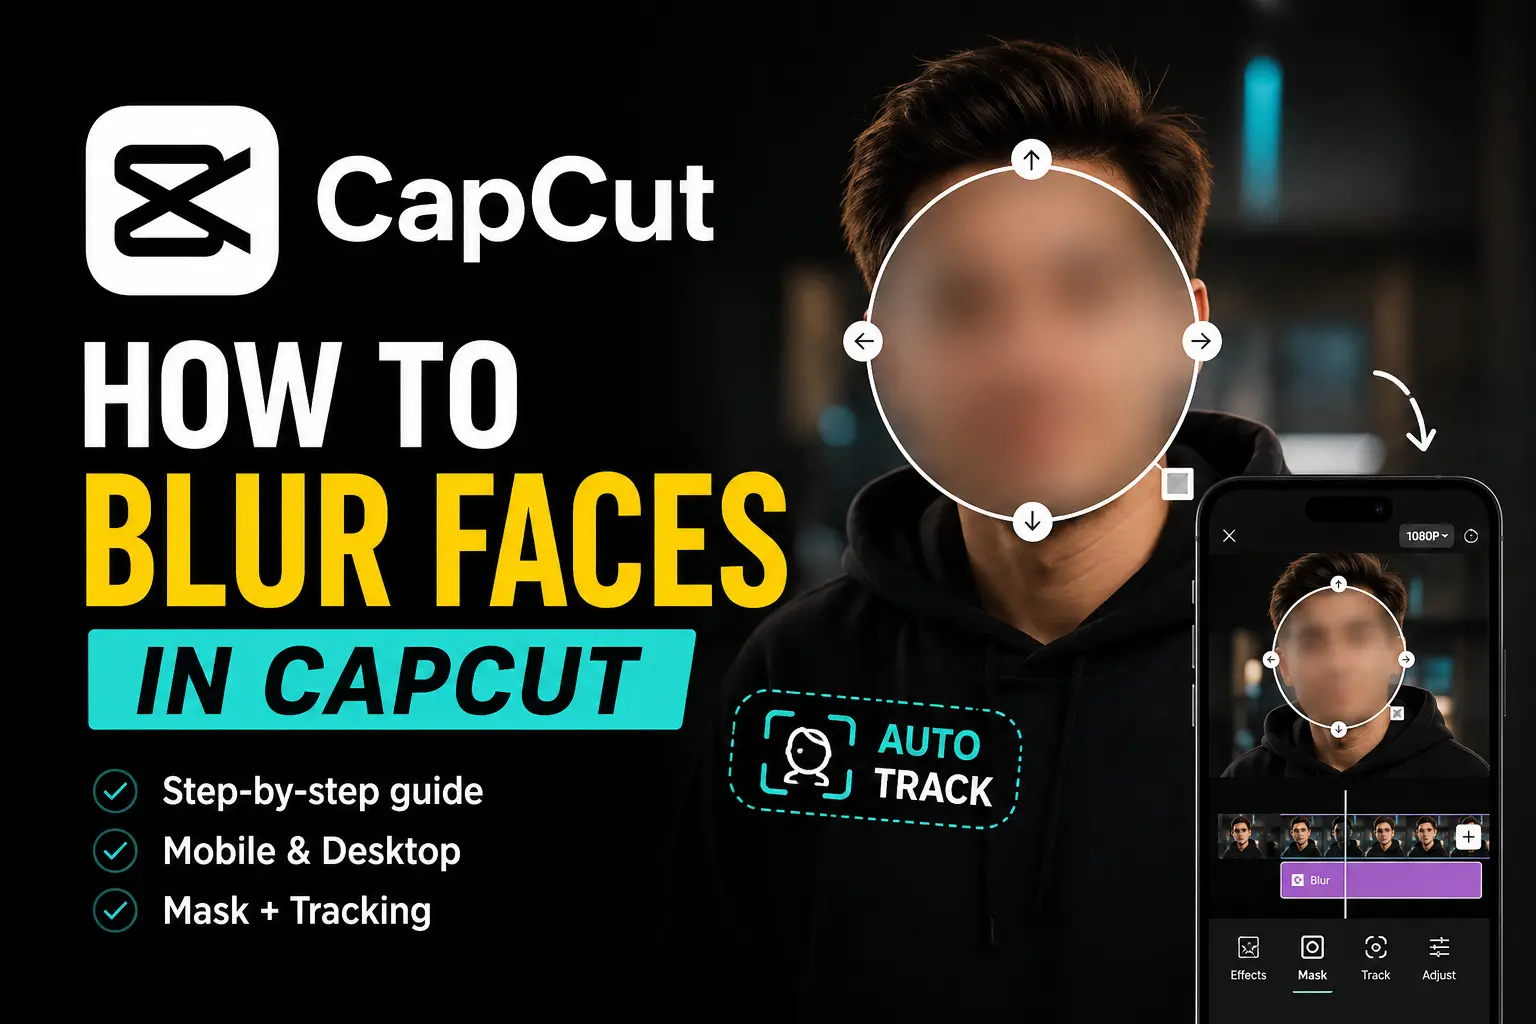
Many video creators need to hide faces before posting content online. Whether you’re protecting someone’s privacy, keeping a child’s identity off social media, or hiding strangers who appear in the background, a face blur effect can help.
The good news is that CapCut makes this possible. The app includes blur effects, masks, and tracking tools that let you cover faces without using separate editing software.
In this guide, you’ll learn how to use the CapCut Blur face feature in CapCut on both mobile and desktop, how face tracking works, and what to do if the blur doesn’t stay attached to a moving subject.
Table of Contents
- Does CapCut Have a Blur Effect?
- How to Blur Faces in CapCut on Mobile
- How to Blur Multiple Faces in CapCut
- How to Blur Faces in CapCut on Desktop
- Is the Blur Effect Free in CapCut?
- Can CapCut Blur Backgrounds and Videos Too?
- Will CapCut Face Blur Affect Video Quality?
- Frequently Asked Questions
- Final Verdict
Does CapCut Have a Blur Effect?
Yes, CapCut includes built-in blur effects that can be used to hide faces, obscure sensitive information, soften backgrounds, or add creative effects to your videos.
You can find these effects in the Effects panel and apply them to an entire clip or just a specific area of the screen. When combined with masks, tracking, or keyframes, the blur can be positioned exactly where it’s needed while leaving the rest of the video untouched.
Although CapCut doesn’t offer a dedicated face blur button, its editing tools make it easy to achieve the same result.
With a few adjustments, you can blur faces, license plates, documents, and other elements you don’t want viewers to see.
This flexibility is one of the reasons many creators choose CapCut for quick privacy edits and social media content.
Can CapCut Blur Faces in Video?
Yes. CapCut can blur faces in both recorded and imported videos.
You can apply a blur effect over a face, resize it to fit the subject, and then use tracking or keyframes to keep it aligned as the person moves throughout the clip.
This is especially useful when:
- Protecting the identity of children.
- Hiding strangers in public recordings.
- Creating anonymous interviews.
- Removing distractions from the frame.
- Following privacy guidelines for social media content.
For videos containing multiple people, separate blur layers can be used for each face. While this requires a little more editing, it produces a cleaner and more professional result.
If you’re new to CapCut, exploring some of the best features of CapCut can help you understand how masks, overlays, and effects work together during editing.
How to Blur Faces in CapCut on Mobile
The mobile version of CapCut is where most users create and edit videos. Fortunately, adding a face blur effect only takes a few minutes.
Step 1: Import Your Video
Open CapCut and tap New Project. Select the video from your gallery and add it to the timeline.
Step 2: Add the Video as an Overlay
In the bottom toolbar, tap Overlay > Add overlay, then select the same video. This adds a second copy of your clip to the timeline. Drag it so it sits under the original clip — not above it.
Note: Do not use the Copy/Duplicate button on the original clip — use the Overlay route instead.
Step 3: Apply the Blur Effect
Select the overlay clip, then navigate to:
Effects > Video Effects > Lens > Blur
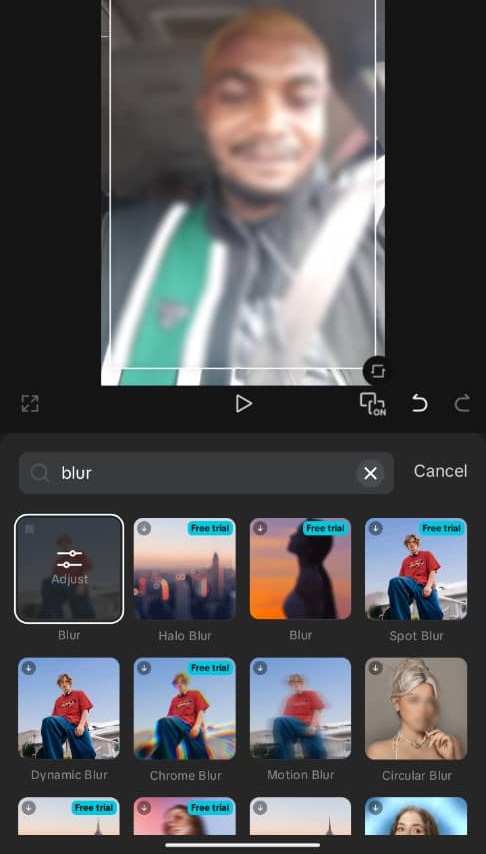
Apply the blur and adjust its duration to match the full clip. At this stage the entire overlay will appear blurred — that’s expected.
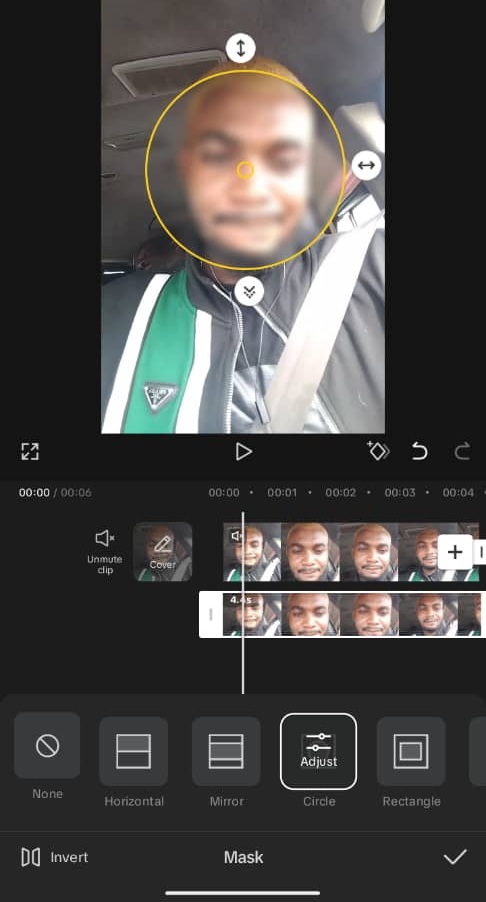
Step 4: Add a Mask
With the overlay clip still selected, tap Mask (scroll to the far right) and choose a shape — circle works well for faces. Resize and reposition it over the face, and adjust feathering for smoother edges. The blur will now appear only inside the mask area, while the rest of the video stays clear.
Step 5: Track the Face
If the person moves, CapCut can track the face automatically:
- With the mask applied, tap Track mask.
- Tap Track — CapCut will automatically move the mask to follow the face throughout the clip.
If the auto-tracking isn’t accurate enough, you can also use keyframes to manually adjust the mask position at key moments.
Many creators rely on masks and keyframes for this process. If you’re unfamiliar with keyframe animation, our guide on how to use keyframes in CapCut can help you keep effects attached to moving subjects.
💡 Pro tip (paid feature): If you’re on CapCut Pro, you can skip manual tracking entirely by using Camera Tracking. Select your overlay clip, scroll to Camera Tracking in the bottom toolbar, choose Face as the tracking subject, then tap Track. CapCut’s AI will automatically follow the face across the entire clip — no keyframes needed. Note that Camera Tracking is a Pro-only feature; free users will see a “Free trial” option before being prompted to upgrade.
How to Blur Multiple Faces in CapCut
Videos often contain more than one person, especially when filming in public places.
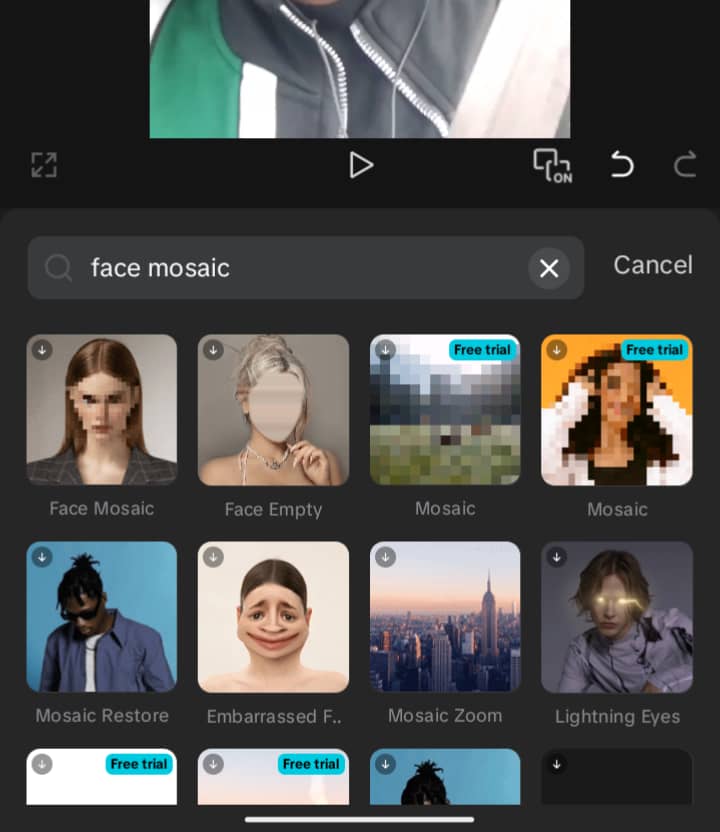
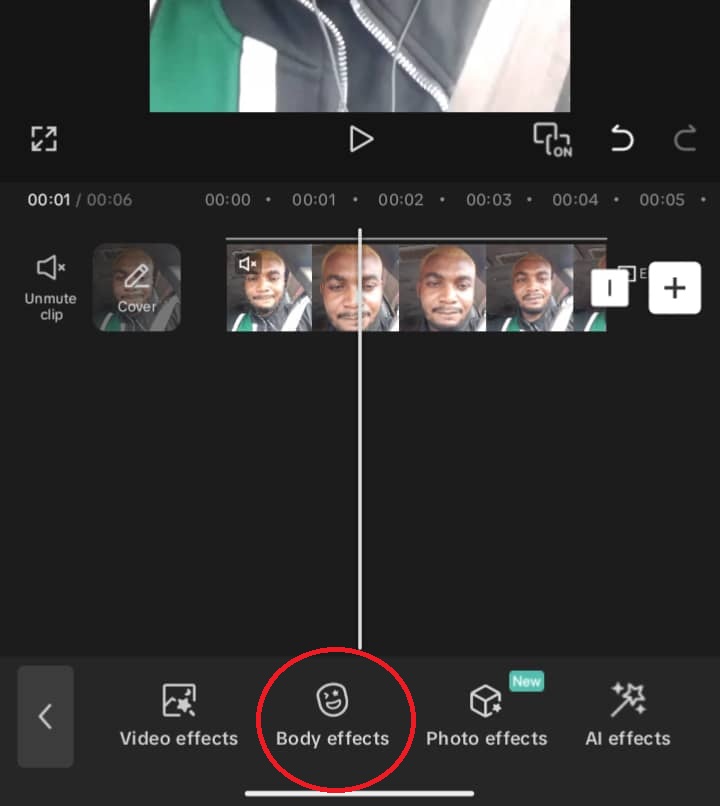
The quickest way to blur multiple faces at once is CapCut’s built-in Face Mosaic effect.
Go to Effects → Body Effects → Face Mosaic. CapCut will automatically detect all visible faces in the clip, track them as they move, and keep the blur aligned — no manual masks or keyframes needed. You can adjust blur strength, edge smoothness, and tracking accuracy from the same panel.
For more precise control — for example, if you want to blur one face but not another, or if Face Mosaic isn’t tracking accurately — add a separate overlay layer and mask for each individual face following the same steps outlined above.
This gives you independent control over each person and lets you fine-tune the blur area without affecting the rest of the frame.
For clips with heavy movement where auto-tracking loses the face, combining masks with keyframes gives the most reliable results.
What to Do If the Blur Doesn’t Follow the Face
If the blur drifts away from the subject during playback, it’s usually down to fast movement, the face briefly leaving the frame, sudden lighting changes, or a mask that’s too small to maintain a lock.
A few things that typically fix it: add more keyframes at the moments where tracking slips, use a slightly larger mask, or split the clip into shorter segments and track each one separately.
Re-running Track Mask from scratch on a problem section often helps too. Always preview the full clip before exporting, tracking errors are much easier to catch during playback than frame by frame.
How to Blur Faces in CapCut on Desktop
If you edit videos on a computer, CapCut Desktop gives you more precision when positioning and tracking blur effects. The workflow differs slightly from mobile and offers better control for longer projects.
Step 1: Import your video
Open CapCut Desktop, create a new project, and drag your video into the timeline.
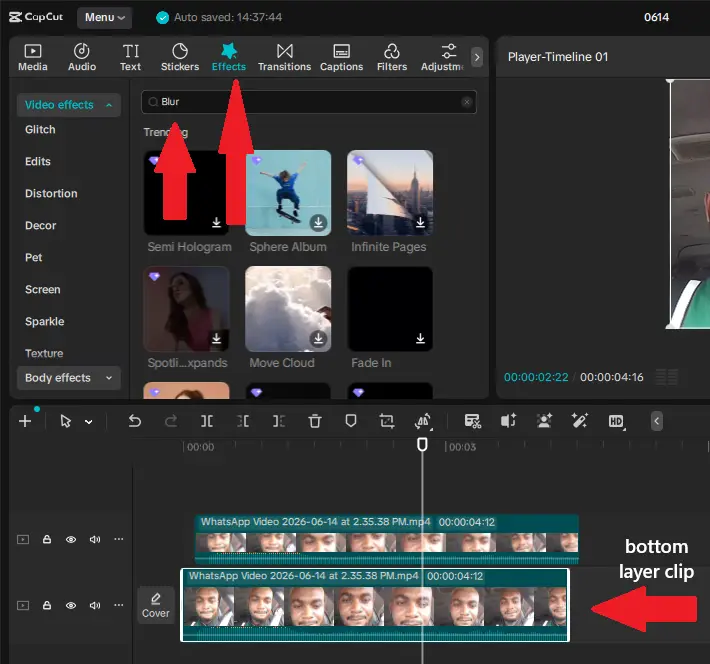
Step 2: Duplicate and apply the blur
Copy and paste your video clip to create a second layer directly above the original. Select the bottom layer and apply the blur effect via Effects → Video Effects → search “Blur”. Adjust the blur intensity to your liking.
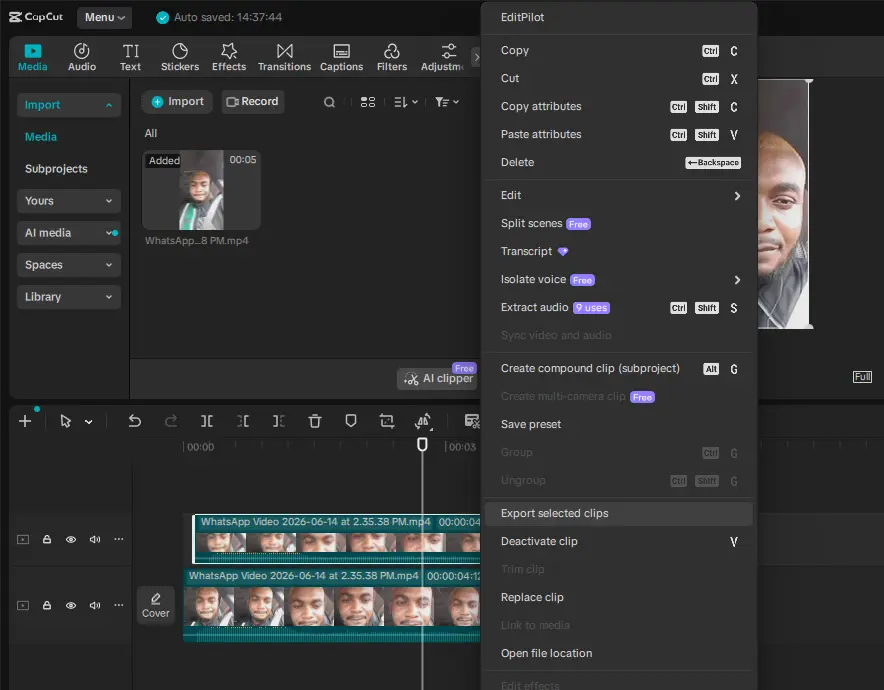
Then right-click both layers and select “Create Compound Clip” — this bundles them into a single editable unit so the blur and mask work together cleanly.
Step 3: Add a mask
With the compound clip selected, go to the Video tab in the right-hand panel and click Mask → Add Mask. Choose a shape — circle works well for faces — and drag it over the face in the preview window. Click Reverse in the mask panel so the blur only appears inside the mask area, leaving the rest of the frame clear.
Step 4: Track the face
If the subject moves, scroll to the bottom of the Mask panel and click Track Mask → Track. CapCut will automatically generate keyframes that follow the face throughout the clip.
Note that CapCut desktop doesn’t support manually adding keyframes directly to blur effects, so Track Mask is your main option for moving subjects.
If you run into issues with tracking, check out our guides on CapCut mask and keyframes and fixing CapCut keyframe problems.
Is the Blur Effect Free in CapCut?
Yes, for most users, the core blur tools are free. You can blur faces using standard blur effects, masks, and keyframes without a Pro subscription.
That said, some AI-powered features like Camera Tracking are locked behind CapCut Pro, and which effects are free vs. paid can vary by region and app version.
If you’re not sure what your plan includes, it’s worth checking the CapCut Free vs Pro breakdown or the latest CapCut pricing plans.
Can CapCut Blur Backgrounds and Videos Too?
Yes, CapCut’s blur tools go well beyond faces. You can blur entire video clips, backgrounds, specific objects, license plates, text, and sensitive information.
Background blur is especially popular for making subjects stand out or creating a cinematic depth-of-field look. The process follows the same logic as face blurring: apply the blur effect, then use a mask to target the background area while keeping the subject sharp.
If you’re creating content for social media, combining blur with some of the best CapCut effects for social media videos can give your edits a more polished finish.
Will CapCut Face Blur Affect Video Quality?
The blur effect itself only affects the selected area of your video. It doesn’t automatically reduce the quality of the entire export.
However, poor export settings can make the finished video appear soft, pixelated, or blurry.
Before exporting, review the best CapCut export settings to maintain maximum quality.
If your footage already looks degraded after export, our guide on why CapCut videos become blurry after export can help identify the cause.
Frequently Asked Questions
Does CapCut have a blur effect?
Yes. CapCut includes several built-in blur effects on both mobile and desktop. The most commonly used for privacy purposes is the standard Blur effect, found under Effects > Video Effects > Lens > Blur. There are also additional options like Halo Blur, Circular Blur, and Motion Blur depending on your app version.
Does CapCut have a blur tool specifically for faces?
Not a dedicated one-tap face blur button, but CapCut does have Face Mosaic under Effects > Body Effects, which automatically detects and blurs all visible faces in a clip. For more control over a single face, the recommended approach is combining a blur effect with a circular mask, as covered in the step-by-step guide above.
Can CapCut blur faces in a video while keeping the rest clear?
Yes. This is done using the mask tool. After applying a blur effect to an overlay layer, you add a circular or rectangular mask and position it over the face. Only the area inside the mask will appear blurred — everything outside stays sharp. You can then use Track Mask to keep the blur on the face as it moves.
Can CapCut blur a video or just parts of it?
Both. You can apply a blur effect to an entire clip to blur the whole video, or use masks to target specific areas — faces, backgrounds, license plates, or any object. The mask tool gives you full control over which part of the frame the blur affects.
Can CapCut blur on mobile and desktop?
Yes, blur effects and masking are available on both the CapCut mobile app (iOS and Android) and CapCut Desktop (Windows and Mac). The core tools are the same on both platforms, though the desktop version uses a slightly different workflow involving a compound clip, which gives you more precision for detailed edits.
Final Verdict
CapCut gives you everything you need to blur faces without leaving the app — whether you’re protecting someone’s identity in a street video, complying with privacy guidelines before posting, or simply keeping unwanted faces out of your content.
On mobile, the overlay and mask method works well for most situations, and the built-in Track Mask feature handles moving subjects without requiring any manual frame-by-frame adjustments.
For multiple faces, Face Mosaic automates the whole process. On desktop, the compound clip workflow gives you more precision and control, making it the better choice for longer projects or footage where tracking accuracy really matters.
Beyond faces, CapCut handles background blur, object blur, license plates, and full-clip blur just as cleanly — making it one of the more versatile free editors available on both mobile and desktop.
For most creators, there’s no need to bring in a separate privacy or blurring app. The tools are already there.
The main limitation worth knowing is that Camera Tracking — the most powerful face-following feature sits behind the Pro plan. But for the majority of use cases, the free tools are more than capable of producing clean, professional results.