
Have you ever opened CapCut to edit a video, only to realize the clip you need is sitting in Google Photos and nowhere to be found inside CapCut?
It happens more often than you might think.
You can see the photo or video in Google Photos, but when you open CapCut, it feels like the file has disappeared.
The good news is that CapCut can use media stored in Google Photos. The catch is that the file usually needs to be downloaded or made available locally before CapCut can import it.
In most cases, the problem isn’t that CapCut doesn’t support Google Photos. It’s that Google Photos stores media in the cloud, while CapCut works best with files it can directly access on your device.
Can CapCut Use Google Photos?
Yes, CapCut can use photos and videos from Google Photos.
However, if the media only exists in Google Photos cloud storage, CapCut may not be able to import it until the file is downloaded to your phone, tablet, or computer.
Once the file is stored locally, you can import it into CapCut just like any other photo or video.
This applies to:
- CapCut Mobile (Android and iPhone)
- CapCut Desktop
- CapCut Online
If you’re unsure whether your media format is supported, check our guide on what file formats CapCut supports before troubleshooting further.
Why Google Photos Doesn’t Always Show Up in CapCut
The biggest source of confusion is that Google Photos and CapCut don’t work the same way.
Google Photos is primarily a cloud storage service. CapCut is a video editor.
That means Google Photos can display media that isn’t actually stored on your device anymore. You can see the thumbnail, preview the file, and even play it back. But CapCut may not be able to access the original file until it’s downloaded.
Think of it like looking through a shop window. You can see the item, but CapCut still needs the actual product in hand before it can work with it.
Other common reasons Google Photos media may not appear inside CapCut include:
- CapCut doesn’t have permission to access your photos or videos.
- The file is still stored only in the cloud.
- The media format isn’t fully supported.
- The file is extremely large.
- Your internet connection is unstable.
- The media is stored in a location CapCut cannot access.
If you’re working with large videos, you may also find our guide on whether CapCut can handle long videos and large files useful.
How to Use Google Photos With CapCut on Android
Android users usually have the easiest experience because Google Photos often integrates closely with the device gallery and file picker.
Even so, cloud-only files may still need to be downloaded before CapCut can see them.
Step 1: Download the File From Google Photos
- Open Google Photos.
- Find the photo or video you want to edit.
- Open the file.
- If the file is stored only in the cloud, download it to your device.
Once downloaded, the file will typically appear in your Photos, Gallery, Downloads, Camera, or Movies folder depending on your device.
Step 2: Import the File Into CapCut
- Open CapCut.
- Tap New Project.
- Browse your available media.
- Select the downloaded photo or video.
- Import it into your timeline.
If the file still doesn’t appear, the issue is usually permissions rather than Google Photos itself.
Step 3: Check CapCut Permissions
CapCut needs permission to access media stored on your device.
To verify this on Android (Option 1):
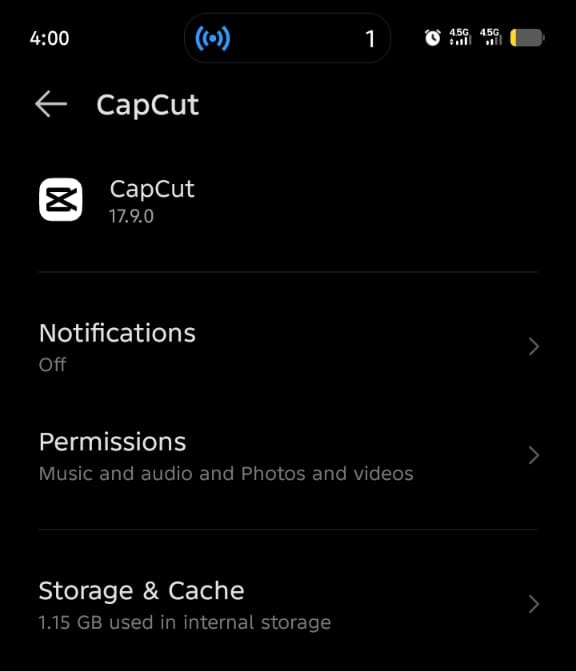
- Open Settings.
- Go to Apps.
- Select CapCut.
- Tap Permissions.
- Allow access to photos, videos, and storage.
Option 2
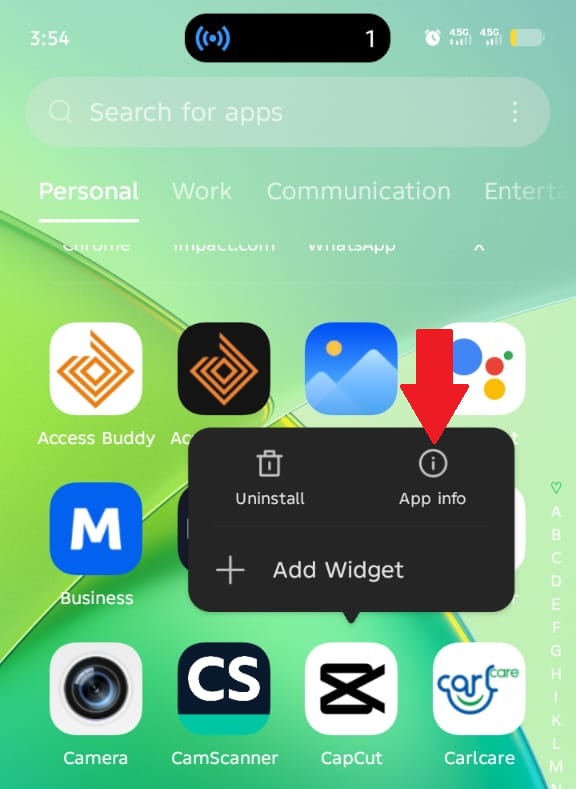
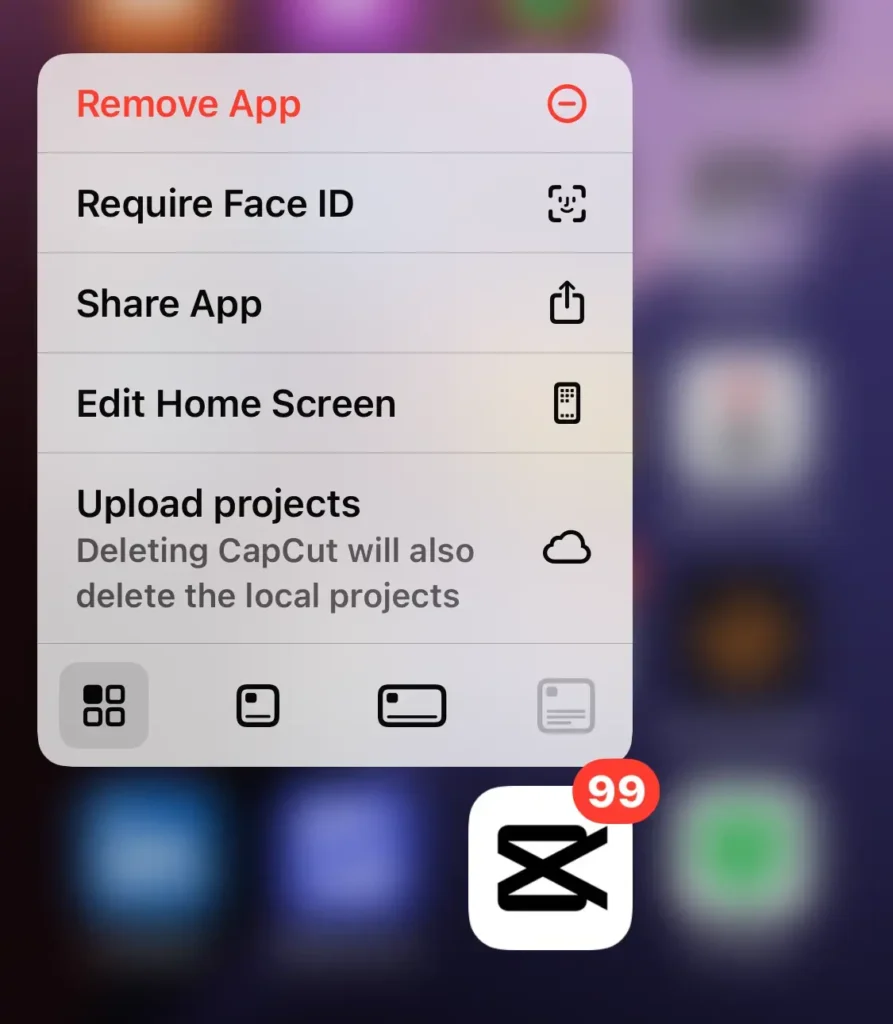
Long-press the CapCut app icon on your home screen or app drawer. A menu will appear with options such as Uninstall and App info.
Tap App info to go directly to CapCut’s settings screen, then select Permissions and allow access to photos, videos, and storage.
If access is denied or restricted, CapCut may show only some of your media files or none at all.
While reviewing permissions, it’s also worth understanding whether CapCut is safe to use and what access the app typically requires to function correctly.
How to Use Google Photos With CapCut on iPhone
On iPhone, the process is slightly different.
CapCut typically pulls media from your Photos library or Files app rather than directly from Google Photos. If the file only exists inside the Google Photos app, you’ll usually need to save it to your iPhone first.
Step 1: Save the File From Google Photos
- Open Google Photos.
- Find the photo or video you want to edit.
- Tap the file to open it.
- Use the Share or Download option.
- Save the file to your Photos app or Files app.
Step 2: Import the File Into CapCut
- Open CapCut.
- Tap New Project.
- Browse your Photos library.
- Select the saved file.
- Import it into your project.
If the file doesn’t appear immediately, close and reopen CapCut. Sometimes the media picker needs to refresh before newly downloaded files become visible.
Step 3: Check Photo Permissions on iPhone
If CapCut still can’t find the file, check its photo permissions.
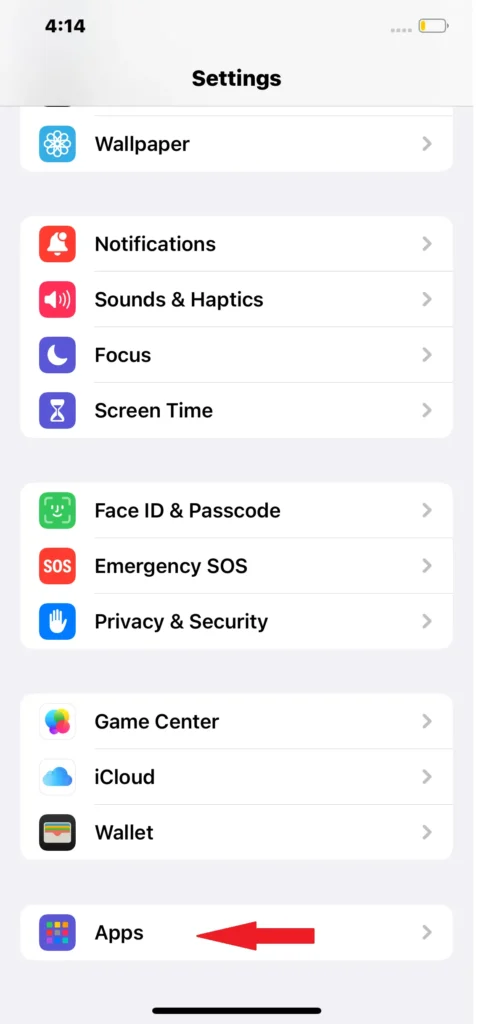
- Open Settings.
- Scroll down and tap Apps.
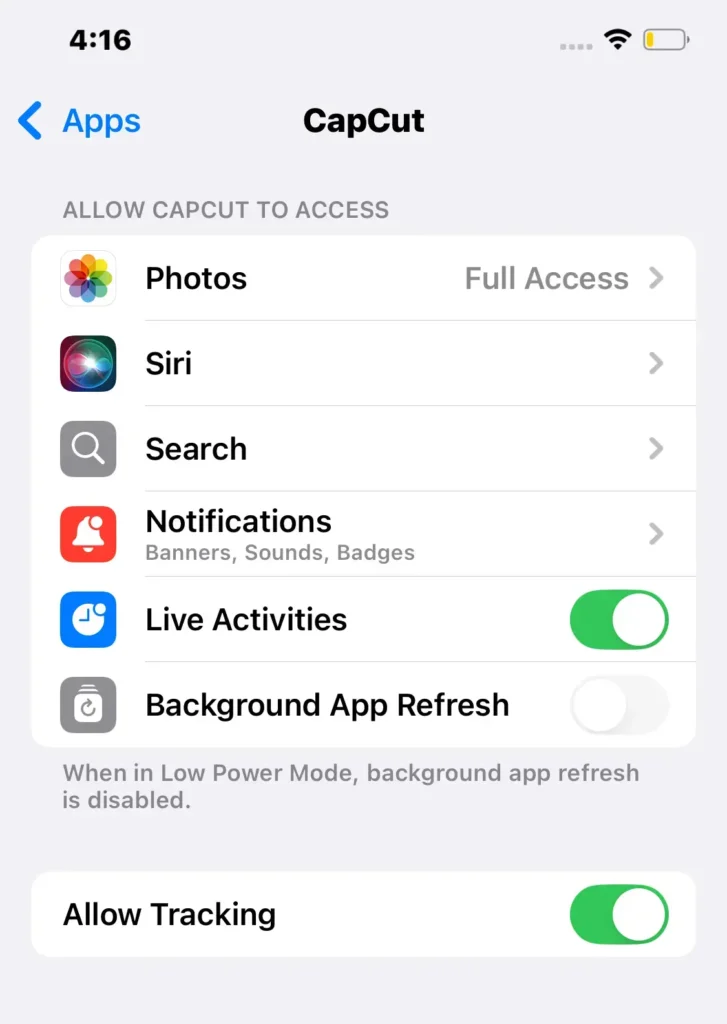
- Select Photos.
- Choose Full Access or allow the specific files you want to use.
Many import issues come down to limited photo permissions rather than a problem with Google Photos itself.
How to Use Google Photos With CapCut Desktop
CapCut Desktop works much like traditional video editing software.
You simply download the media from Google Photos and import it into your project.
- Open Google Photos in your browser.
- Locate the photo or video you want to edit.
- Download the file to your computer.
- Open CapCut Desktop.
- Create a new project.
- Import the downloaded media.
This is often the best option for larger videos because you have more storage control, a bigger timeline, and better performance when working with longer projects.
If you’re deciding between platforms, our comparison of CapCut Online vs Desktop vs Mobile can help you choose the right version.
How to Use Google Photos With CapCut Online
CapCut Online can also work with Google Photos files, but you’ll still need to upload the media into the editor.
- Open Google Photos.
- Download the file you want to edit.
- Open CapCut Online.
- Create a new project.
- Upload the downloaded file.
- Edit and export your video.
Keep in mind that large uploads can take longer, especially on slower internet connections.
Why CapCut Says Your Google Photos File Is Missing
If CapCut shows a “missing file,” “media unavailable,” or similar error, it usually means the editor has lost access to the original file.
Common causes include:
- The file only exists in cloud storage.
- The original file was deleted from your device.
- The file was moved to a different folder.
- CapCut no longer has permission to access the media.
- The file format isn’t supported properly.
- The media is still downloading from Google Photos.
This is one reason it’s smart to keep local copies of important videos while editing.
If you’re concerned about project safety, you may also want to read whether CapCut autosaves projects and drafts and where CapCut saves projects.
Why Google Photos Videos Can Use More Storage After Importing Into CapCut
A lot of users assume a Google Photos video won’t take up additional space because it’s already backed up online.
Unfortunately, that’s not how video editing works.
Once you download the file, your device stores a local copy. Then CapCut may generate cache files, project data, preview files, and exported videos.
A single video can quickly turn into multiple files.
If storage is becoming an issue, our guide on why CapCut takes so much storage explains what’s happening behind the scenes.
Best Workflow for Using Google Photos With CapCut
If you regularly edit videos stored in Google Photos, following a simple workflow can save a lot of frustration.
- Choose the photo or video in Google Photos.
- Download it to your device.
- Confirm the file opens correctly.
- Import it into CapCut.
- Edit your project.
- Export the finished video.
- Back up the final export to Google Photos.
This approach gives CapCut reliable access to the file and ensures you have a finished copy stored somewhere safe outside the app.
What to Do If a Google Photos Video Won’t Import Into CapCut
If the file refuses to import, try these fixes:
- Download the file from Google Photos again.
- Confirm the file is saved locally.
- Check CapCut permissions.
- Restart CapCut.
- Update CapCut to the latest version.
- Verify the file format is supported.
- Test a smaller video file.
If the video is particularly large, you may need to optimize it first. Our guides on large video files in CapCut and reducing video file size in CapCut can help.
Should You Download Google Photos Files Before Editing?
Yes.
If you’re planning a serious edit, downloading the file first is almost always the safest option.
CapCut performs best when it has direct access to the original media. Cloud-only files can cause import failures, missing media errors, and slower performance.
Downloading the file gives CapCut a stable source to work with and reduces the chances of problems later in the editing process.
Can You Save CapCut Exports Back to Google Photos?
Absolutely.
After exporting your finished video, save it to your device as normal. Google Photos can then back it up automatically if backup is enabled, or you can upload the file manually.
This creates a second copy of your finished project outside CapCut, which is useful if you ever lose access to a draft or accidentally remove a project.
Frequently Asked Questions
Can CapCut use Google Photos?
Yes. CapCut can use photos and videos stored in Google Photos, but the media often needs to be downloaded to your device first. Once the file is available locally, you can import it into CapCut on Android, iPhone, desktop, or online.
Why can’t CapCut see my Google Photos videos?
CapCut may not see your Google Photos videos if the file is stored only in cloud backup, app permissions are restricted, the media format is unsupported, or the file has not finished downloading to your device.
How do I import Google Photos into CapCut on Android?
Open Google Photos, download the photo or video if necessary, then open CapCut and start a new project. You can import the file from your gallery, Downloads folder, or file picker.
How do I use Google Photos with CapCut on iPhone?
Save the photo or video from Google Photos to your iPhone Photos app or Files app first. Then open CapCut, create a new project, and import the saved file.
Can I save CapCut videos back to Google Photos?
Yes. After exporting your video from CapCut, Google Photos can automatically back it up if backup is enabled, or you can upload the file manually.
Why does CapCut say my Google Photos file is missing?
This usually happens when the original file was moved, deleted, stored only in the cloud, or CapCut no longer has permission to access it. Downloading the file again often fixes the problem.
Do I need to download Google Photos videos before editing in CapCut?
In most cases, yes. Downloading the video gives CapCut direct access to the media file and helps prevent import errors, missing file messages, and playback issues.
Can CapCut access Google Photos directly?
CapCut does not directly browse your Google Photos cloud library in the same way Google Photos does. Most files need to be downloaded or made available locally before they can be imported.
Does CapCut work with Google Photos on desktop?
Yes. Download the media from Google Photos to your computer, then import it into CapCut Desktop just like any other photo or video file.
Can I use Google Photos videos in CapCut Online?
Yes. Download the video from Google Photos first, then upload it into CapCut Online through your browser before editing.
What file formats from Google Photos work in CapCut?
CapCut supports common formats such as MP4, MOV, JPG, PNG, and several others. If a file won’t import, the format may not be fully supported or the file may be corrupted.
Why is my Google Photos video taking up more storage after importing into CapCut?
When you download a Google Photos video, your device creates a local copy. CapCut may also generate project files, cache files, previews, and exports, which can significantly increase storage usage.
Final Thoughts
CapCut can work with photos and videos stored in Google Photos, but the process is usually smoother when the files are available directly on your device.
While cloud storage is great for backups and freeing up space, video editing apps generally perform better when they have direct access to the original media.
Taking a minute to download the files you plan to edit can save you from import errors, missing media warnings, and unnecessary troubleshooting later.
A simple workflow goes a long way: download the file from Google Photos, edit it in CapCut, export your finished video, and then back up the final version to Google Photos again.
This gives you a reliable editing experience while keeping your completed projects safely stored in the cloud.
If CapCut isn’t finding your Google Photos media, don’t assume the file is lost. In most cases, the issue comes down to permissions, cloud-only storage, or file access settings that can be fixed in a few minutes.
Once everything is set up correctly, using Google Photos with CapCut is straightforward and can make it much easier to manage your videos across multiple devices.