
Can You Take a Filter Off a CapCut Template? Yes, Here’s How
Ever found the perfect CapCut template… except for that one annoying filter? Maybe it’s too bright, too blurry, or just doesn’t match your vibe.
You’re not alone. A lot of users wonder the same thing: can you take a filter off a CapCut template without ruining everything else? remove filter from CapCut template
The good news? Yes, you can. And this post walks you through exactly how to do it step by step, even if you’re brand new to editing in CapCut. Let’s fix that filter fast.
Aside from taking a filter off a template, there are other editing and customization you can perform on a CapCut template. Read our How to Edit Capcut Templates
What Is a CapCut Template?
A CapCut template is a pre-made video editing layout that lets you drop in your own clips or photos without starting from scratch.
It often includes things like transitions, music, text effects — and yes, filters. Templates are super popular because they save time and give your videos a professional look fast.
But here’s the catch: many templates apply visual filters automatically.
That means the look you get isn’t just from your footage — it’s been styled with brightness, contrast, saturation, or color grading effects.
And those filters aren’t always obvious until you try to change them.
Understanding what’s built into the template helps you know what you can and can’t edit.
Do CapCut Templates Always Have Filters?
Not all CapCut templates have filters, but many do. Some apply subtle adjustments like a soft tint or color shift. Others go heavy with stylized looks — think retro vibes, high contrast, or dreamy blur.
Here’s the thing: filters can be added in two ways. One, as a visible filter layer that you can usually remove or adjust. Two, as part of a preset effect or animation where the filter is baked in.
That second type is harder (sometimes impossible) to undo without editing the entire template from scratch.
So before you try to remove anything, it’s good to check which type you’re working with.
Can You Remove a Filter From a CapCut Template?

Yes, in many cases, you can take a filter off a CapCut template. But how easy it is depends on how the filter was applied.
If the filter was added as a separate effect layer, you can remove or adjust it directly. CapCut lets you access filters and basic adjustments like brightness, contrast, and saturation with just a few taps.
This works whether you’re editing on mobile or desktop.
But if the filter is part of a preset animation or baked into a visual effect (like a glitch transition or stylized overlay), you might not be able to fully remove it.
Some templates are locked down creatively, meaning the look is part of the template’s design and can’t be separated without editing every element manually.
Still, that doesn’t mean you’re stuck. You can often reduce the intensity, replace it with your own look, or tweak the underlying settings to get much closer to what you want — without ruining the rest of the template.
Do you post costantly?, learn about the best CapCut Templates you can use for social media post.
Step-by-Step: How to Take a Filter Off a CapCut Template (Mobile + Desktop)
Follow the steps below in order. Stop as soon as the filter is gone.
Mobile (iPhone + Android): How to Remove a Filter From a CapCut Template
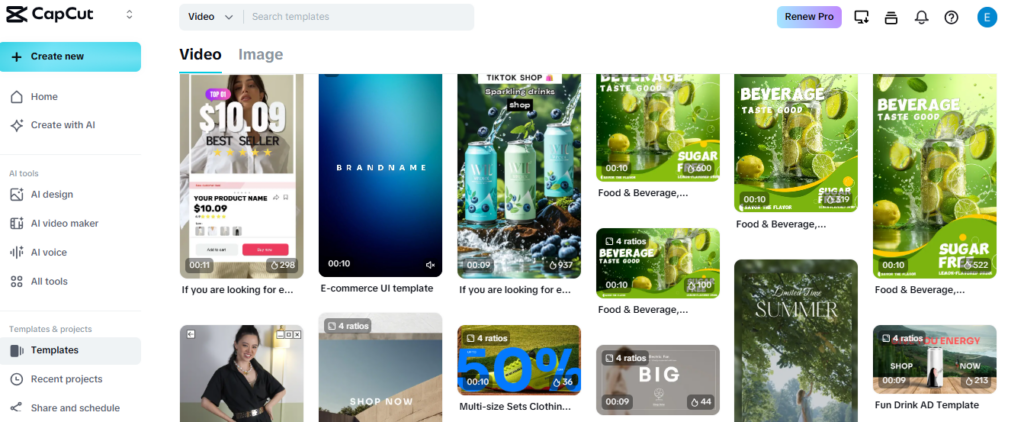
Step 1: Open your template project
- Open CapCut.
- Tap Templates, choose the template you used, then tap Use template (or open the project you already saved).
- Get to the screen where you can see the timeline (the clip strip at the bottom).
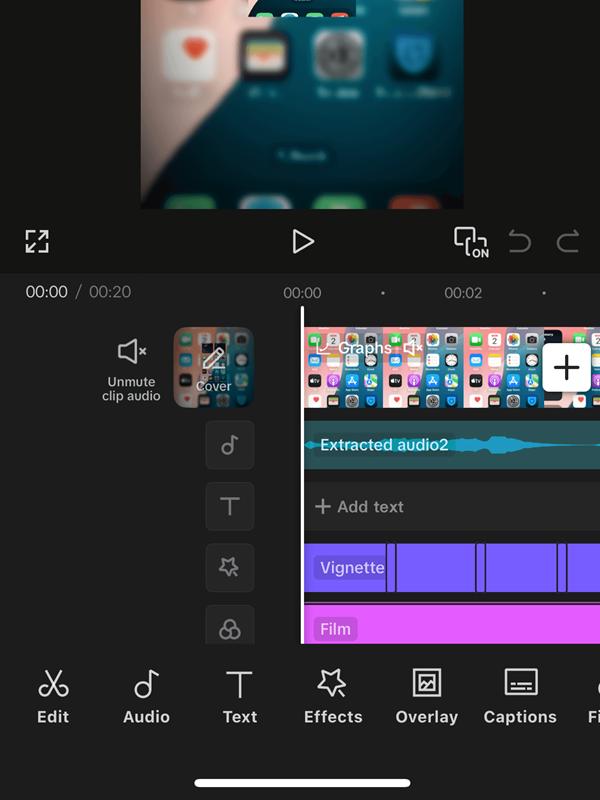
Step 2: Select the clip that looks filtered
- On the timeline at the bottom, tap the clip you want to fix.
- When it’s selected, you’ll see a border/highlight around it.
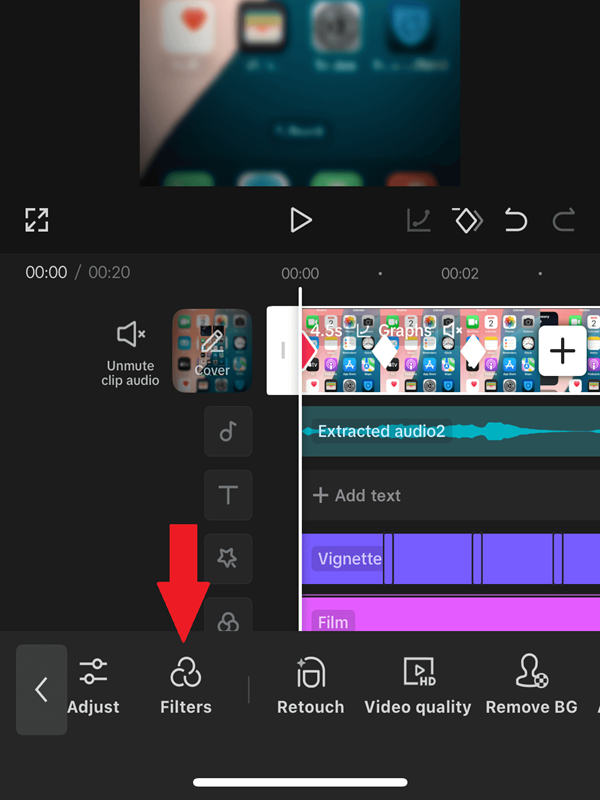
Step 3: Remove the filter (most common fix)
- Keep the clip selected.
- Swipe the bottom menu until you see Filter and tap it.
- Tap None (or Original depending on your version).
- Tap the checkmark to apply.
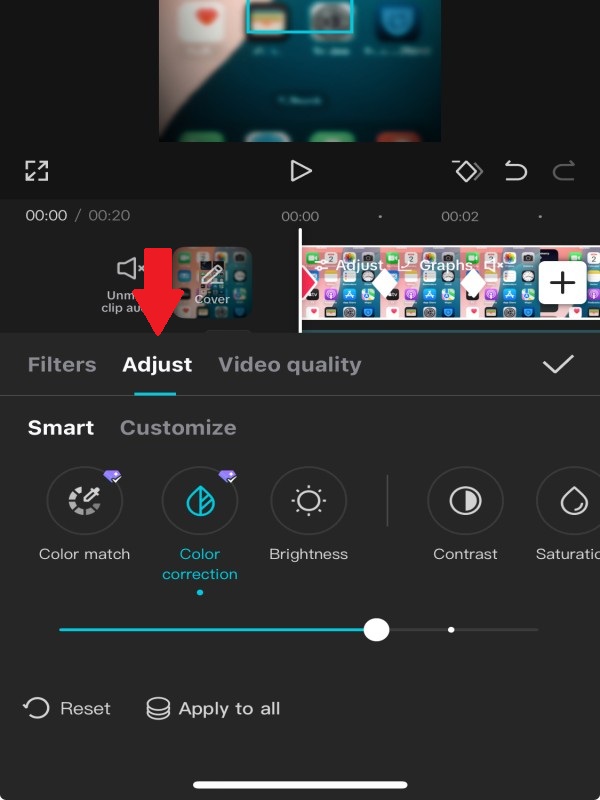
Step 4: Reset Adjust (this removes hidden “filter” changes)
Sometimes the template looks is not a filter. It’s adjustments like brightness or color tone.
- Tap the clip again.
- Tap Adjust.
- Set sliders back to normal (usually 0), especially:
- Exposure/Brightness
- Contrast
- Saturation
- Highlights/Shadows
- Temperature/Tint
- Fade/Sharpen
- If you see Reset, tap it.
- Tap the checkmark to apply.
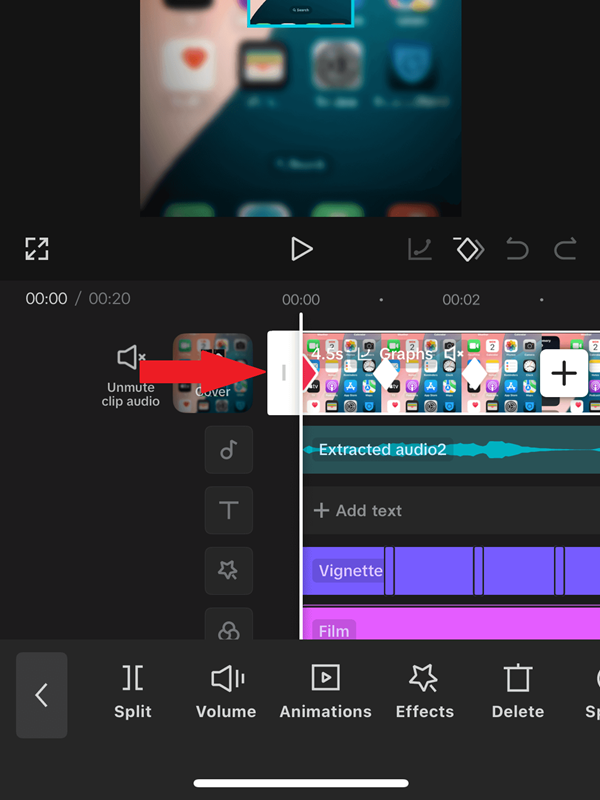
Step 5: Check and remove Effects (if the look is still there)
If the filter still won’t go away, the template may be using an effect.
- Tap the clip.
- Tap Effects or Video effects.
- If an effect is selected, tap it.
- Tap Delete/Remove (trash icon) or turn its strength down to 0.
- Preview the clip.
Step 6: Check for an Overlay layer (if everything looks tinted)
Some templates add a layer on top (like a film look or color wash) that affects all clips.
- Look at your timeline for extra tracks above your main clips (overlay/effect/sticker layers).
- Tap the top layer.
- If it’s causing the look, delete it or reduce its intensity.
- If it’s an overlay clip, find Opacity and lower it, or remove the overlay.
Step 7: Repeat for every clip in the template
Templates often apply the same look to multiple clips, so you may need to repeat the steps.
- Tap the next clip in the timeline.
- Repeat Filter → None and Adjust → Reset.
- Preview the full video from the start before exporting.
Desktop (CapCut PC App or CapCut Web): How to Remove a Filter From a CapCut Template
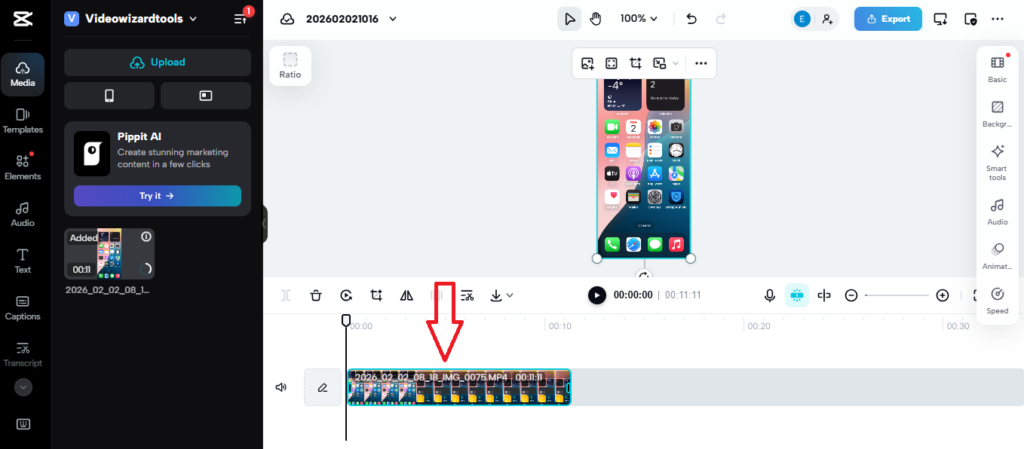
Step 1: Select the clip
- Open your CapCut project.
- Click the clip on the timeline so it becomes highlighted/selected.
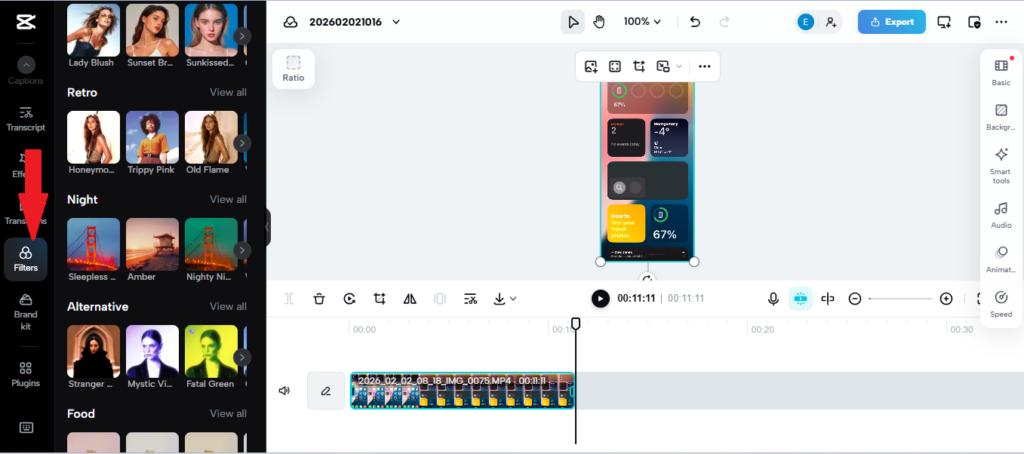
Step 2: Remove the filter
- Find the Filter section (usually in the right-side panel).
- If a filter is active, switch it to None.
- If there’s an Intensity/Strength slider, set it to 0 (or remove the filter completely).
Step 3: Reset color adjustments
- Open Adjust or Color (right-side panel).
- Set the sliders back to default (or click Reset if you see it).
Step 4: Remove effects or overlays changing the look
- Check for Effects in the timeline or the right panel.
- Click the applied effect.
- Delete it, disable it, or reduce its intensity to 0.
- Look for overlay tracks/layers on the timeline and remove anything adding color or a film tint.
Quick Troubleshooting (When It Still Looks Filtered)
If “None” doesn’t change anything
That usually means it’s not a Filter. Go straight to:
- Adjust → Reset
- Effects → Remove
- Overlay layer → Delete or lower opacity
If only one clip looks wrong
That clip probably has its own filter/adjustment. Tap that clip and repeat the steps.
If the whole video has the same tint
Look for a top layer overlay or a template effect applied across all clips.
Why Some Filters Can’t Be Fully Removed (And What To Do Instead)
Sometimes you do everything right, and the video still looks “filtered.” That’s usually because the template isn’t using a normal filterthat you can switch off.
It’s using a built-in look that’s part of the template design.
Here are the most common reasons it happens, plus exactly what to do in each case.
1) The “filter” is actually an Effect
Some templates use a video effect to create the vibe, like glow, blur, film grain, vintage, or a color tint. It can look like a filter, but it lives in a different place.
What to do:
- Tap the clip on the timeline.
- Open Effects (or Video effects).
- If anything is applied, tap it.
- Tap Delete/Remove (trash icon) or reduce the intensity to 0.
- Repeat on the next clip if the template applies effects on multiple clips.
Easy check: If “Filter → None” does nothing, it’s often an effect.
2) The template uses an Overlay layer to color everything
Some templates place a semi-transparent layer on top of your footage. This layer might be a color wash, a film layer, a light leak, or a “cinematic” overlay. Even if you remove filters, that overlay still changes the look.
What to do:
- Look at the timeline for a second layer above your clips.
- Tap that top layer (overlay).
- Try one of these:
- Delete it (fastest fix)
- Lower Opacity until the tint is gone
- Change its Blend option (if available) or turn it off
- Preview the whole video.
Easy check: If every clip has the same tint, overlays are a top suspect.
3) The template has an Adjustment layer applied across the whole project
Some templates apply color changes using an adjustment layer so it affects all clips at once. This can feel “stuck” because it’s not attached to just one clip.
What to do:
- Scan the timeline for a long bar that stretches across many clips.
- Tap it.
- Open Adjust.
- Tap Reset (or set every slider back to 0).
- Preview again.
Easy check: If you reset one clip but the next one still looks filtered, the template might be using a project-wide adjustment.
4) The look is built into the template’s transitions and animations
This is the hardest one. Some templates bake the color style into transitions, flashes, zooms, or “vibe” moments. So even if you remove filters, certain parts still change color during transitions.
What to do instead (best options):
- Reduce, don’t remove: find the effect and lower intensity
- Replace the template: use a similar template with a cleaner look
- Cover it with your own color fix: apply a light adjustment to balance it (more on this in the next section)
Easy check: If the color changes only during transitions, it’s likely baked into the animation/effect.
5) The template creator locked parts of the look
Some templates are designed so you can only swap clips and text, not fully edit the style. That’s why it can feel like CapCut is ignoring you.
What to do:
- Try the removal steps on:
- Filters
- Adjust
- Effects
- Overlays
If none of those work, the template is likely style-locked. Your best move is to replace the filter look rather than fight it.
If you’re wondering can you take a filter off a CapCut template, think of it like this:
- If it’s a Filter or Adjust, you can usually remove it.
- If it’s an Effect, Overlay, or built into transitions, you may not remove it completely, but you can almost always tone it down or replace the look.
For a broader guide on customizing templates overall, check out our step-by-step on how to edit CapCut templates.
Alternative: How to Replace the Filter Instead (When You Can’t Fully Remove It)
Sometimes the template looks won’t disappear no matter what you tap. When that happens, the smartest move isn’t to fight it.
It’s to replace it with your own look so your video still comes out clean and intentional.
This section shows you the easiest ways to “override” a template’s filter so it looks the way you want.
Option 1: Add Your Own Filter and Turn the Strength Down
This works well when the template has a light tint you can’t fully delete.
Mobile steps (iPhone/Android):
- Tap a clip in the timeline.
- Tap Filters.
- Choose a filter that fits your style (or choose a neutral one if you just want balance).
- Lower the Intensity slider until it looks natural.
- Tap the checkmark.
- Repeat for other clips if needed.
Pro tip: If your clips are all from the same lighting, keep the intensity low. Small changes look more professional than heavy filters.
Option 2: Use Adjust to “Cancel Out” the Template Look
This is the best trick when the template adds a strong, warm tone, washed-out look, or heavy contrast.
What you’re doing: You’re not removing the filter. You’re balancing it, like turning down a too-loud song.
Mobile steps:
- Tap the clip.
- Tap Adjust.
- Start with these fixes (small moves first):
- If it looks too warm/yellow: lower Temperature
- If it looks too pink/green: adjust Tint
- If it looks faded: increase Contrast a little
- If colors look dead: increase Saturation slightly
- If highlights are blown out: reduce Highlights
- If shadows are too dark: raise Shadows
- Preview for 3 seconds.
- Keep tweaking until it looks normal.
- Tap the checkmark.
Shortcut mindset: Don’t touch every slider. Fix the one or two that look wrong.
Option 3: Reduce the Template Effect Intensity (If It’s an Effect)
If the “filter” is coming from a video effect (glow, blur, vintage, etc.), you may not be able to remove it completely. But you can usually soften it.
Mobile steps:
- Tap the clip.
- Tap Effects (or Video effects).
- Tap the applied effect.
- Lower its Intensity (or strength) slider.
- Tap the checkmark.
Best use: When you like the template style, but it’s doing too much.
Option 4: Remove or Fade an Overlay Layer That’s Causing the Tint
If your whole video has the same color wash, there’s a good chance the template has an overlay sitting on top of everything.
Mobile steps:
- Look at the timeline for a top layer above your clips.
- Tap that overlay layer.
- Tap Opacity.
- Lower opacity until the tint is barely noticeable, or delete the overlay entirely.
- Preview the full video.
When to use: When the template adds a “film” vibe that makes your footage look cloudy, yellow, or too dark.
Option 5: Match Your Look Across All Clips (So It Doesn’t Look Messy)
Once you replace the filter on one clip, you want the rest to match. Otherwise, the video jumps in color and looks off.
Easy way to keep it consistent:
- Finish adjusting the first clip until it looks right.
- Go clip by clip and apply similar settings.
- Keep your changes light and consistent.
If your version of CapCut has a Copy adjustments option:
- Copy from your edited clip
- Paste onto the other clips
This saves a ton of time.
The Best “Override” Combo (Works on Most Templates)
If you want the most reliable method that works on most templates, do this:
- Set Filter → None (even if it seems useless)
- Reset Adjust
- Lower or remove Effects
- Fade or delete any Overlay
- Add your own light Adjust tweaks to balance the final look
This gives you control even when the template tries to keep its original style.
If manual tweaks aren’t enough, try CapCut’s AI features to smart-balance your look.
Tips to Customize CapCut Templates Without Breaking the Look
Once the filter is gone (or you’ve replaced it), the next problem hits: the template can start looking “off.” Text doesn’t pop the same.
Transitions feel weird. Clips don’t match. That’s normal.
Templates are designed like outfits. If you change one piece, you may need to adjust a few others so everything still looks good together.
Here are the simplest ways to customize without ruining the vibe.
1) Keep Your Changes Small (The “10% Rule”)
Most people go too hard and end up with a video that looks edited in a bad way.
If you’re using Adjust, try to keep most sliders within a small range. Tiny changes look clean. Big changes scream “something is wrong.”
A good starting point:
- Slight brightness tweak
- Small contrast bump
- Gentle saturation increase only if needed
If your video already looks okay, don’t “fix” it until it looks worse.
2) Fix Lighting First, Then Color
If the clip is too dark or too bright, no filter swap will save it until lighting is corrected.
Do this order:
- Exposure/Brightness
- Highlights/Shadows
- Contrast
- Saturation
- Temperature/Tint
This keeps you from chasing color problems that are really just lighting problems.
3) Make Clips Match Each Other (So It Doesn’t Look Random)
Templates work best when the clips feel like they belong together. If one clip is warm and the next is cold, it feels messy.
Quick matching trick:
- Pick the best-looking clip as your “reference”
- Adjust the other clips until they look similar in brightness and color
You don’t need perfection. You just want them to feel like the same video.
4) Use CapCut’s Sharpen Carefully
After removing a filter, footage can look softer, especially if the template used blur or glow.
Sharpen can help, but too much makes faces look crispy and weird.
Try:
- A small sharpen increase
- Preview on full screen before exporting
If skin starts looking grainy or harsh, back off.
5) If You Remove a Filter, Check Your Text Readability
Some templates rely on filters to make text easy to read. Once you change the look, the text can blend into the background.
Fix it fast:
- Add a light shadow to text
- Add a subtle background box behind the text
- Change text color to white or black (whichever has better contrast)
- Move text away from bright areas of the clip
If people can’t read your text in one second, they’ll scroll.
6) Don’t Touch Every Clip’s Style Separately If You Can Avoid It
If you edit each clip differently, the video will look inconsistent.
Better approach:
- Use similar adjustment settings across clips
- Keep the same filter or the same “look” for the whole video
- Only make exceptions when a clip has clearly different lighting
Consistency beats perfection.
7) Watch Your Transitions After You Change the Look
Some transitions look great with a strong filter, but feel harsh when the filter is gone.
After your changes:
- Preview every transition
- If a transition looks too flashy or distracting, replace it with a cleaner one
- If the template won’t let you change it, lower the effects intensity or keep your adjustments lighter
8) Export Settings Matter More Than People Think
Sometimes your video looks fine in the editor, but the export looks darker or less colorful.
To avoid that:
- Preview in full screen before exporting
- Export in higher resolution if possible
- Avoid stacking too many effects on top of each other
A clean edit beats a complicated edit that loses quality.
If you’re happy with this section, the next one is Common Mistakes to Avoid (this is where we save readers from wasting time and getting frustrated).
Once your filter is removed and the video looks great, learn how to export without needing Pro.
Common Mistakes to Avoid (So You Don’t Waste Time)
Most people can take a filter off a template, but they get stuck because of a few simple mistakes.
If you want your post to be the best answer for can you take a filter off a CapCut template, this is the section that saves readers from frustration.
Mistake 1: Trying to remove the filter without selecting the clip
CapCut won’t change anything if you’re not editing the right clip.
What to do instead:
- Tap the clip on the timeline first
- Make sure it’s highlighted
- Then open Filter or Adjust
If nothing highlights, you might be tapping the preview window instead of the timeline.
Mistake 2: Removing the filter on one clip and thinking it fixed the whole template
Templates often apply the same look to multiple clips. So you remove it once, then the next clip still looks tinted and you think CapCut “didn’t save.”
What to do instead:
- Go clip by clip
- Repeat Filter → None and Adjust → Reset
- Preview the full video from the start
Mistake 3: Confusing Filters with Adjustments (and skipping Adjust)
A lot of template “filters” aren’t filters. They’re adjustments like temperature, contrast, and saturation.
What to do instead:
- After setting Filter → None, always check Adjust
- Hit Reset if you see it
- If there’s no reset, set each slider back to normal (usually 0)
Mistake 4: Forgetting to check Effects
If the template uses glow, blur, vintage, or film grain effects, your video will still look filtered even after you remove the actual filter.
What to do instead:
- Tap the clip
- Open Effects / Video effects
- Remove the effect or reduce intensity to 0
Mistake 5: Missing an Overlay layer that’s tinting everything
This is a big one. Overlays can sit above all clips and make the whole video look warm, faded, or “cinematic.”
What to do instead:
- Check for a second track above your main clips
- Tap it
- Lower Opacity or delete the overlay layer
If the whole video has the exact same tint, assume overlay first.
Mistake 6: Stacking too many fixes at once
Some people add a new filter, tweak a bunch of adjustments, then add effects… and now the video looks worse than before.
What to do instead:
Do fixes in this order:
- Filter → None
- Adjust → Reset
- Effects → Remove
- Overlay → Delete or lower opacity
- Only then add a light look if needed
One change at a time keeps things clean.
Mistake 7: Ignoring text readability after removing the filter
Templates often depend on the filter to make the text stand out. Once you remove it, the text can disappear into the background.
What to do instead:
- Add a slight shadow
- Add a background box
- Switch text to white or black
- Move text away from bright areas
If the text is hard to read, the video feels low quality, even if everything else is fine.
Mistake 8: Exporting without previewing the entire video
Sometimes the filter seems removed in one part, but shows up again later during transitions or effects.
What to do instead:
- Watch the full video before exporting
- Pay attention to transitions where color suddenly shifts
- If the look changes only during transitions, it’s likely baked into template effects/
FAQs: Taking a Filter Off a CapCut Template
Quick answers for when a CapCut template filter won’t fully turn off, looks different clip-to-clip, or changes during transitions or export.
Conclusion: So, Can You Take a Filter Off a CapCut Template?
Yes, in most cases, you can take a filter off a CapCut template. The key is knowing where the “filter” is coming from.
If it’s a normal Filter or Adjust settings, you can remove it fast by switching the filter to None/Original and resetting adjustments back to normal.
If it still looks filtered, the style is usually coming from a video effect, an overlay layer, or color changes baked into the template’s transitions. That’s when replacing the look or toning it down is the smarter move.
The best part is you’re not stuck. Even when a template won’t fully let go of its vibe, you can still get your footage looking clean, natural, and the way you actually want it to look.