Can You Edit Audio in CapCut? Yes! Here’s How
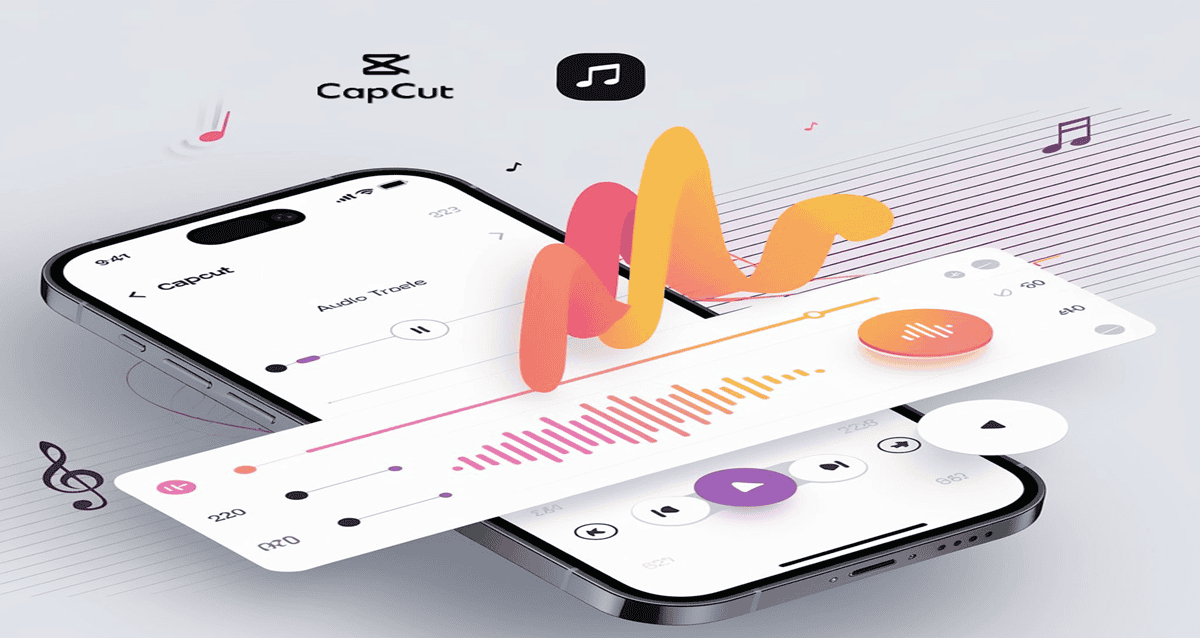
CapCut has earned its reputation as a go-to video editing app, but did you know it’s just as capable when it comes to audio editing?
That’s right, while most users flock to it for its easy-to-use video tools, CapCut also offers a robust set of features to help you edit audio like a pro.
Whether you’re looking to add catchy background music, fine-tune voiceovers, or layer sound effects for that extra punch, CapCut makes it simple and fun to bring your audio to life.
In this guide, we’ll walk you through how to edit audio in CapCut, covering all the tools and tricks you need to create high-quality audio that complements your video projects.
So, whether you’re a seasoned content creator or just getting started, this guide has everything you need to make the most of CapCut’s audio editing capabilities.
Table of Contents
Introduction to Audio Editing in CapCut
Audio plays a vital role in shaping the overall impact of any video.
Whether you’re creating content for platforms like YouTube, TikTok, Instagram, or even a personal project, great audio can take your video from good to outstanding.
It’s not just about the visuals—the way your video sounds has the power to engage your audience, evoke emotions, and convey your message effectively.
CapCut stands out as more than just a video editing app; it’s also equipped with powerful audio editing tools that give you complete creative control.
Beyond enhancing the visual aspects of your project, CapCut allows you to fine-tune the audio elements to ensure your final product sounds just right.
From simple tasks like adjusting background music and cleaning up voiceovers to more complex edits like syncing sound effects or layering multiple audio tracks, CapCut provides a range of tools to suit your needs.
So whether you’re a beginner experimenting with audio editing or a seasoned creator mixing music and effects, CapCut’s intuitive interface makes it easy to achieve professional-quality results.
With CapCut, you’re not just editing visuals, you’re curating an immersive audio-visual experience!
How to Add and Edit Audio in CapCut
CapCut makes it easy to add and edit audio. Here’s a step-by-step guide to get started:
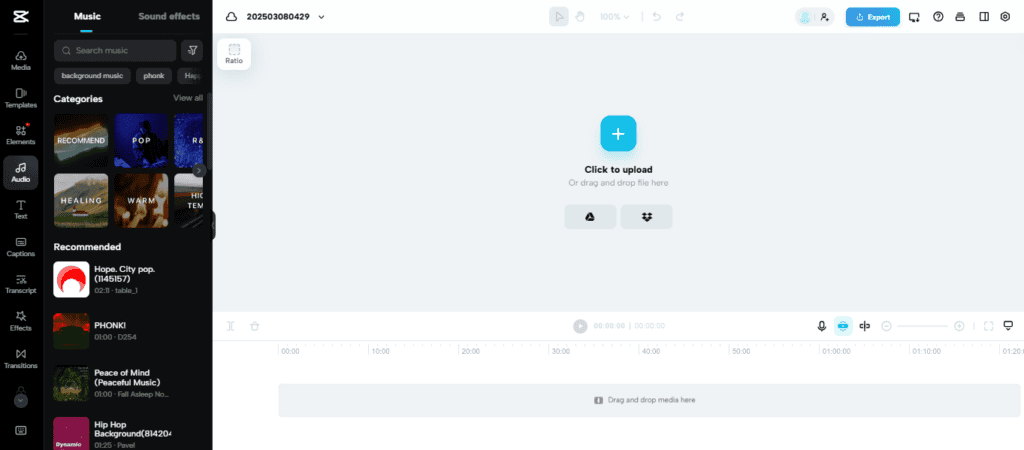
Step 1: Import Your Audio Files
Once you’ve launched CapCut and loaded your video footage, the first step in editing audio is to import your audio files. CapCut allows you to:
- Use the built-in audio library: CapCut includes a free library of music and sound effects that can be added to your project.
- Add external audio files: If you prefer to use custom music or voiceovers, you can upload audio files from your device.
To import audio, click on the “Audio” button at the bottom of the screen, then choose between “Sounds,” “Effects,” “Extracted,” or “Voiceover” depending on your needs.
Step 2: Trim, Split, and Adjust Volume
Once the audio is added to your project, you can begin editing it by trimming, splitting, or adjusting the volume.
These are essential features for fine-tuning the timing of your audio clips to match your visuals. To do this:
- Trim audio: Drag the edges of the audio clip to shorten or lengthen it.
- Split audio: If you need to cut out specific parts of an audio file, use the split feature. Tap the audio clip and select the “Split” option to divide the clip into multiple sections.
- Adjust volume: CapCut allows you to adjust the volume of each audio clip individually. Tap on the clip, select “Volume,” and adjust the slider to achieve the desired audio level.
Step 3: Adding Music and Sound Effects
CapCut makes it easy to add background music or sound effects to enhance your video. You can select from CapCut’s free music library or upload your own tracks.
- Background Music: Choose a track from the “Sounds” library, which features categories like “Vlog,” “Trend,” or “Games” to find a piece that fits the mood of your video.
- Sound Effects: CapCut also provides sound effects like “Clapping,” “Camera Shutter,” or “Game Over” to add some flair to your projects.
Step 4: Adjusting Audio Timing
A key component of audio editing is ensuring that your music, sound effects, or voiceovers are timed perfectly with your visuals.
In CapCut, you can move the audio clips around the timeline to align them with the relevant parts of your video.
This is particularly useful for syncing dialogue with specific scenes or creating dramatic effects using sound.
Advanced Audio Editing Features in CapCut
While CapCut’s basic audio editing features are impressive, it also offers advanced options for users who need more control over their audio tracks.
1. How to Add Voiceover Recording in CapCut
CapCut allows you to record and edit voiceovers directly in the app.
Whether you’re narrating a vlog or adding commentary to gameplay footage, the built-in voice recording feature is simple to use. Here’s how to record a voiceover in CapCut:
- Tap the “Audio” button.
- Select “Record.”
- Hold down the record button and speak into your device’s microphone.
- Once you’re finished, CapCut will automatically add the voiceover to your timeline, where you can edit it like any other audio track.
To understand this better, you can watch the video tutorial on our YouTube channel here: https://youtu.be/FRj_lWadqcs
2. How To Add Audio Effects and Filters
CapCut provides a range of audio effects and filters that can be applied to your clips.
Whether you want to add reverb, adjust the pitch, or apply distortion, these effects help create professional-sounding audio. To access audio effects:
- Tap on the audio clip and select “Voice Effects.”
- From here, you can choose from a variety of effects like “Chipmunk,” “Robot,” or “Echo” to modify the sound of your audio.
This is also covered in the youtube tutorial above.
3. How To Extract Audio from Videos
Sometimes, you may want to extract audio from an existing video and reuse it in a different project.
CapCut makes this easy with its audio extraction feature:
- Import the video from which you want to extract the audio.
- Tap the “Audio” button, then select “Extracted.”
- CapCut will extract the audio and add it to your timeline, where you can edit or repurpose it as needed.
4. Fade In and Fade Out
CapCut allows you to add fade-in and fade-out effects to smooth out the start and end of your audio tracks.
This is particularly useful for creating seamless transitions between audio clips or when your video ends.
- To apply a fade, tap on the audio clip, select “Fade,” and adjust the sliders to control how long you want the fade to last.
CapCut’s advanced features, including voiceover recording, audio effects, and sound extraction, make it an incredibly versatile tool for creators.

Best Practices for Editing Audio in CapCut
To ensure that your audio editing in CapCut is as effective as possible, here are a few best practices to keep in mind:
- Use high-quality audio files: Low-quality audio can detract from the overall quality of your video. Whenever possible, use high-quality sound effects, music, and voiceovers.
- Balance audio levels: Ensure that your background music, dialogue, and sound effects are balanced, so one element doesn’t overpower the others.
- Match audio to video: Syncing your audio with the corresponding video elements can significantly enhance your content’s impact.
- Experiment with effects: Don’t be afraid to try out CapCut’s voice effects and filters to make your audio more engaging or fun.
Advantages of Audio Editing in CapCut
CapCut truly shines when it comes to audio editing, offering several distinct advantages that make it a fantastic tool for creators of all levels.
Here’s why CapCut is worth considering for your audio editing needs:
- User-Friendly Interface: CapCut is designed with simplicity in mind, making it approachable for beginners while still powerful enough for advanced users.
The intuitive layout allows you to edit audio seamlessly alongside your video, so there’s no steep learning curve.
- Variety of Free Features: Even in its free version, CapCut provides an impressive suite of audio editing tools.
You can trim, cut, and split audio files, add background music, adjust volume levels, and synchronize audio to visuals—all without paying a cent.
Check out our full guide on everything you need to know about using CapCut for free here.
- All-in-One Platform: One of CapCut’s standout advantages is its integration of video and audio editing features in a single app.
Instead of switching between multiple programs, you can handle everything in one place, saving time and effort.
- Accessible Creative Elements: From a library of sound effects and royalty-free music to customizable audio filters, CapCut equips you with plenty of tools to enhance the overall impact of your video.
These features enable creators to craft an immersive audio-visual experience that captures their audience’s attention.
CapCut is a well-rounded option for anyone who values convenience, affordability, and creativity in their video editing process.
Should I Use CapCut for Audio Editing?
CapCut is widely known as a video editing app, but its audio editing capabilities make it a strong contender for handling sound-related tasks as well.
So whether you’re editing music, voiceovers, or sound effects, CapCut offers a range of features that cater to various audio editing needs.
However, when deciding if you should use CapCut for audio editing, it’s essential to understand the full extent of its capabilities and whether they align with your goals.
One of CapCut’s standout audio features is its ease of use. The interface is intuitive, allowing users to quickly import audio tracks and edit them in just a few steps.
You can easily cut, trim, and split audio to fit your video timeline or rearrange clips as needed. This makes it a fantastic tool for content creators who want to sync audio to video with precision.
Also, CapCut supports layering multiple audio tracks, giving you the flexibility to add background music, voiceovers, and sound effects all within the same project.
Another major advantage is CapCut’s built-in library of royalty-free music and sound effects. If you don’t have your own audio files, this library provides a wealth of resources that can enhance your projects without needing external downloads.
The sound effects range from ambient sounds to special audio cues, which can add an extra layer of professionalism to your work.
This is particularly useful for those who create social media content and need high-quality audio without the hassle of finding third-party sources.
CapCut also provides the option to manipulate audio volume and add effects like fade-ins and fade-outs.
These tools ensure smooth transitions between different audio elements, which is essential for producing a polished final product.
You can adjust the volume for each track individually, so whether you want background music to be subtle or to emphasize a voiceover, CapCut provides full control.
For creators who prioritize video and need basic audio editing on the side, CapCut’s functionality will likely meet your needs.
The seamless integration of audio and video timelines makes it ideal for YouTubers, TikTok creators, and anyone looking to produce content with synchronized sound.
It’s especially beneficial for users who want an all-in-one platform to handle both video and audio without switching between different software.
On the other hand, if audio is your primary focus or your project requires high-level sound manipulation, you may find CapCut’s tools somewhat limiting.
In such cases, it’s advisable to edit your audio in a more advanced program first and then import it into CapCut for syncing with your video.
FAQs
Can You Add Multiple Audio Tracks in CapCut?
Yes, CapCut allows you to layer multiple audio tracks in a single project. You can combine background music, sound effects, and voiceovers seamlessly, creating a multi-dimensional audio experience. This feature is perfect for making your videos richer in sound without any complexity.
Does CapCut Support External Audio Files?
Absolutely! CapCut makes it easy to import external audio files. Whether you have a royalty-free music track or a custom audio recording, CapCut enables seamless integration, allowing you to enhance your projects with diverse audio elements.
Can You Edit Audio Timing in CapCut?
Yes, CapCut offers precise audio editing tools that allow you to trim, split, and move audio clips along the timeline. This makes it easy to sync your audio with specific scenes, ensuring a polished final product with perfect timing.
Does the Free Version of CapCut Include a Watermark on Audio Edits?
No, the free version of CapCut does not add watermarks to your exported projects, making it stand out among other free editing tools. This ensures that your final output looks clean and professional without any branding interruptions.
Can I Edit Just Audio Without Video in CapCut?
Yes, CapCut allows you to edit audio independently from video. You can trim, split, adjust timing, and even apply effects solely to an audio track, offering flexibility for creators working on audio-only content or voiceovers.
Can I Upload My Own Music to CapCut?
Yes, you can upload your own music or audio files in CapCut. This feature is great for adding custom soundtracks, voiceovers, or other personalized audio content to your video projects.
Does CapCut Support Different Audio Formats?
Yes, CapCut supports various popular audio formats, including MP3, AAC, and WAV, making it compatible with a wide range of audio files, so you won’t have issues importing your preferred sound formats.
Can I Export My Project with High-Quality Audio?
Yes, CapCut allows you to export your project with high-quality audio and video. By selecting the right export settings, you can ensure that your final project maintains optimal audio quality for your viewers.
Conclusion
So, in conclusion, CapCut proves to be a powerful and user-friendly tool for audio editing within video projects.
While it may not have the depth of advanced audio-editing software, its core features—such as trimming, splitting, layering multiple tracks, adding effects, and syncing sound with video—make it a versatile option for content creators.
Whether you need to edit voiceovers, background music, or sound effects, CapCut provides an intuitive platform for enhancing your audio with minimal effort.
CapCut’s support for external audio files, multiple track editing, and various audio formats makes it accessible for creators who want to bring in their own sound elements.
The fact that the free version doesn’t watermark your edits only adds to its appeal. If you’re working on social media content, YouTube videos, or personal projects, CapCut offers a convenient all-in-one solution for both video and audio editing.
In summary, CapCut is a solid choice for creators seeking simplicity and efficiency in editing audio alongside their videos.
Its features cover the essential audio editing needs, making it an excellent option for beginners and experienced users alike who want to streamline their workflow.